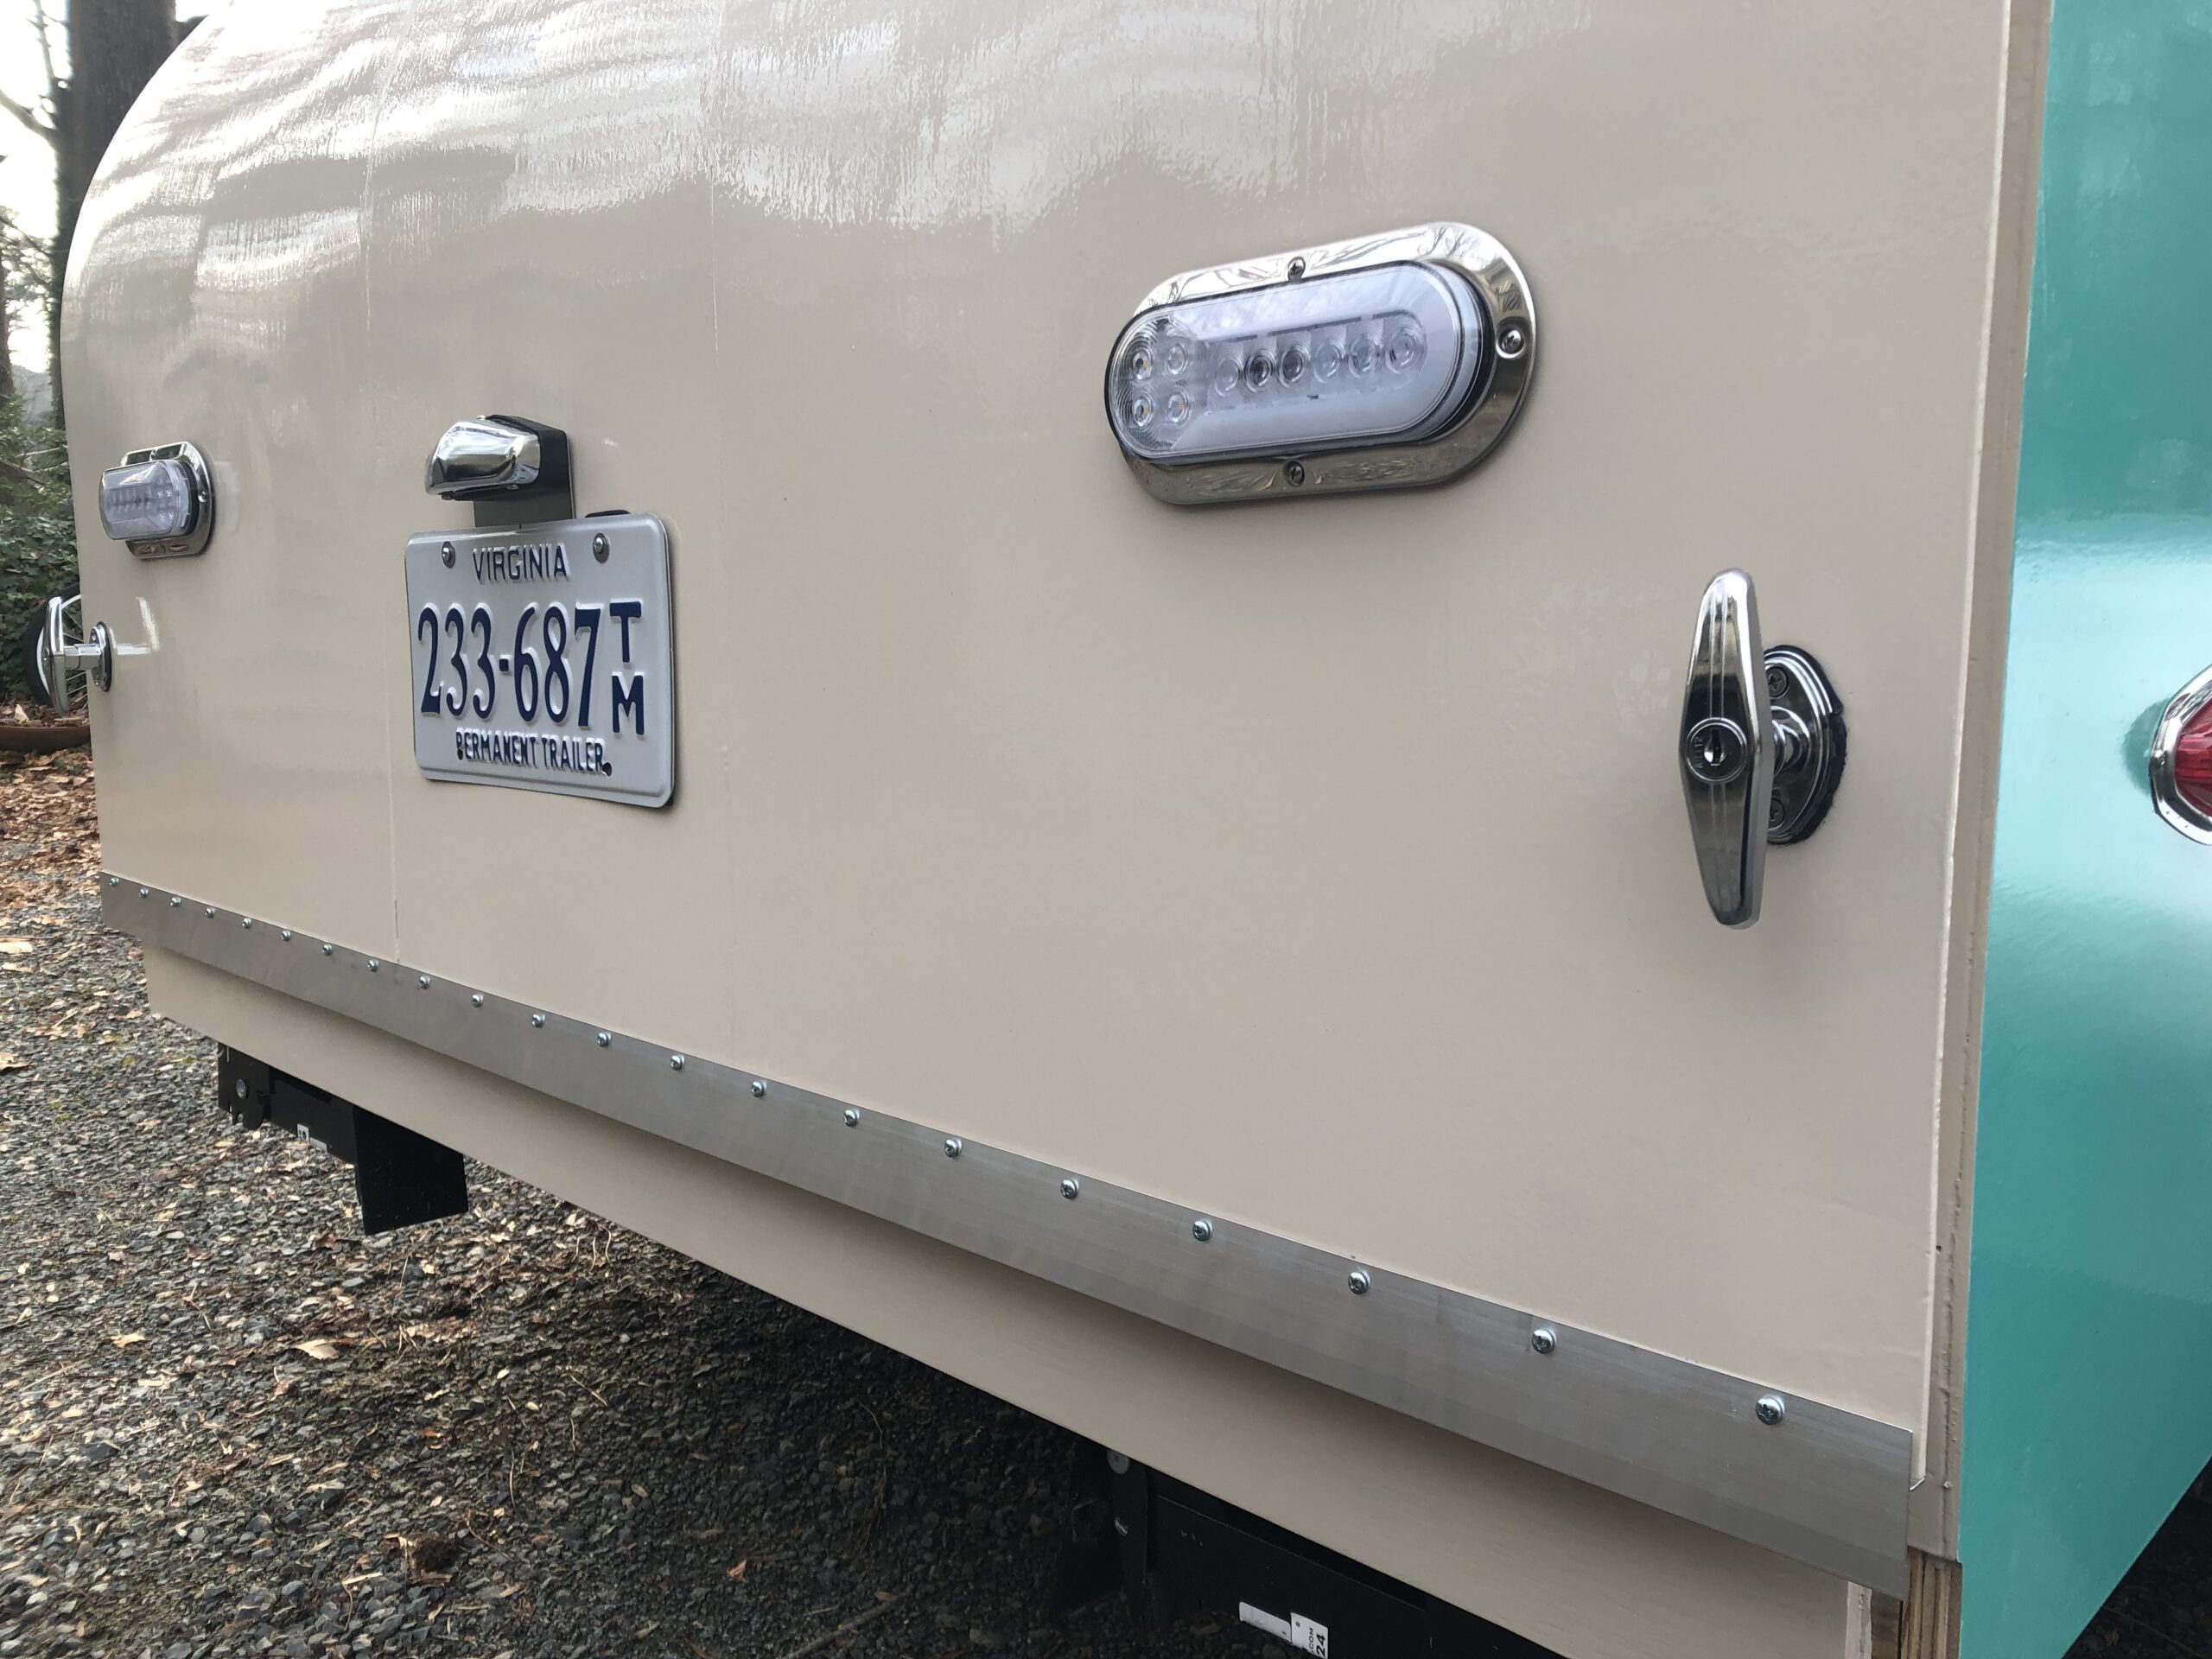
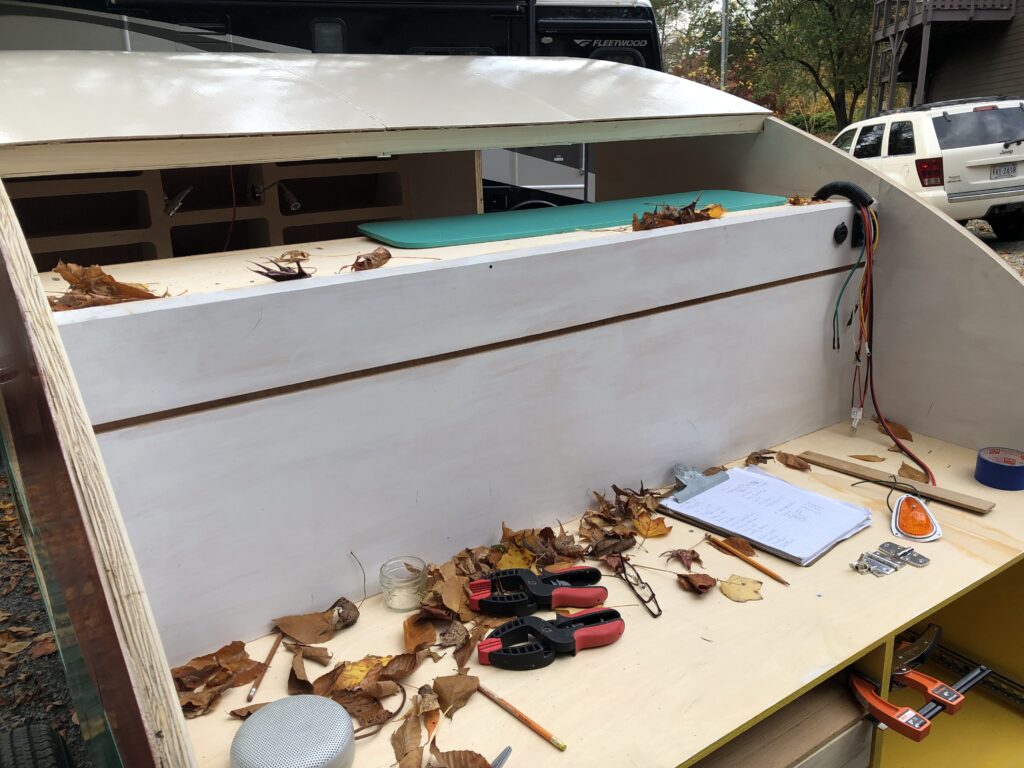
I put away the sawhorse worktable this evening. I had one last precision cut to make for the countertop, and I would ‘t need it anymore. Likewise, there was a bit of aluminum trim that took some figuring and measuring before cutting, but that’s in the rearview mirror now.
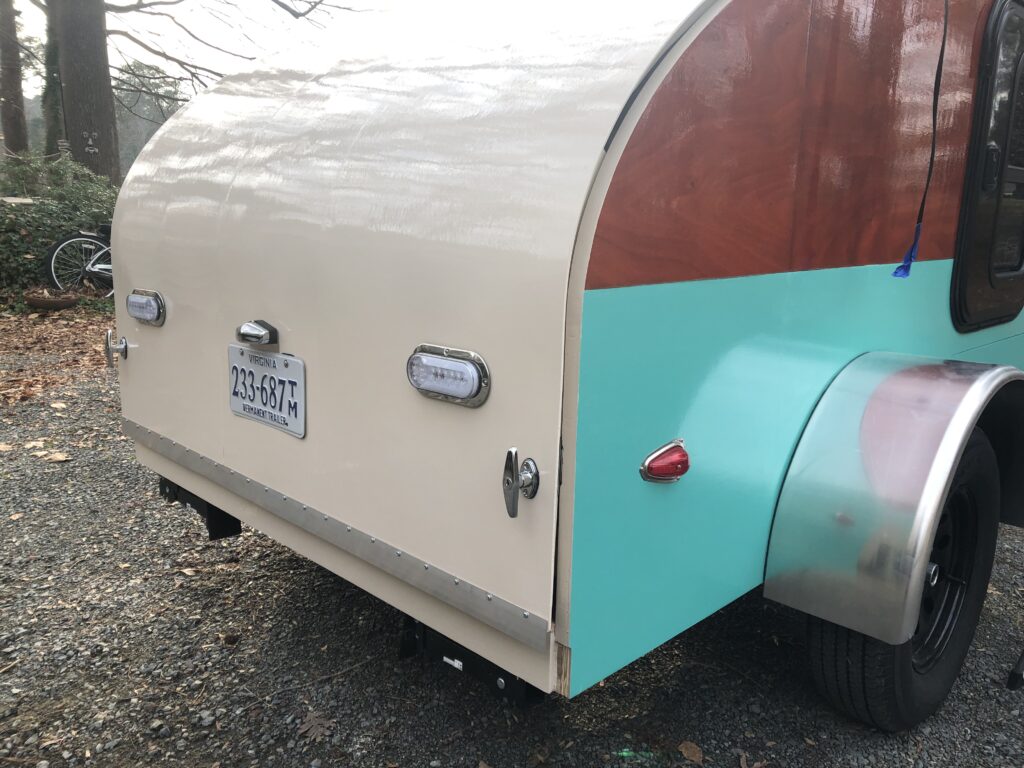
Aluminum trim will make the seal with the gasket on the bottom of the galley door.
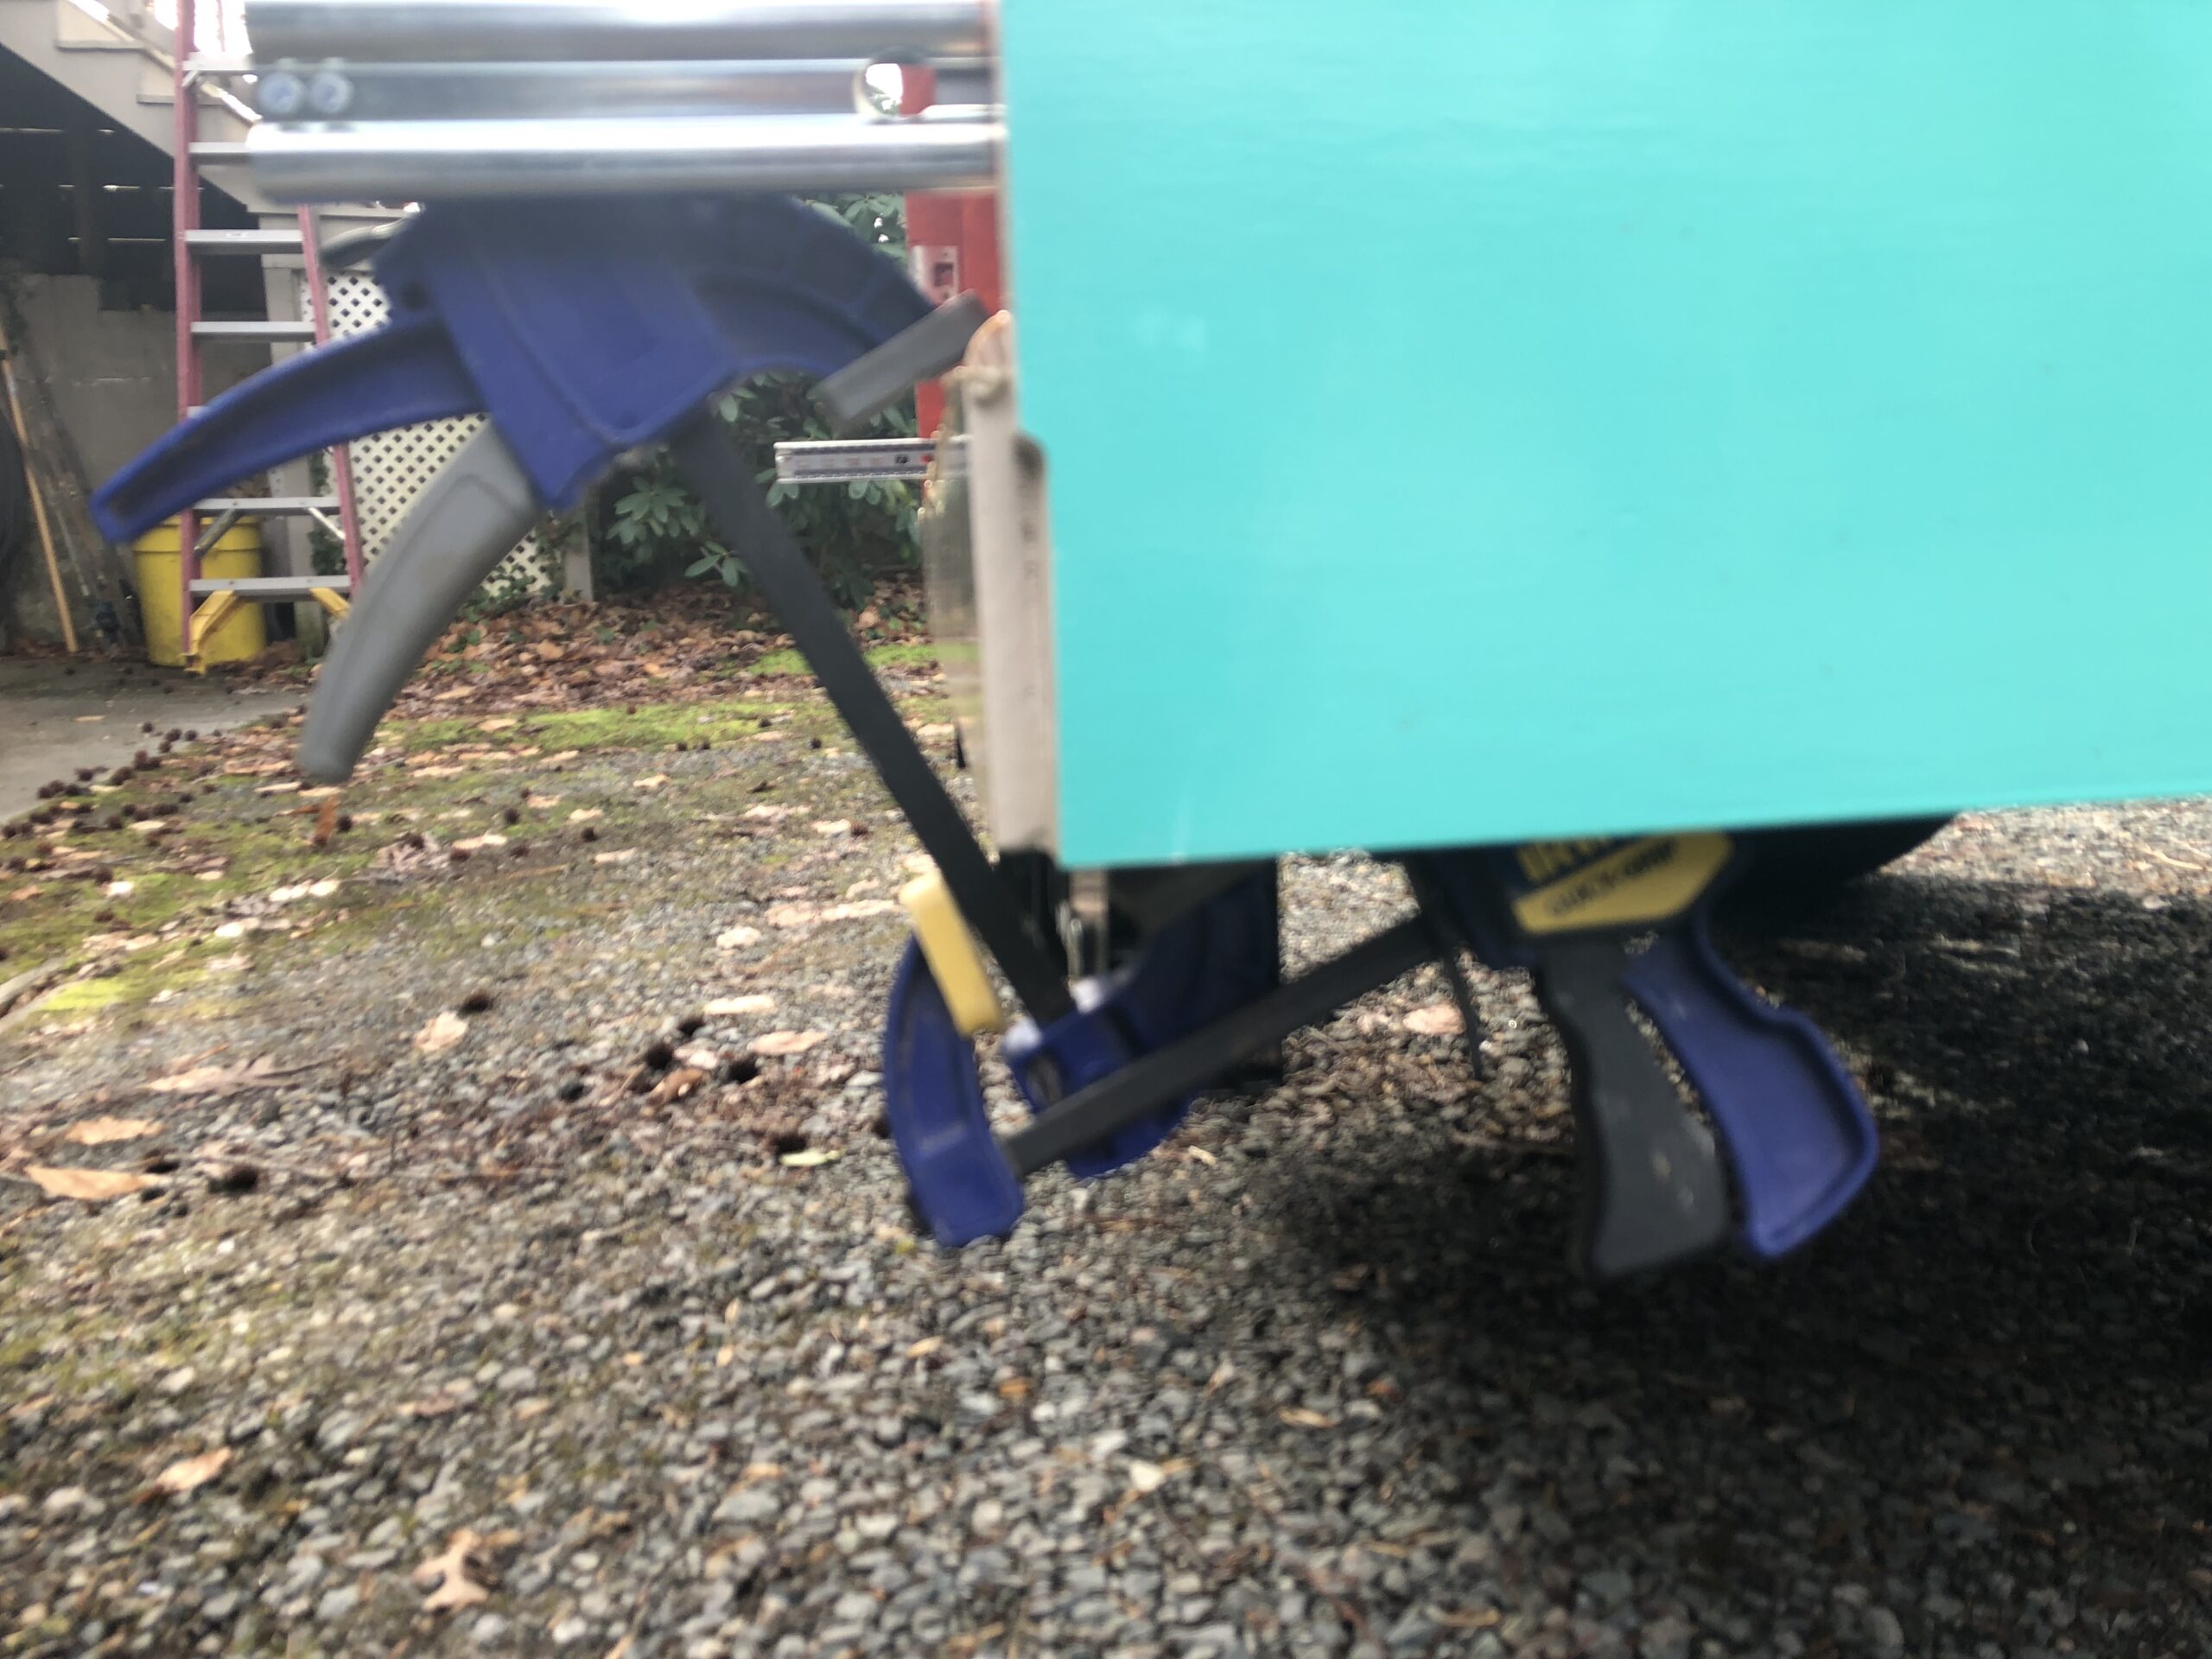
I used a clamp to hold another clamp to give a squeeze to a bit of trim on the rear.
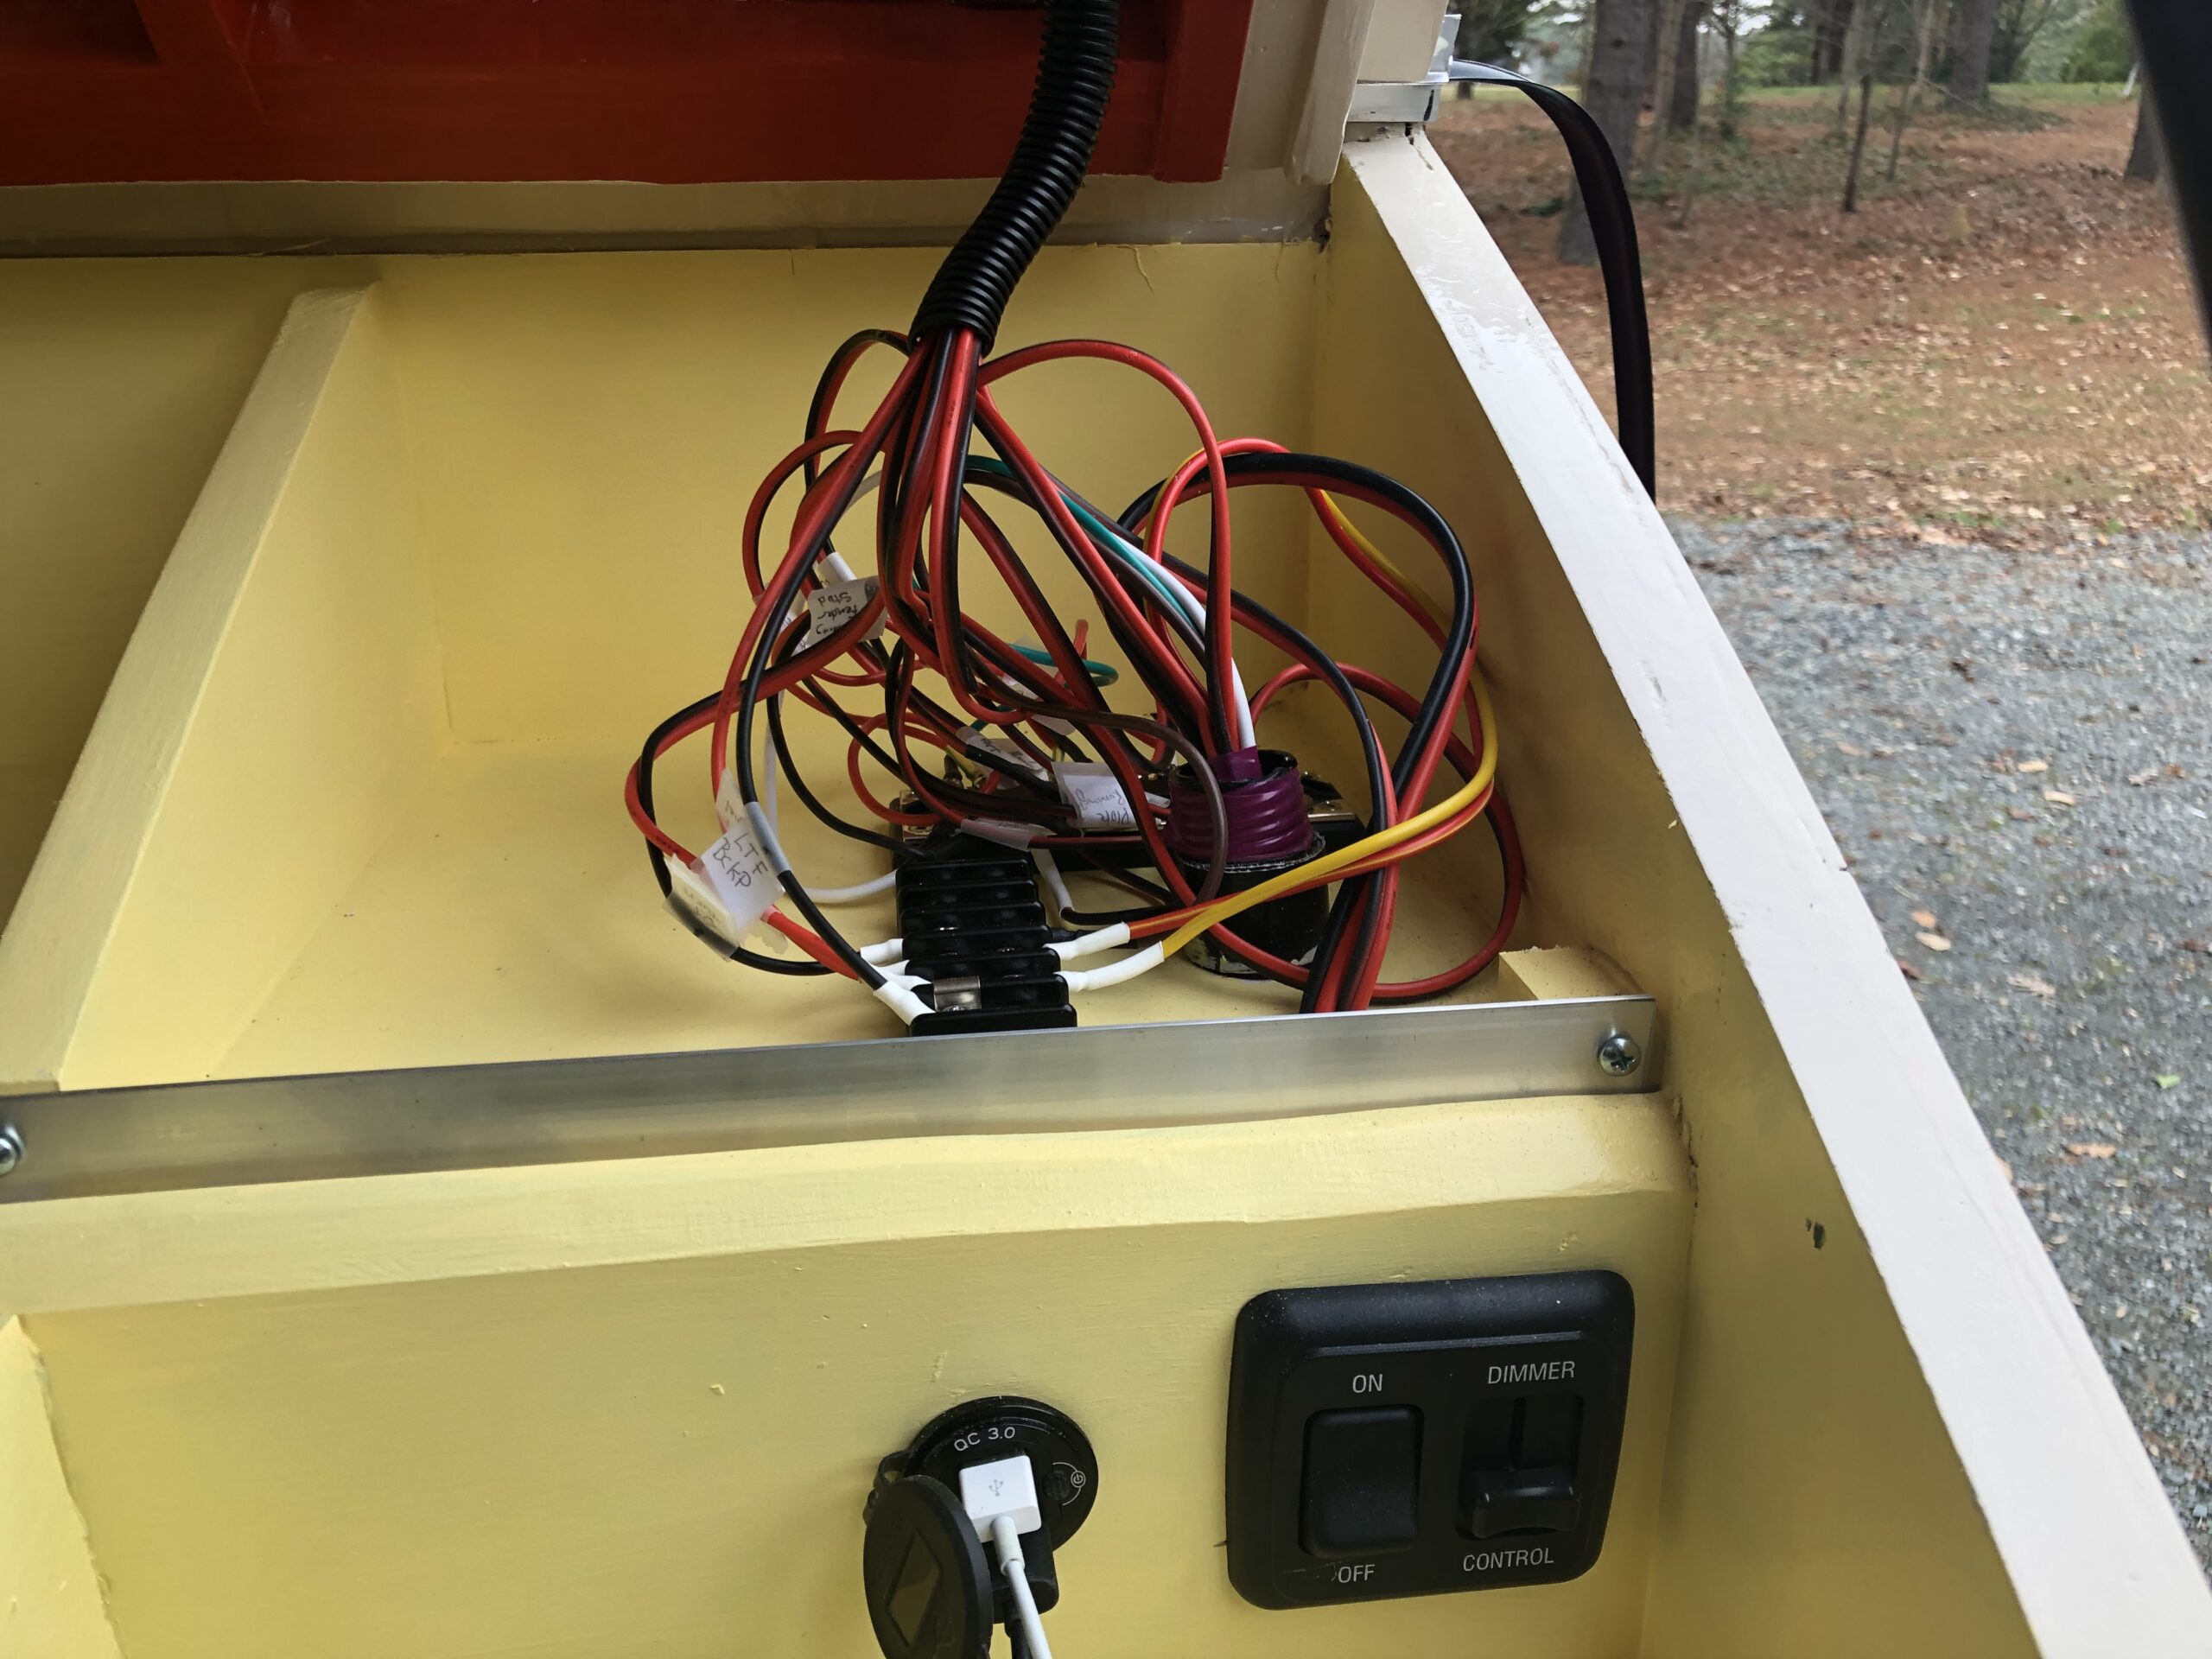
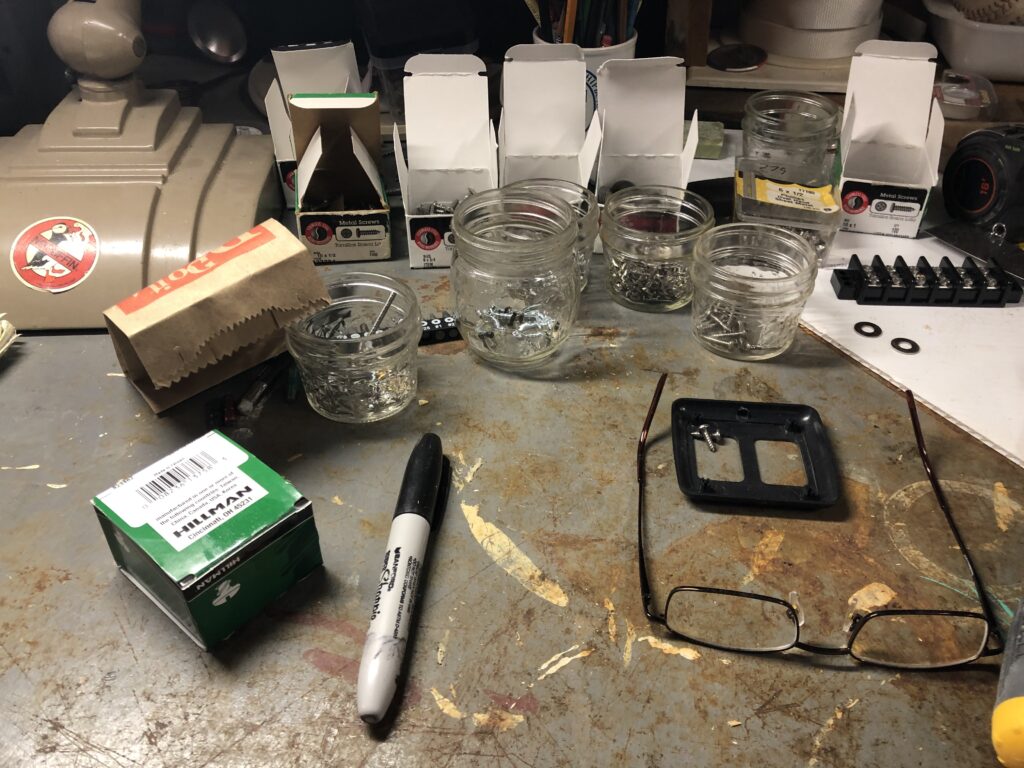
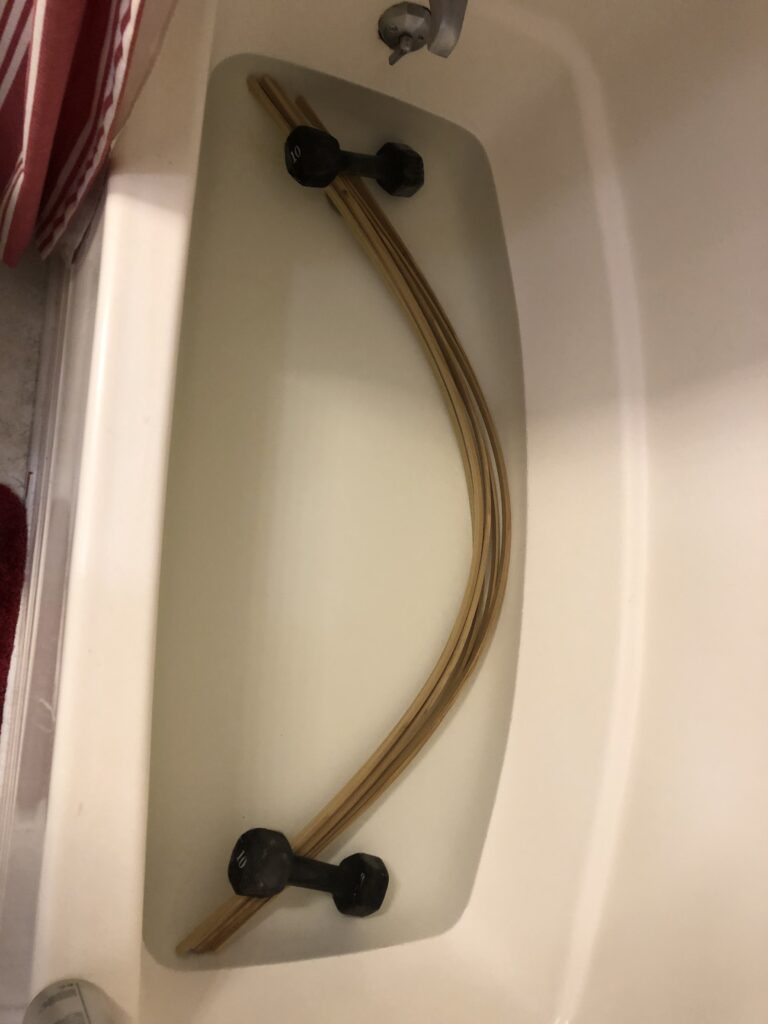
I’m going to keep my wire nest proudly on display.
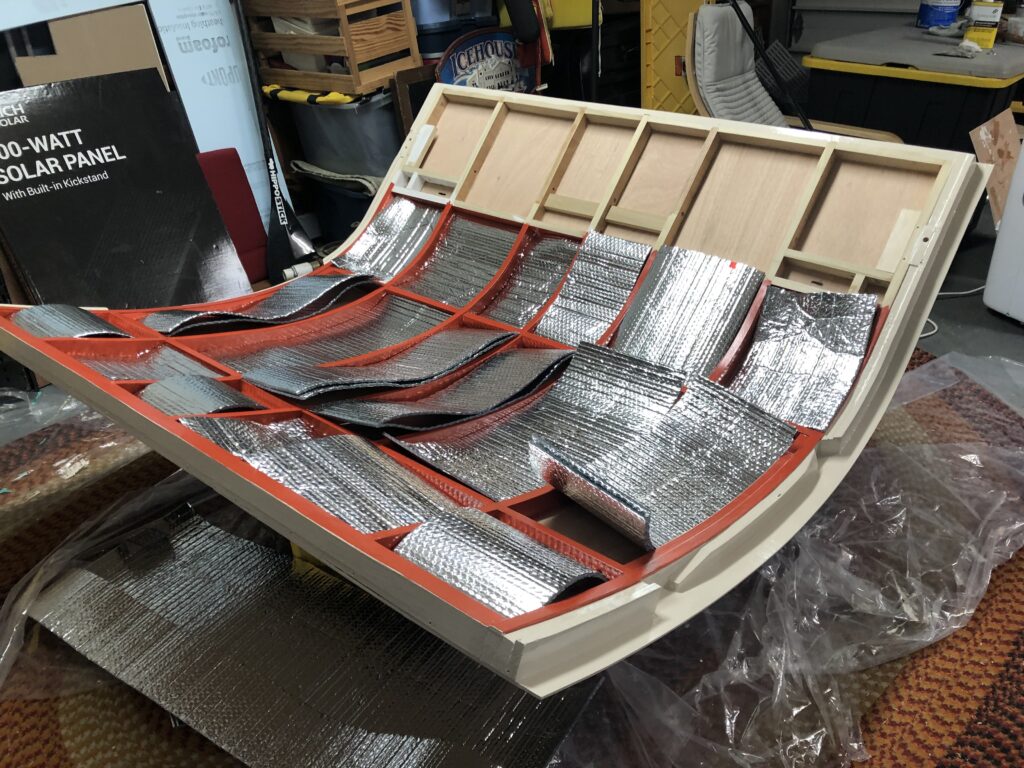
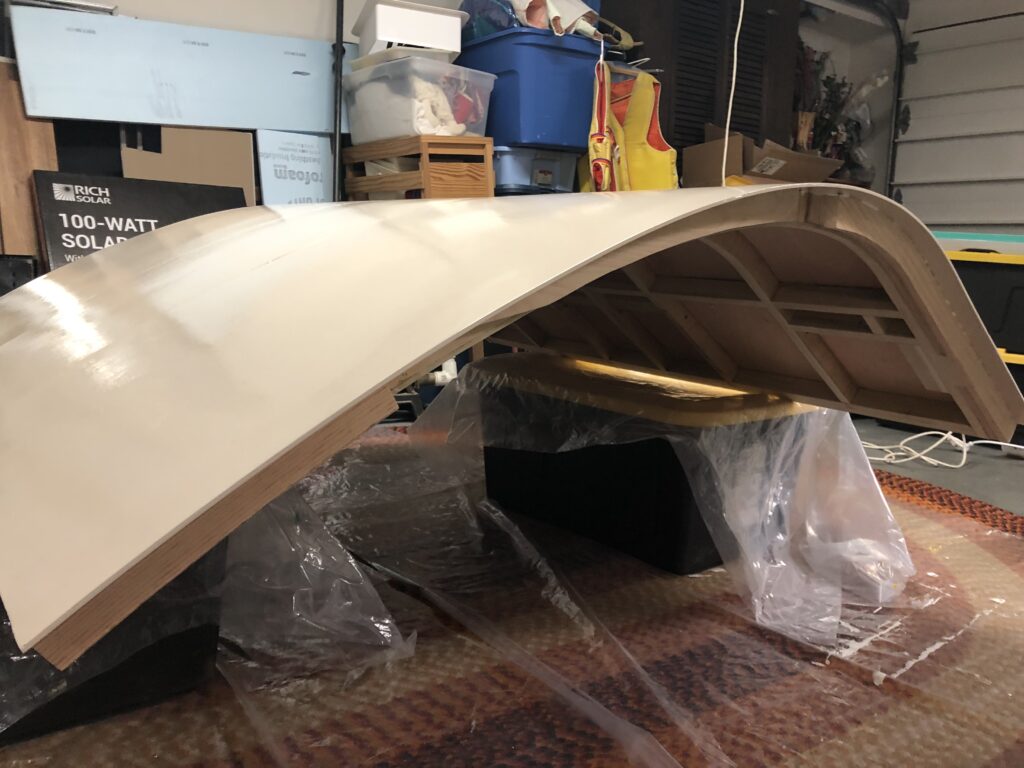
Two layers of bubble wrap insulation between the ribs.
And a countertop! More on that in a separate post.
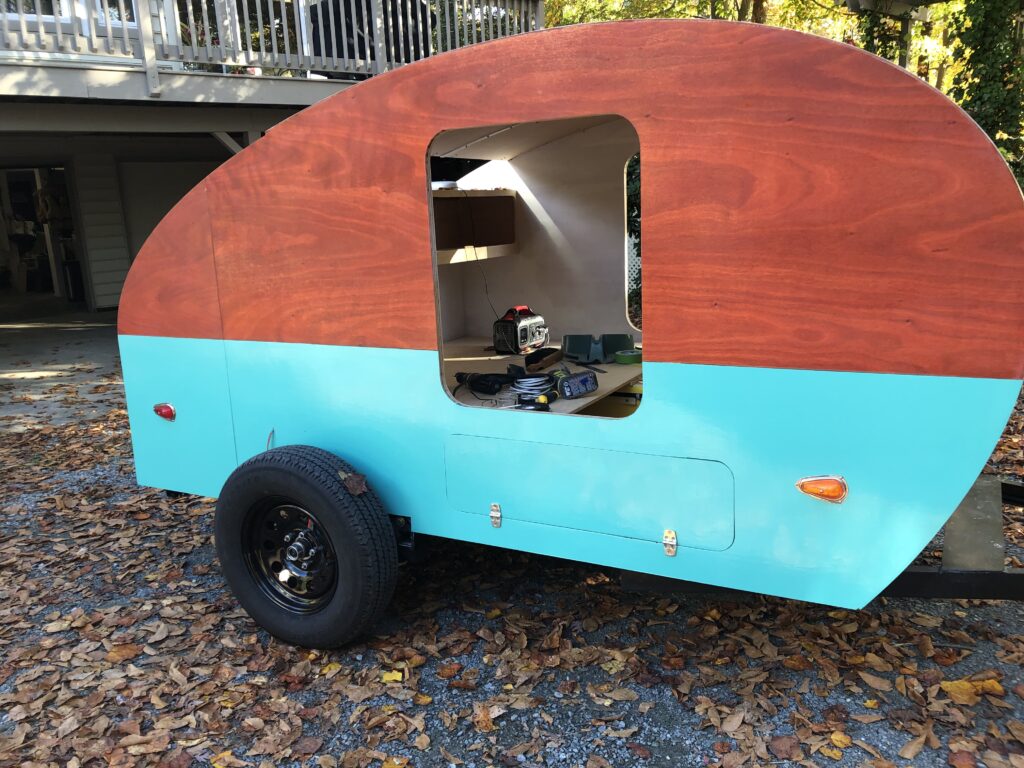
There’s some caulking and sealing that I need to do around all the screws and that aluminum galley trim, but we’ll have to wait until we get to 70 degree weather. We think the whole thing will come together tomorrow.
These beauties are stainless steel. They were not free.
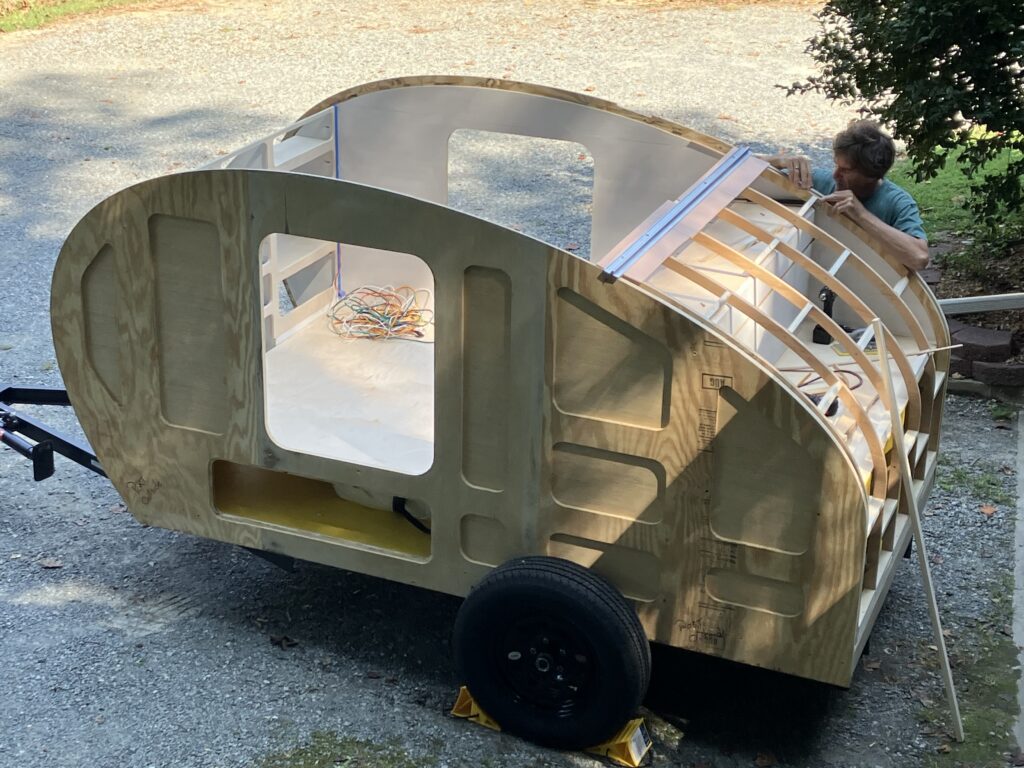
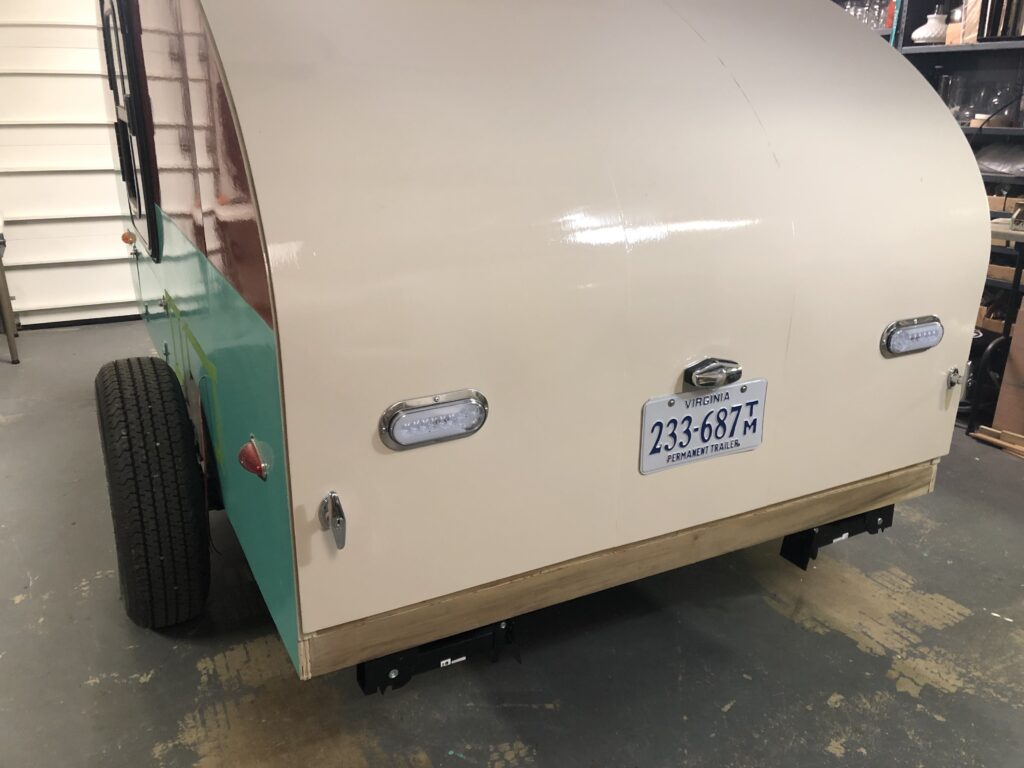
The fenders are screwed right into the frame. The trick here was locating where the voids in the frame were. For a refresher, here’s a picture of the trailer when it didn’t have the outside skin:
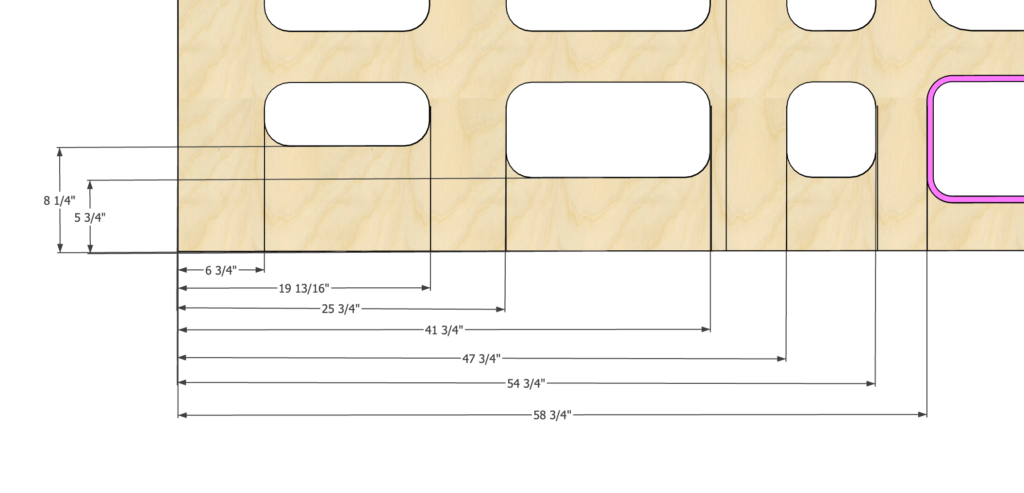
You can see where there are these cutouts to save weight on the structure, but I didn’t want to put a screw there, so I went back to my Sketchup drawing:
And used that to tape the outline of them from the outside. That’s the green tape that was on some previous pictures.
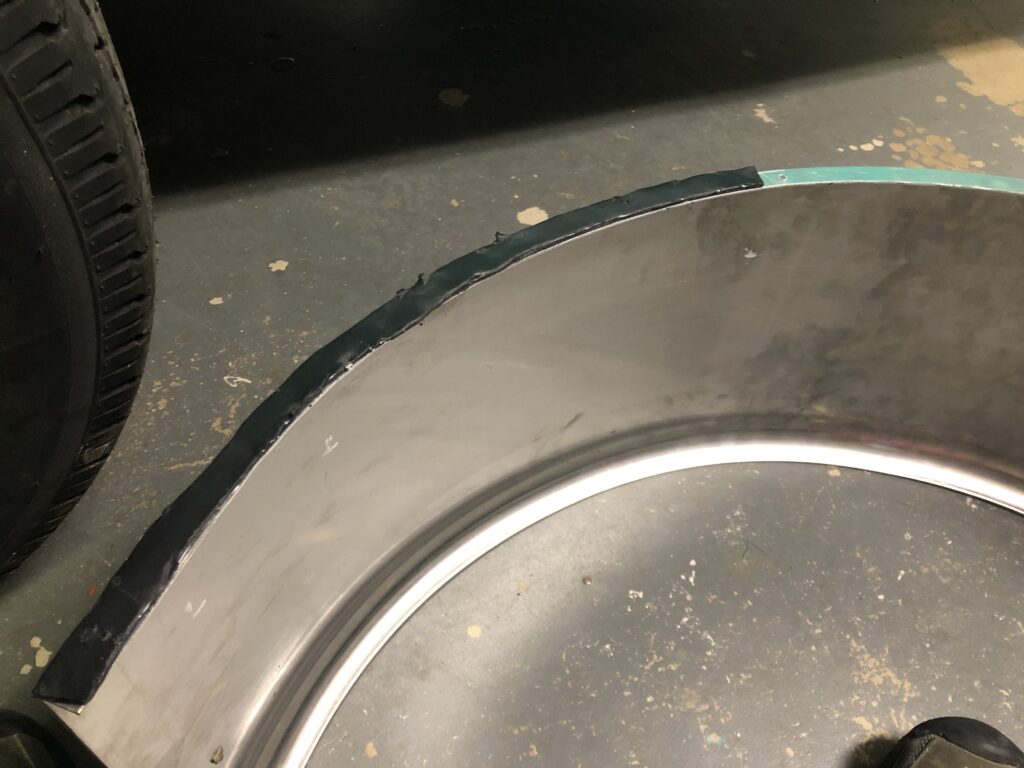
Putting butyl tape on the fender edge before screwing into camper.
I love how the view2 from the workbench changes depending on the phase of the project.
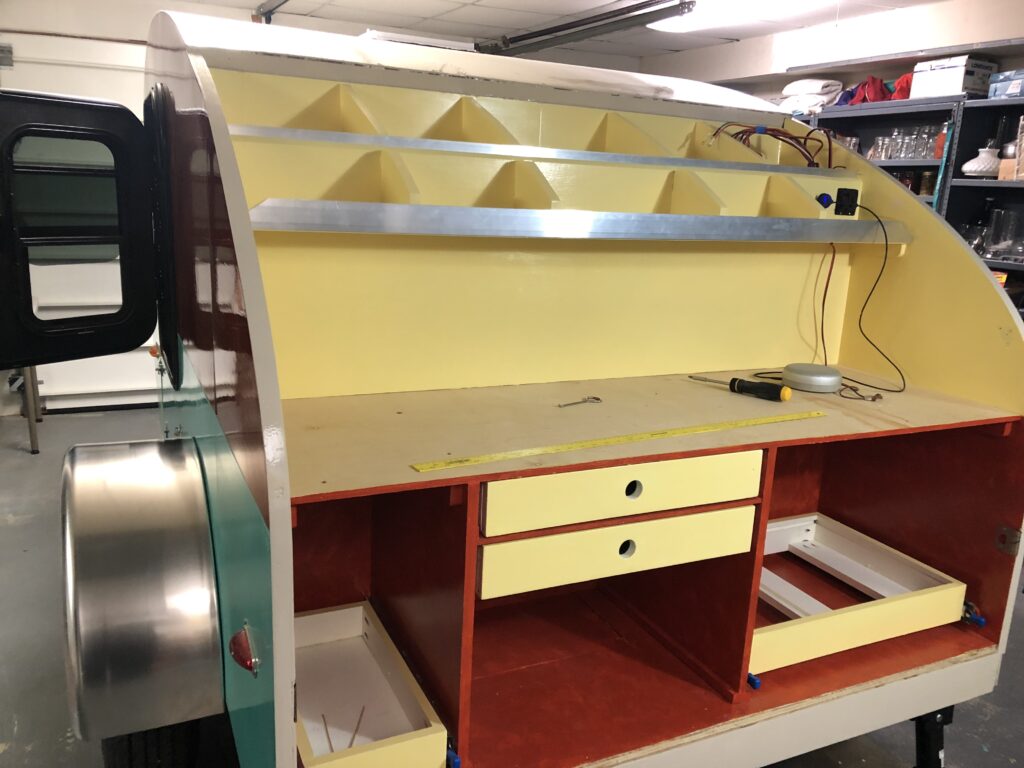
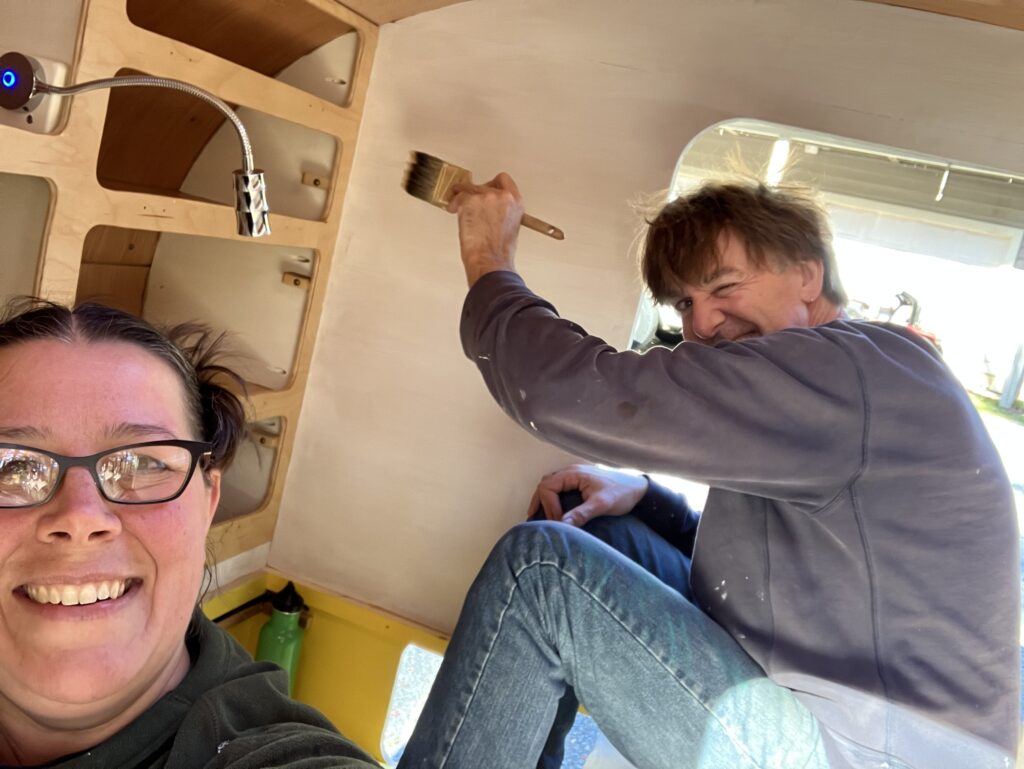
The inside of the galley door has had a few coats of paint and now Kayla is fitting insulation.
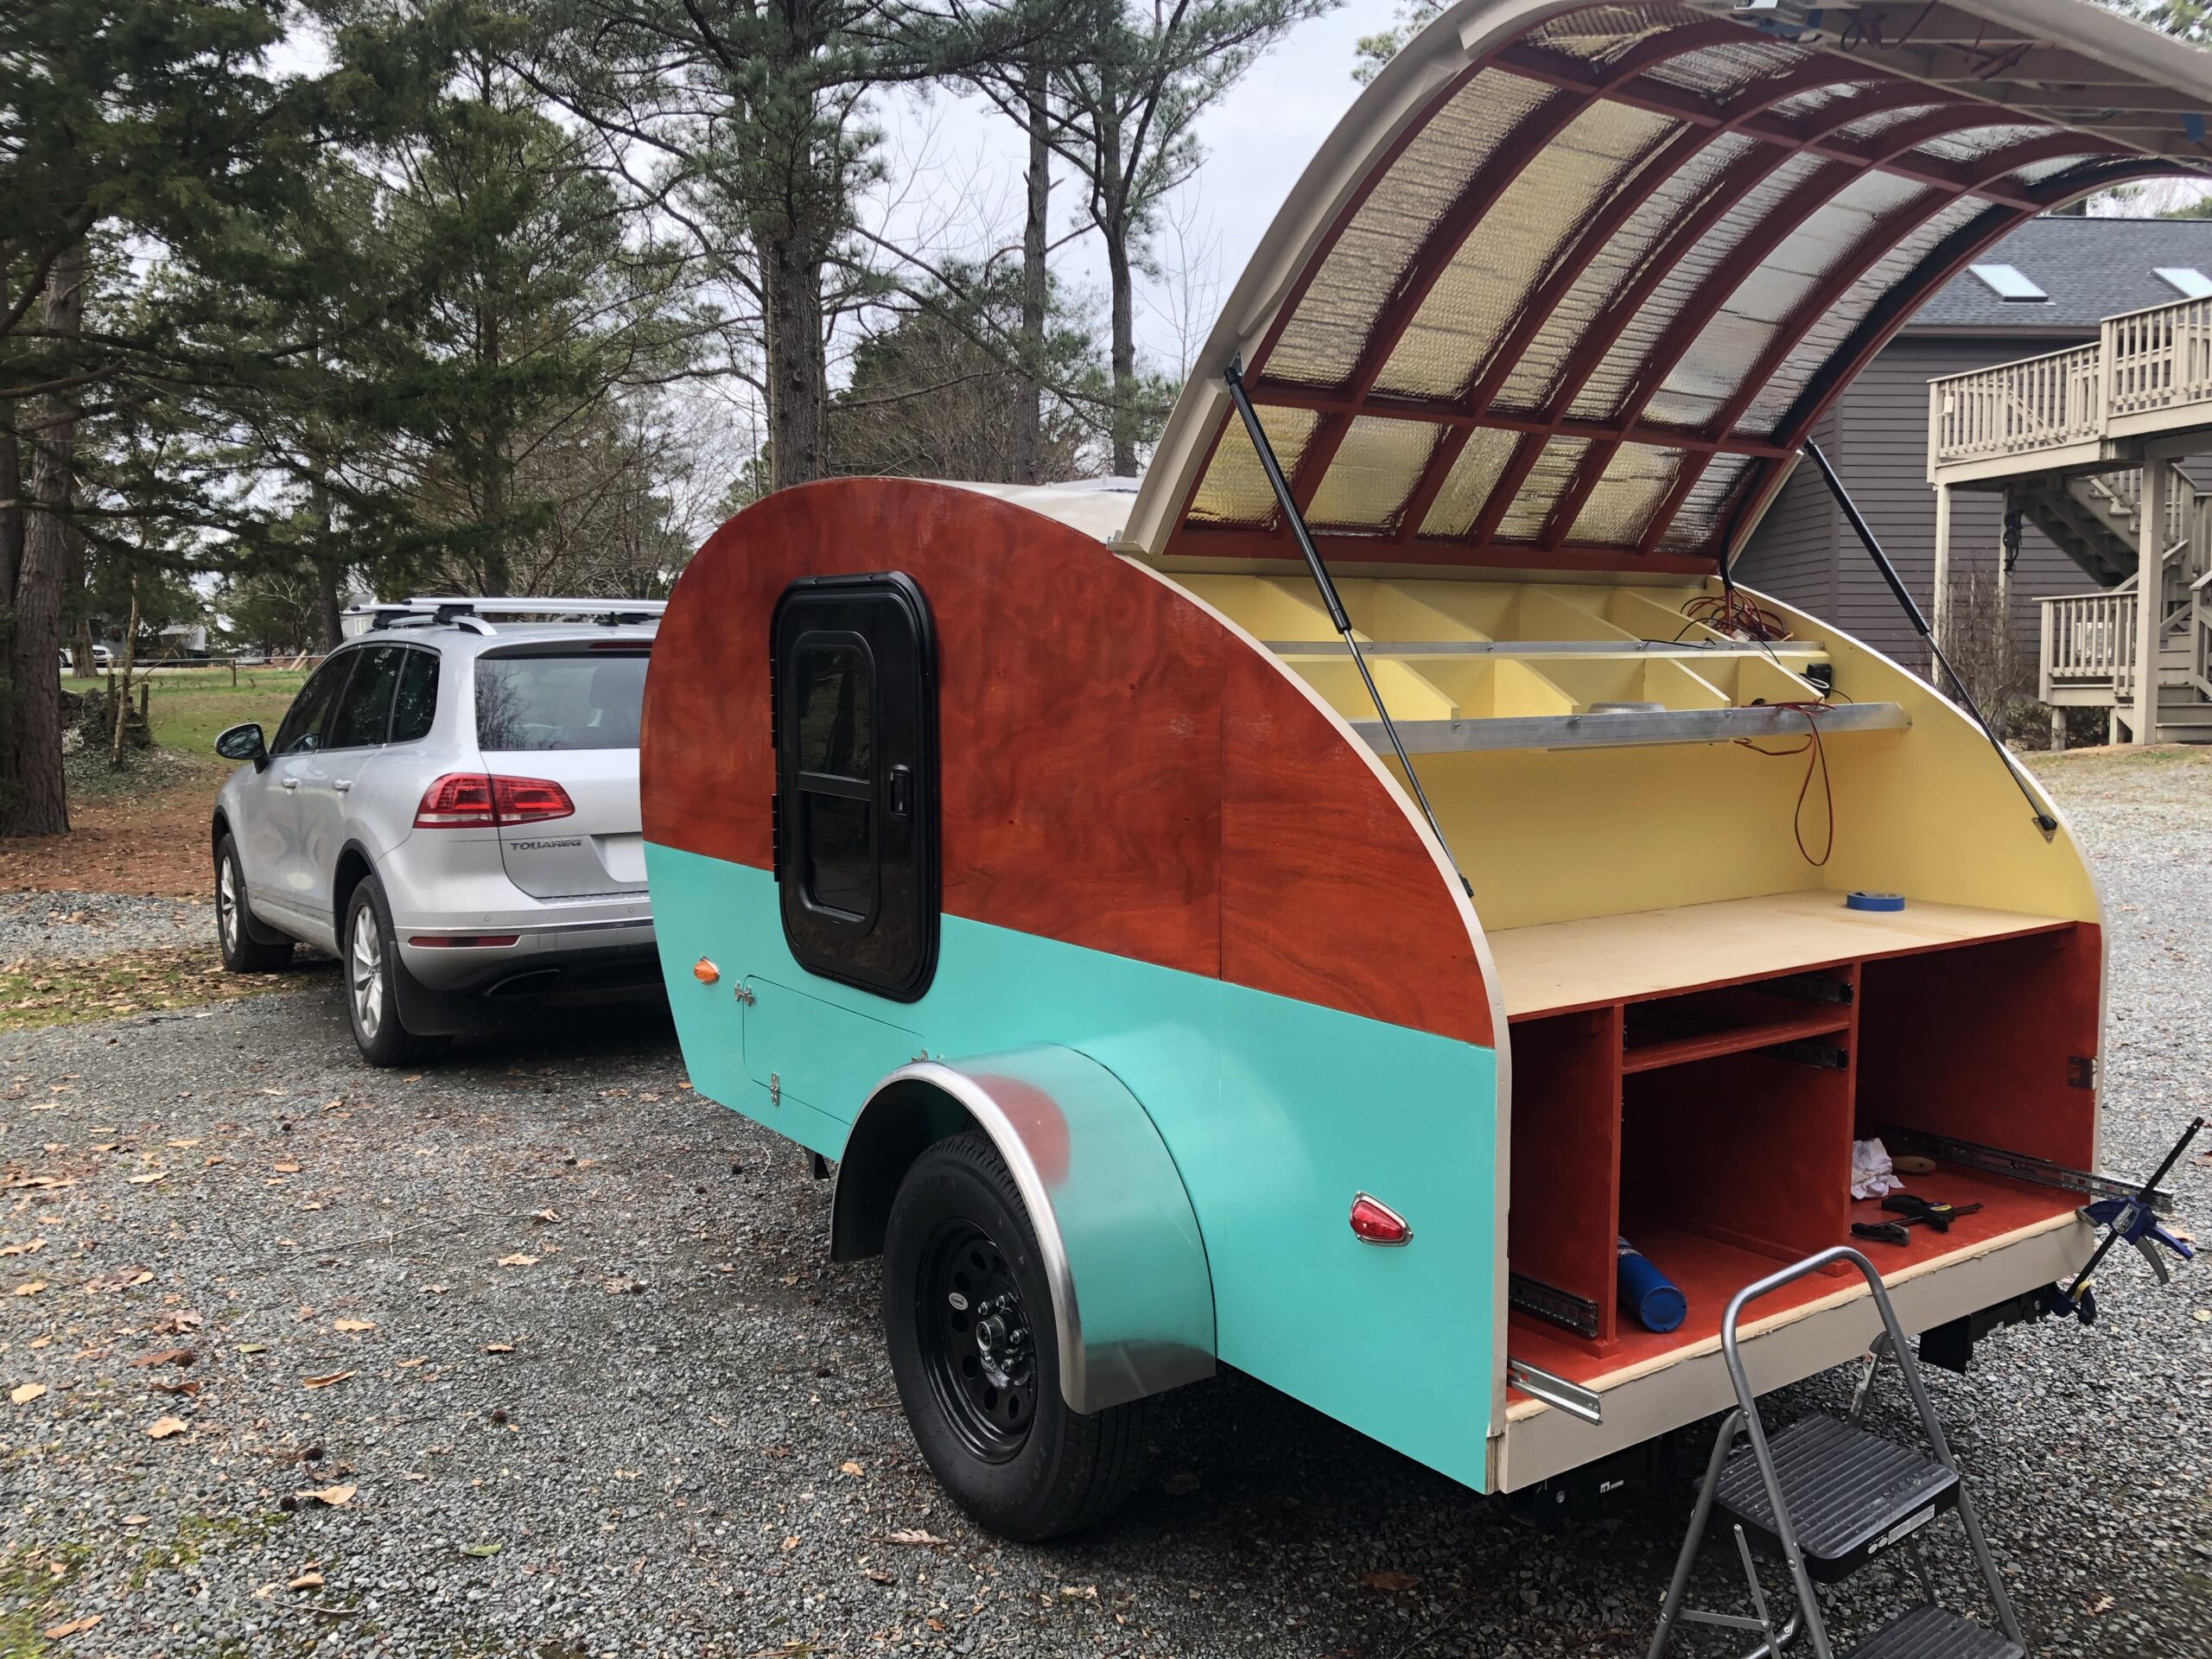
Galley painted and dressed for the ball. I just need to screw in that aluminum trim.
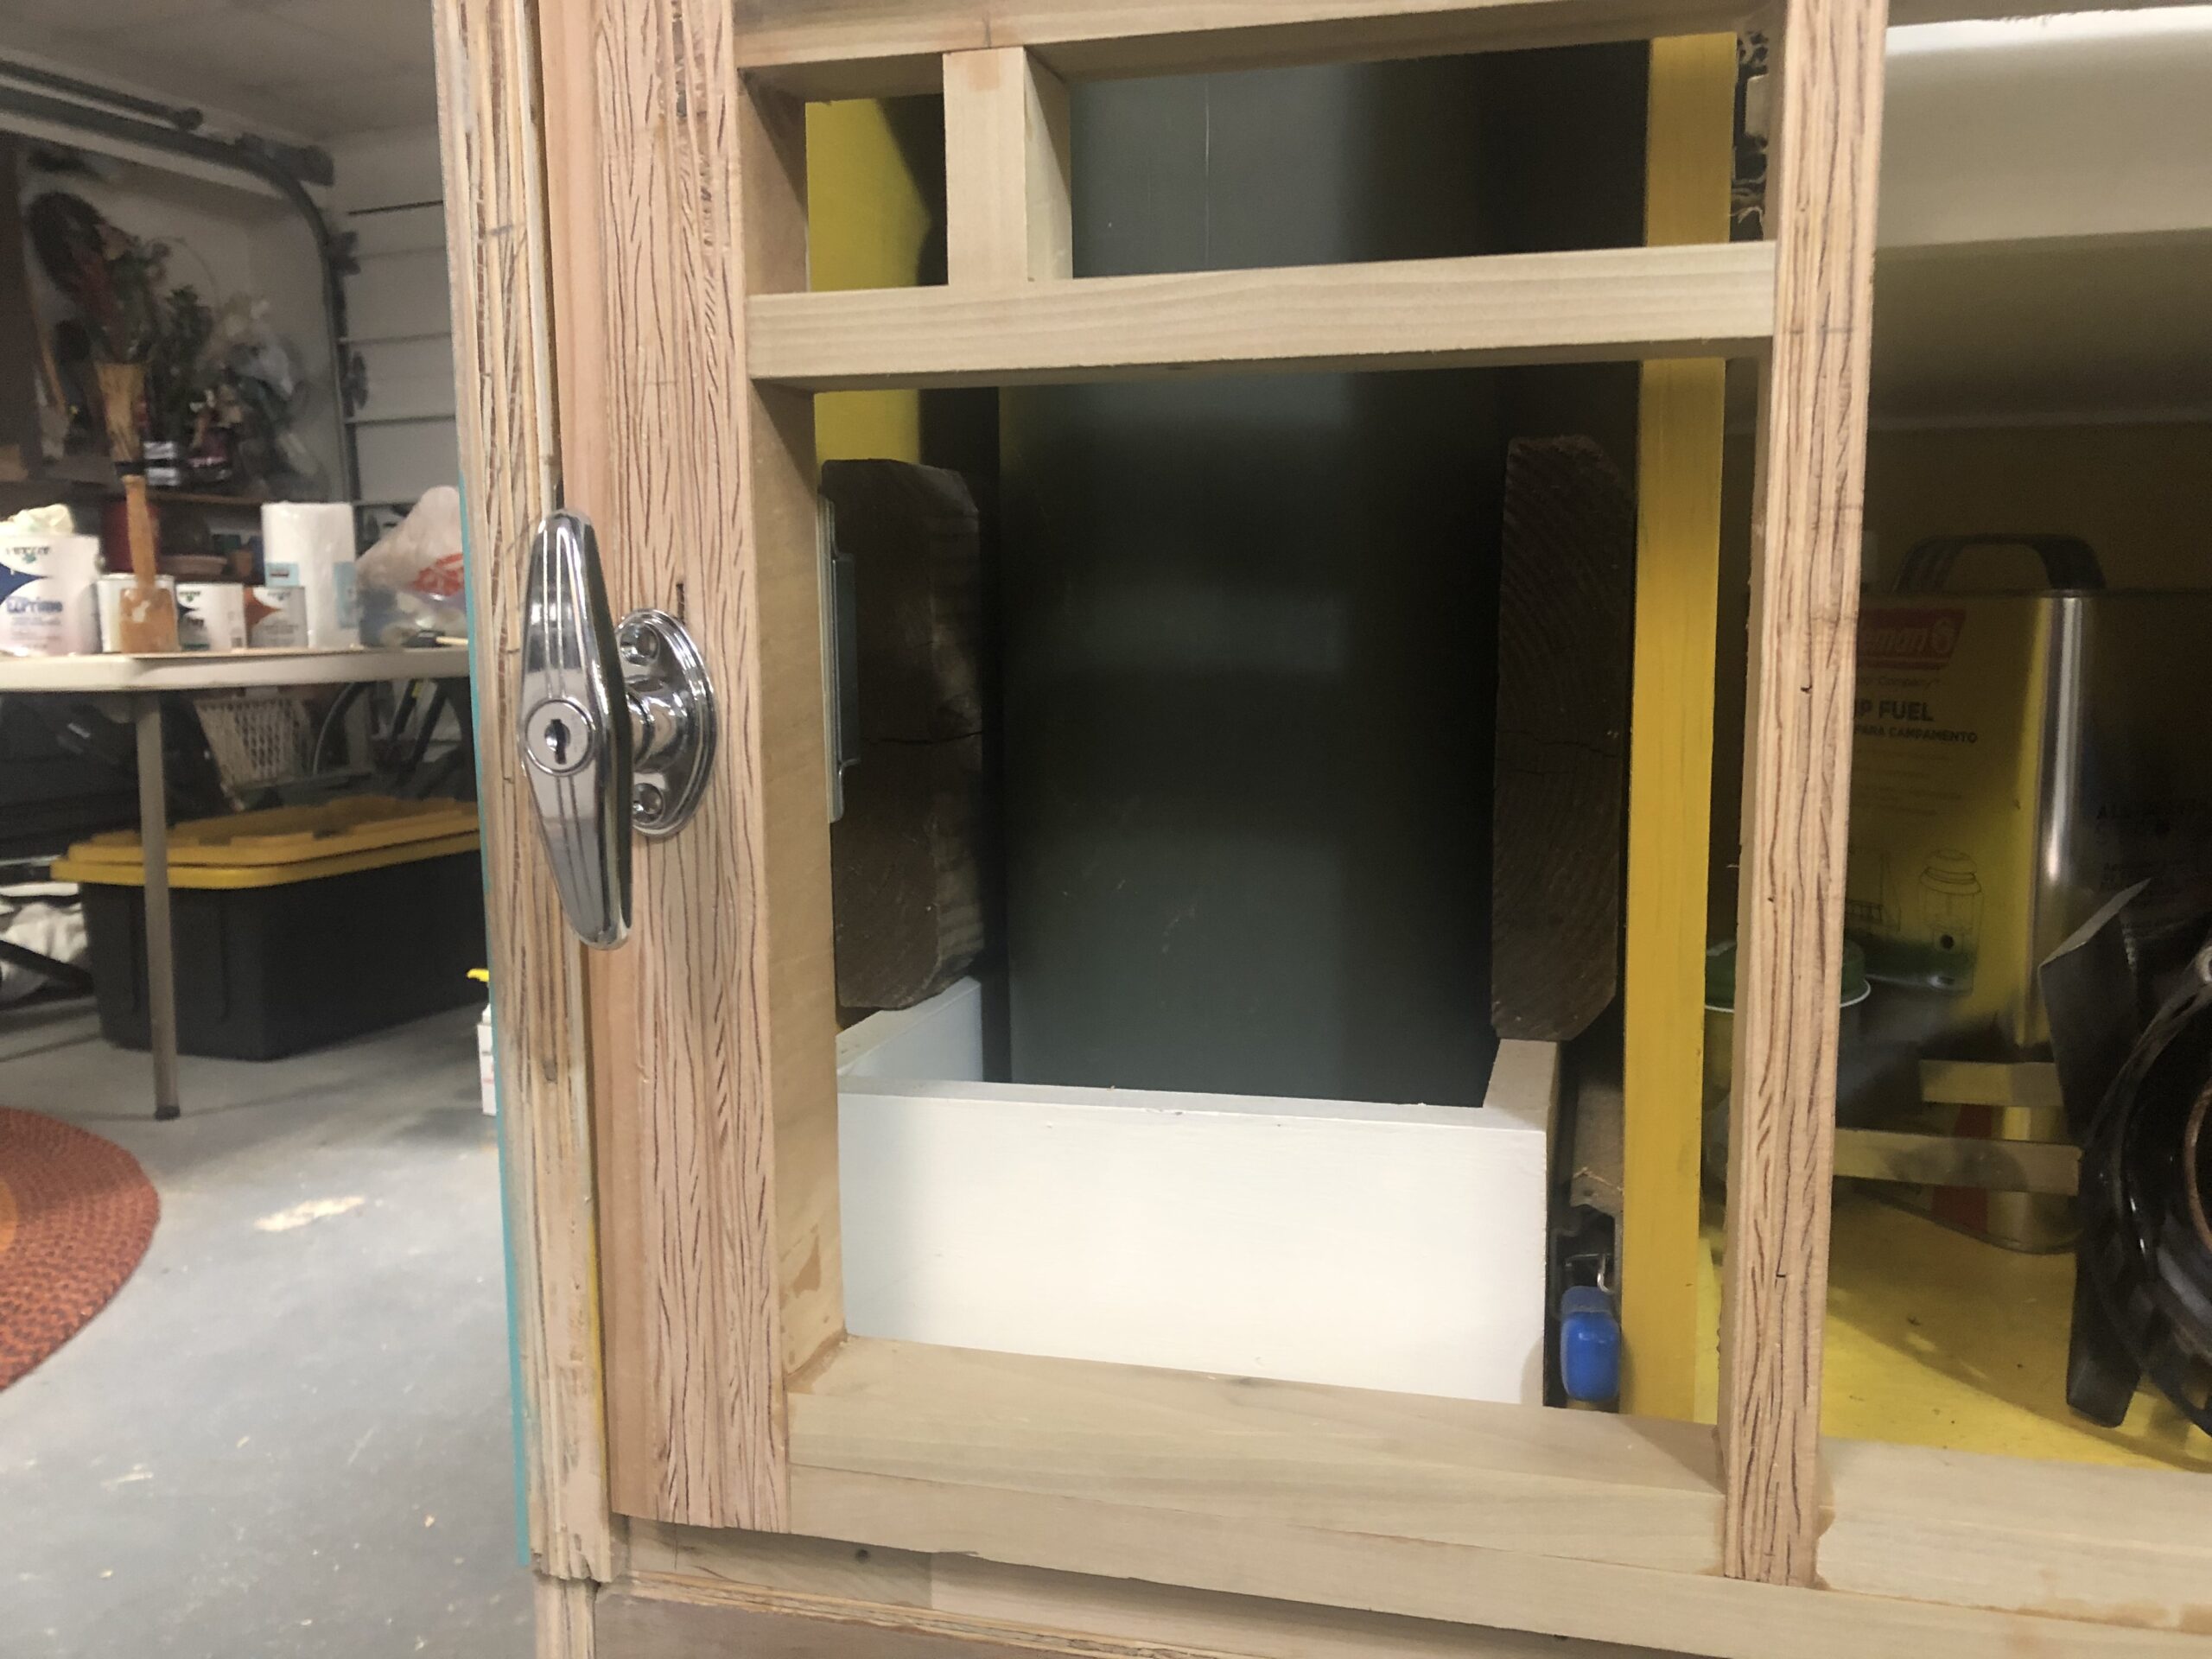
That’s the sound of the hatch clicking into place. It took a day of fiddling to get it all to fall into place, but here’s the door fully dry-fitted.
Once it all was in place, we took the door back off for some more painting. It’ll get fully sealed and wired very soon. I’m pretty amazed at the consistency around the frame. I had to take a video to get it to all fit:
That gap will have a rubber gasket to seal it when all is said and done. The entry and storage doors are also fully installed:
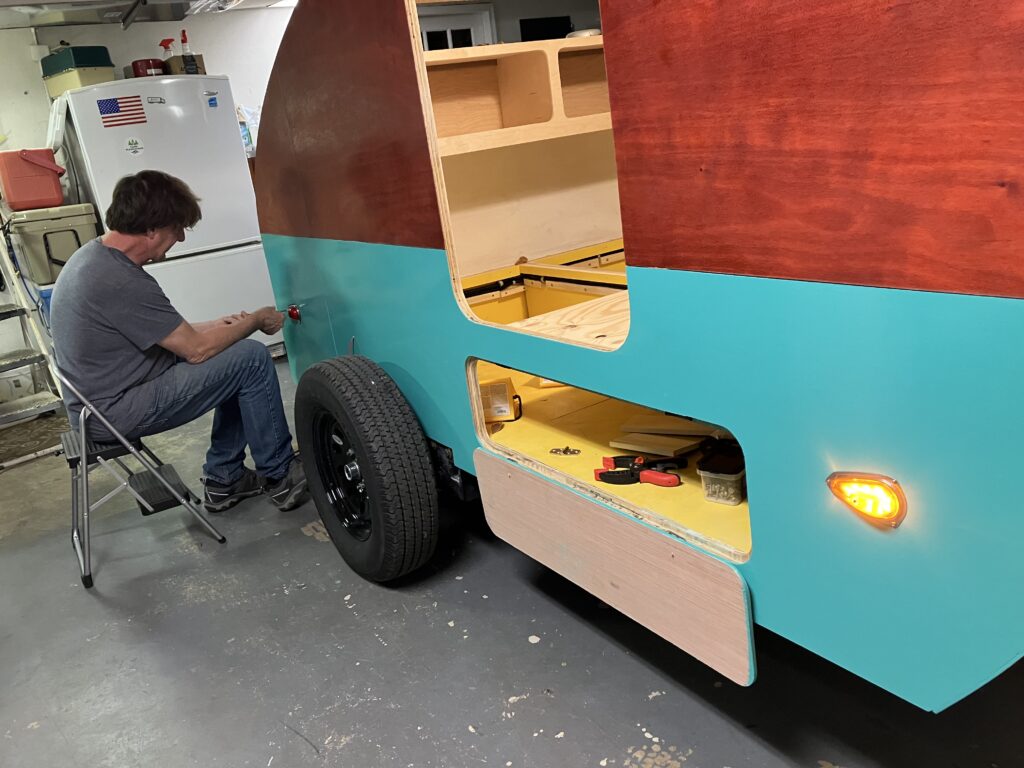
Those tape square are for helping me mount the fender.
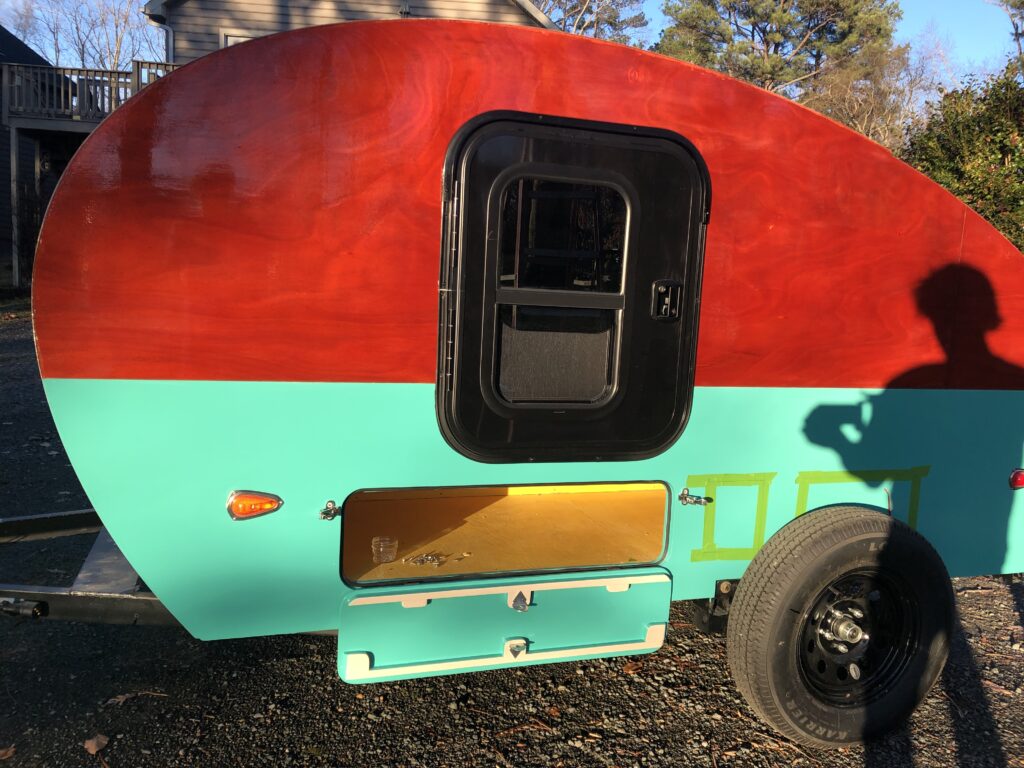
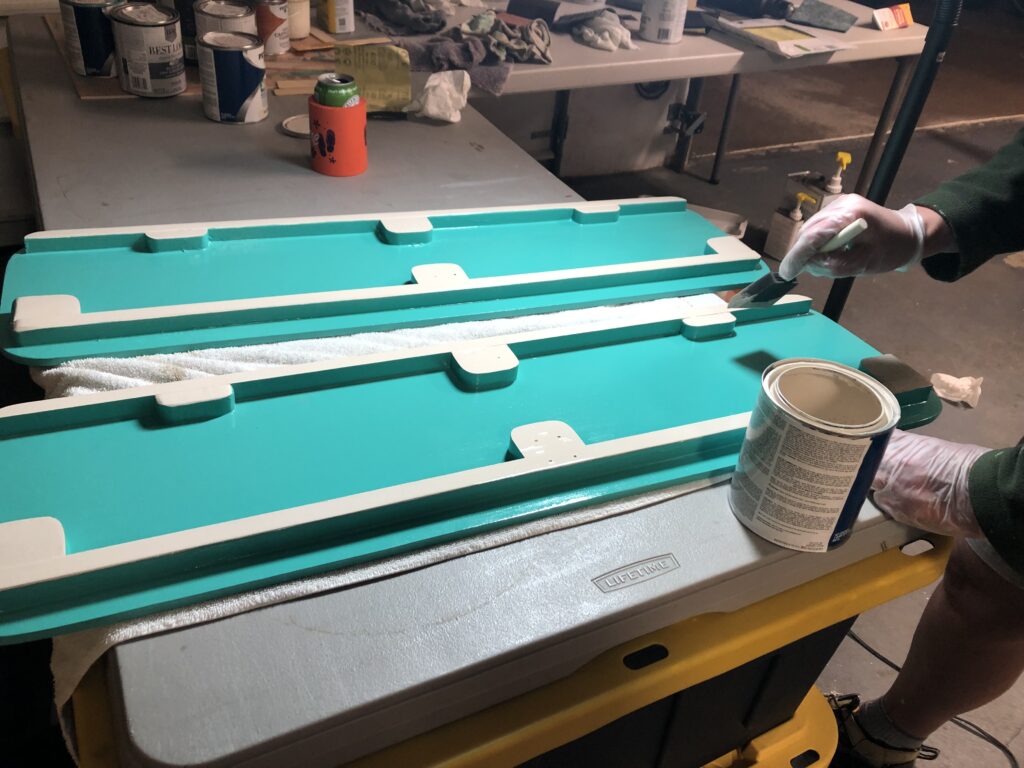
A new galley hatch door gets its first coat of paint.
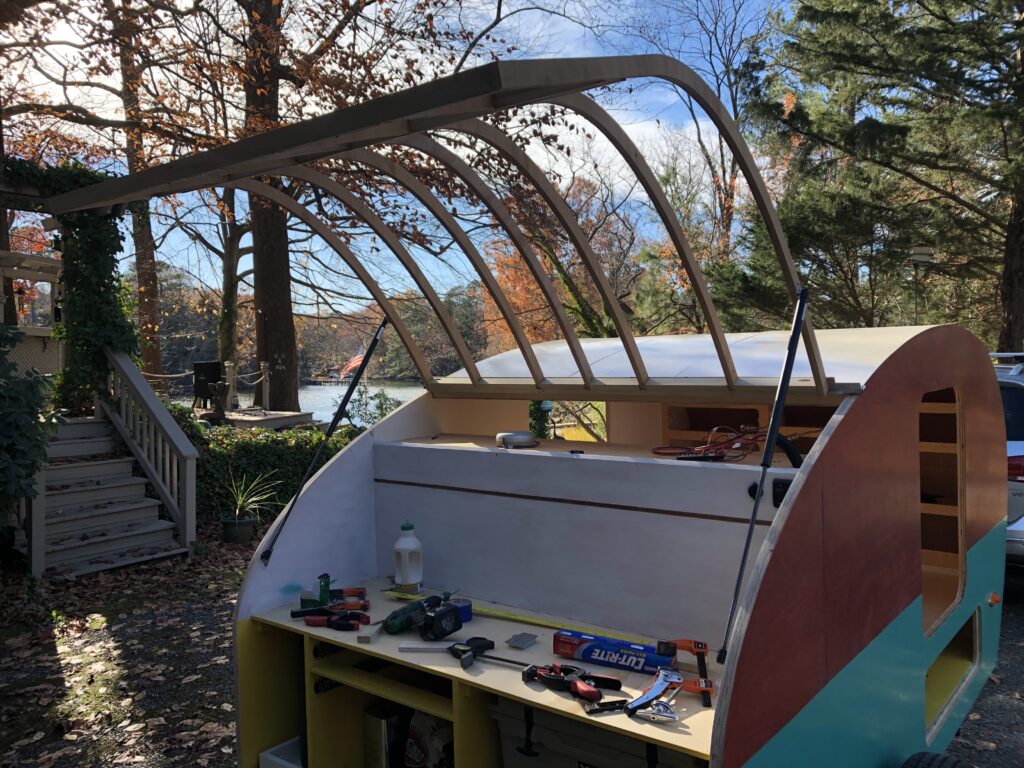
The galley hatch door seems to be coming together. The the big test will be how it fits when installed on the camper, which will be happening soon. Speaking of tests, I’ve been referring to the galley door as my final exam in my teardrop building class. It has been the most challenging build I’ve ever had to do, that’s for sure. Here’s some highlights of the process:
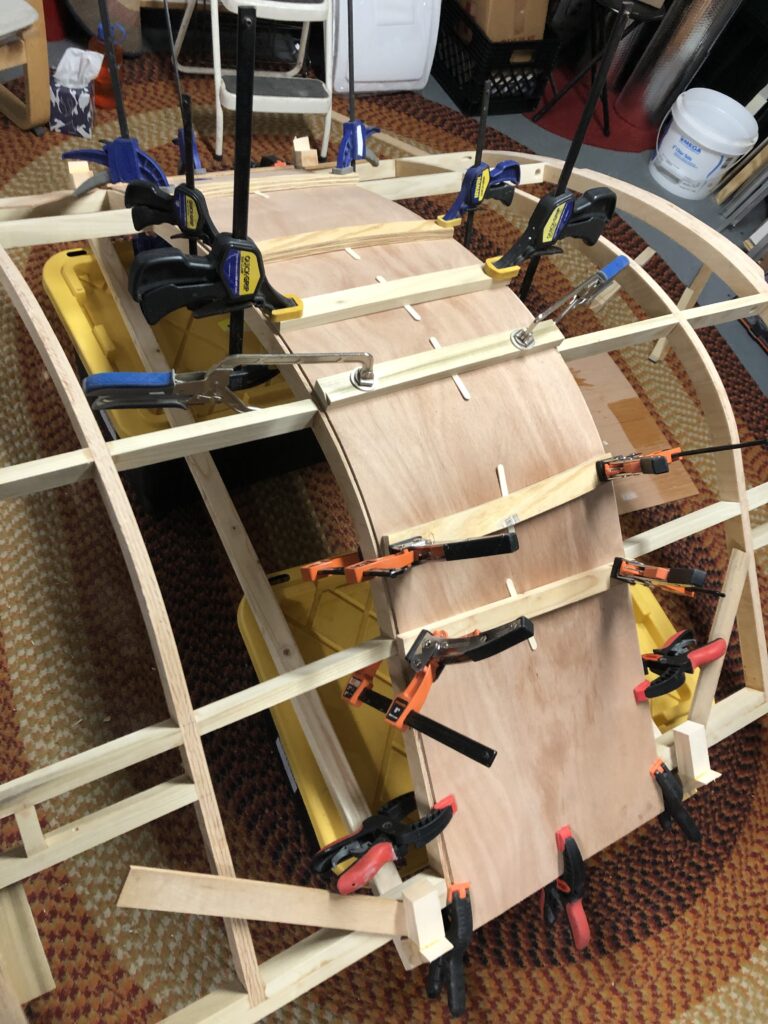
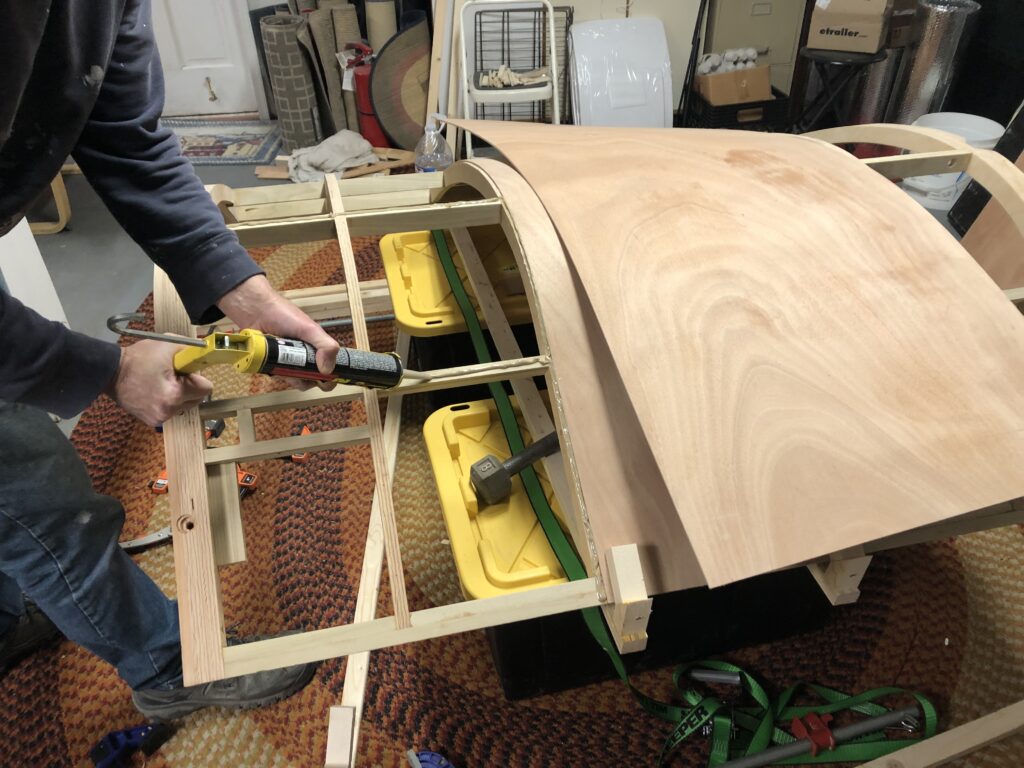
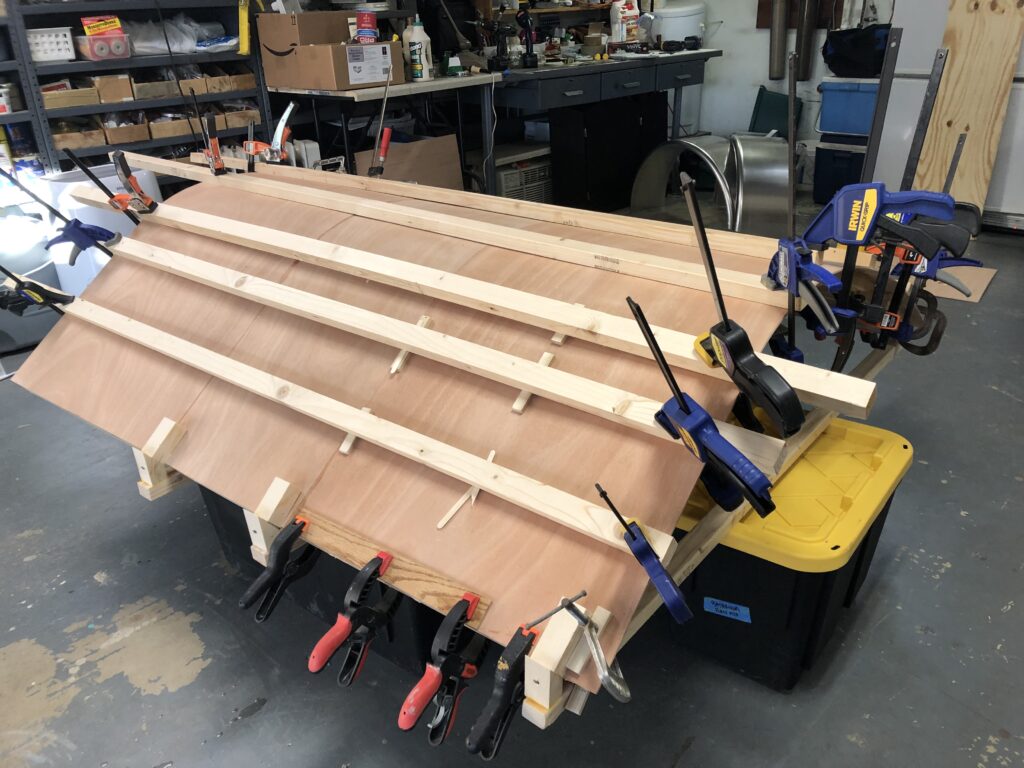
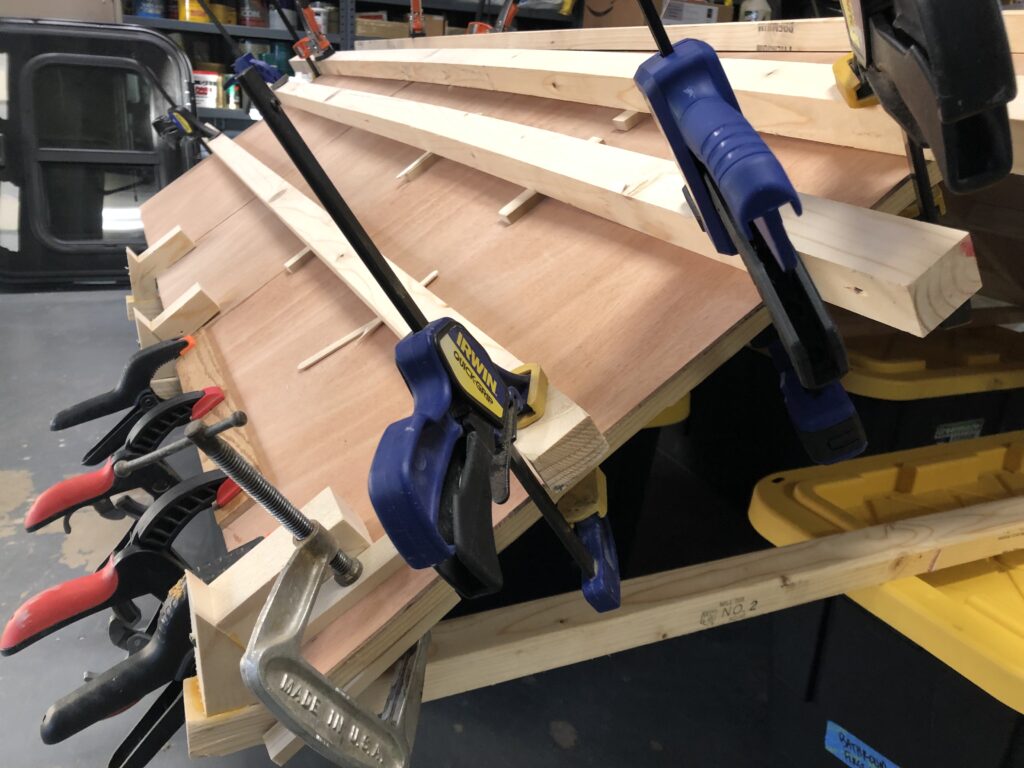
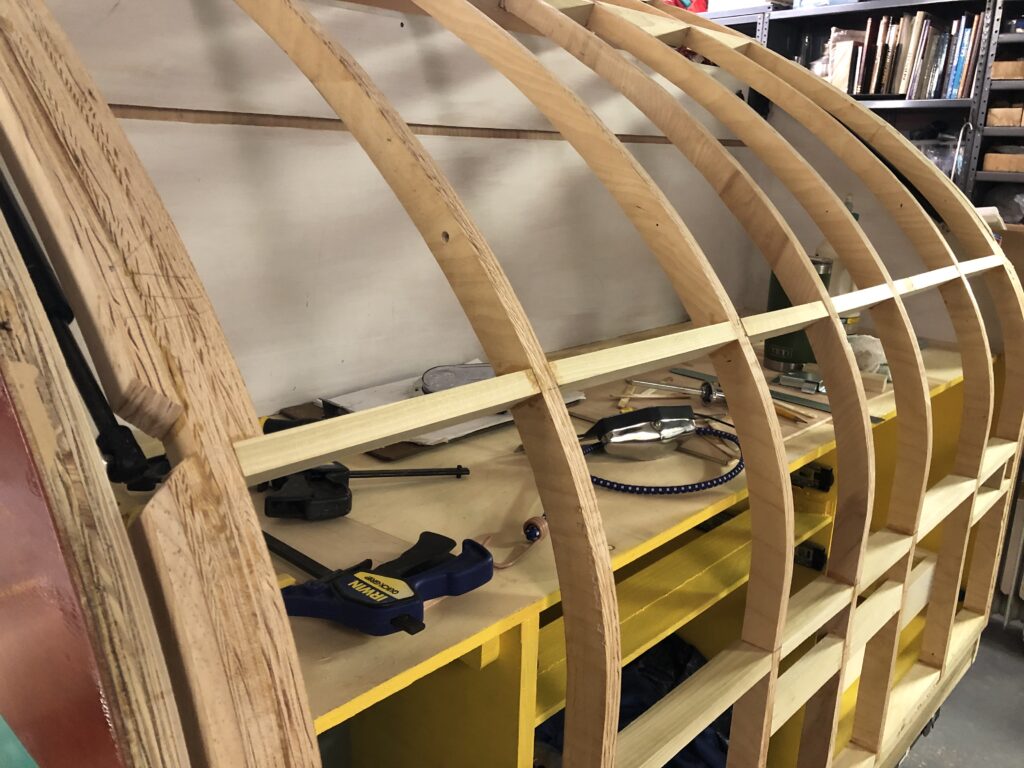
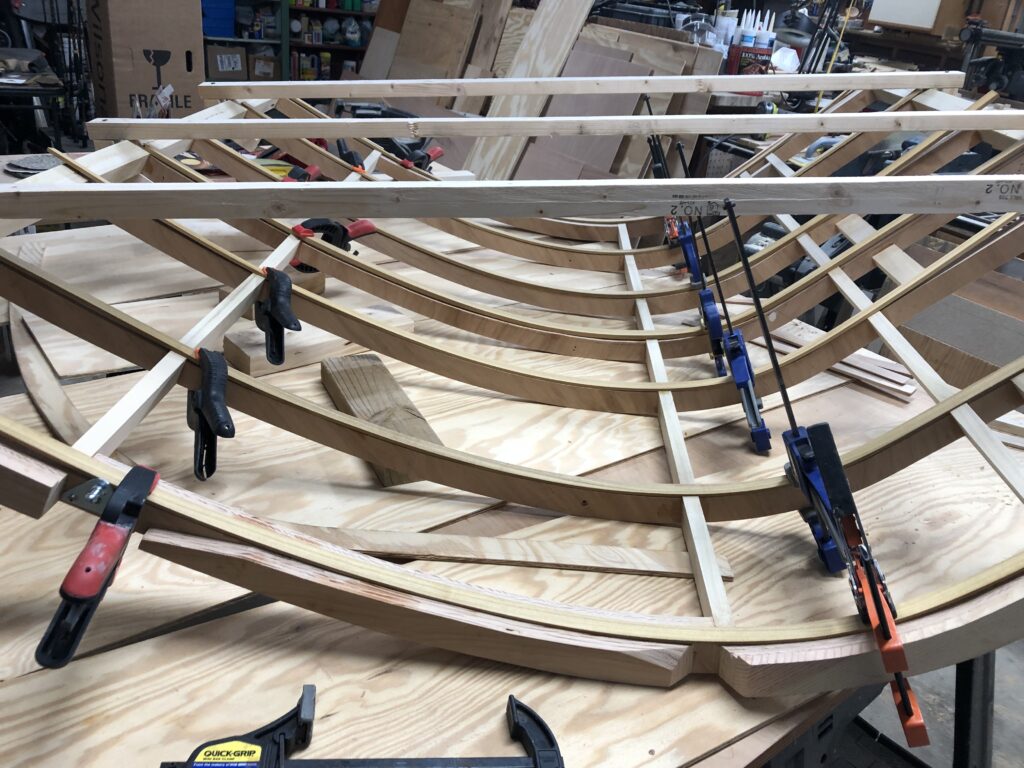
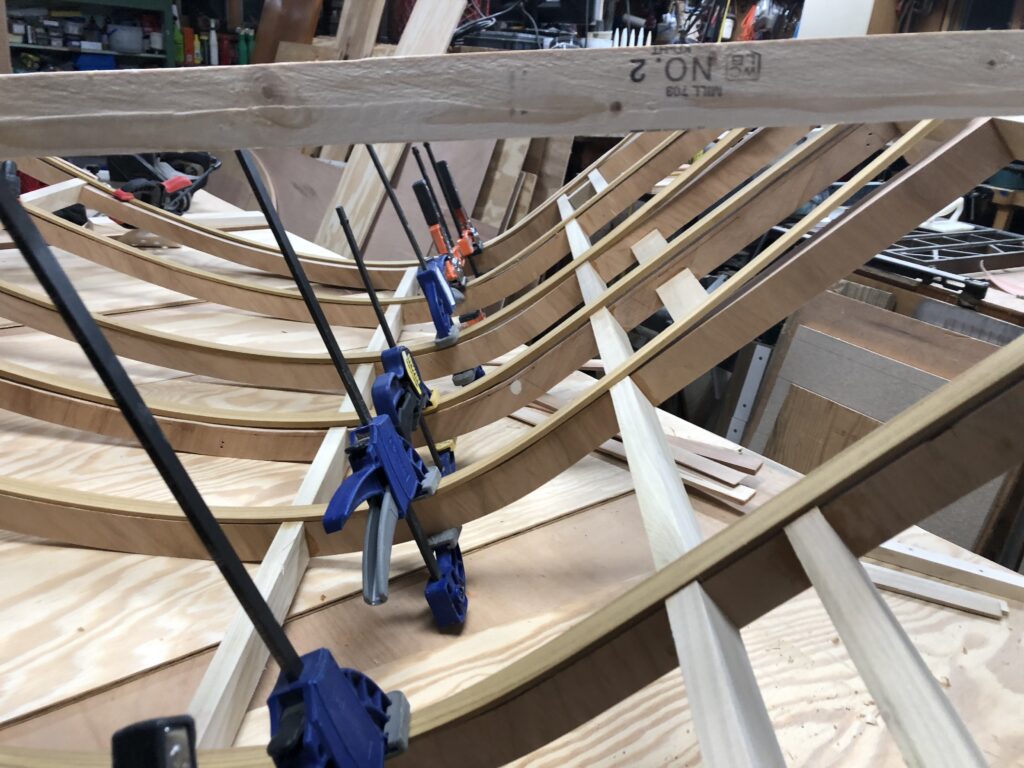
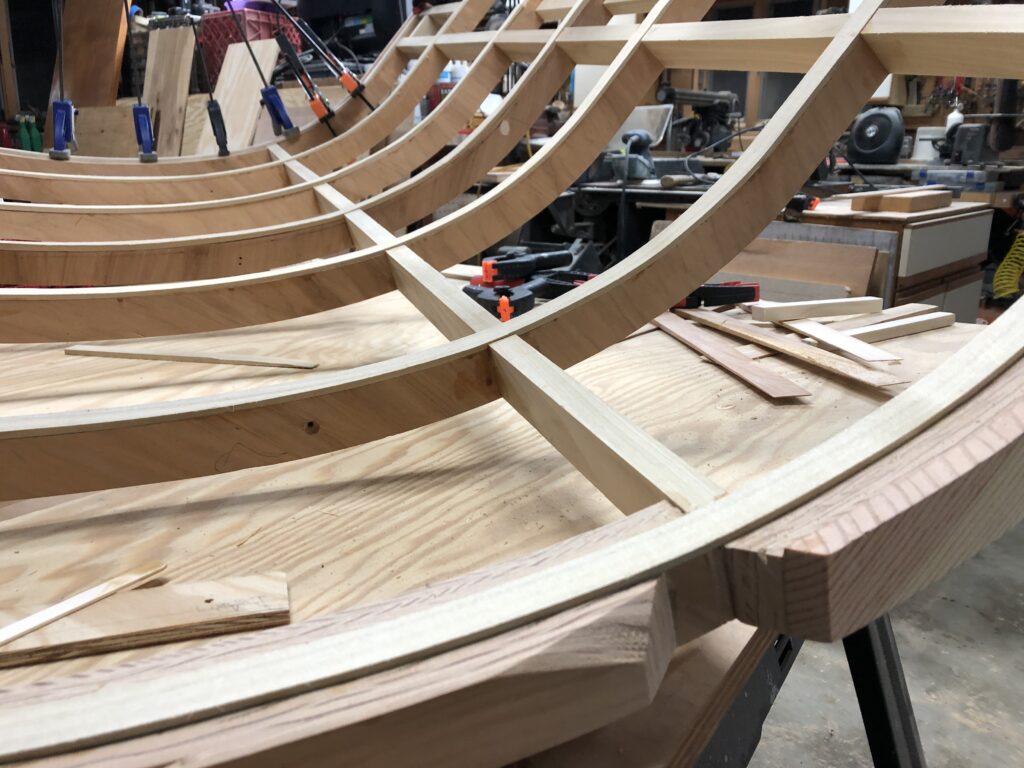
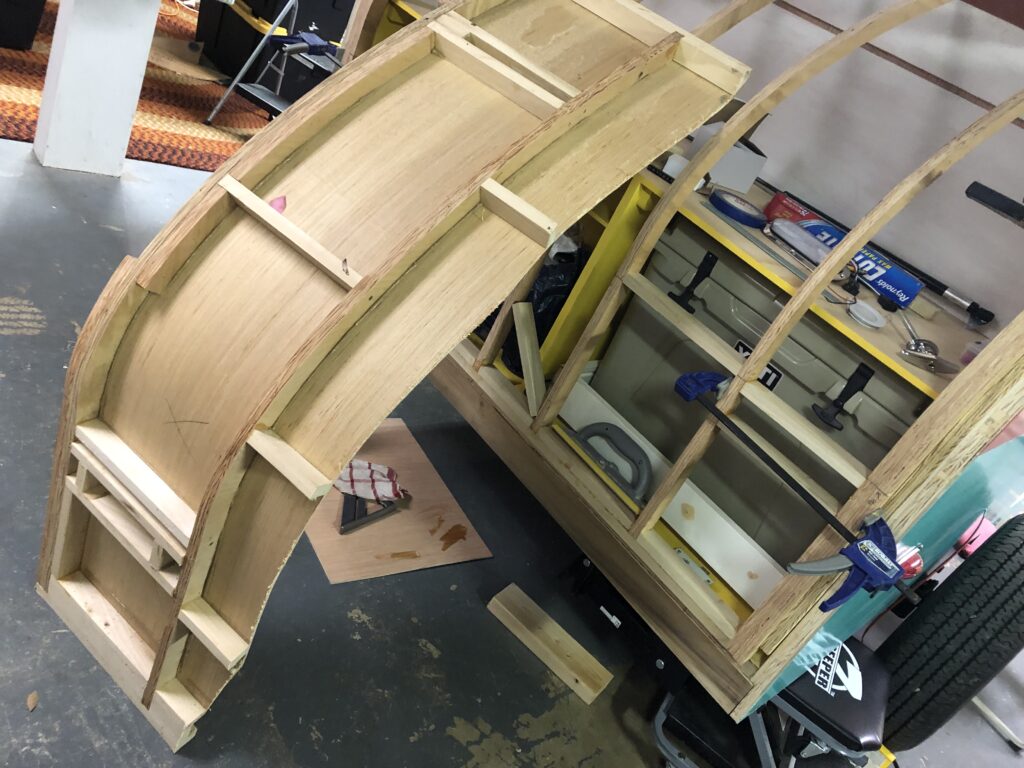
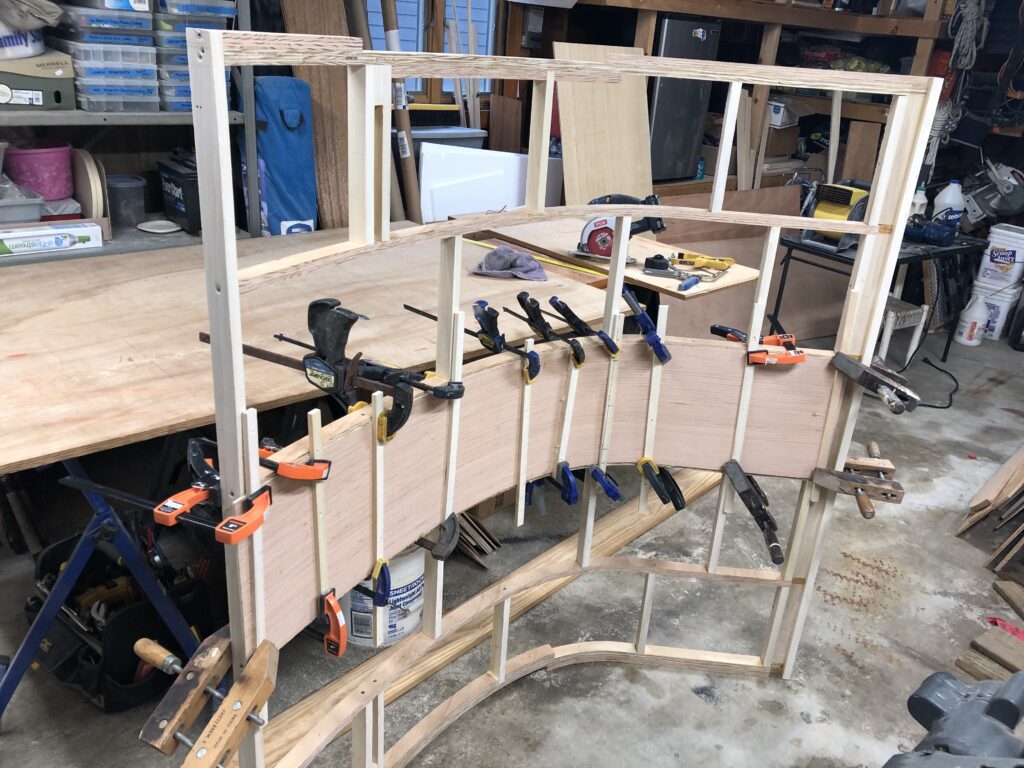
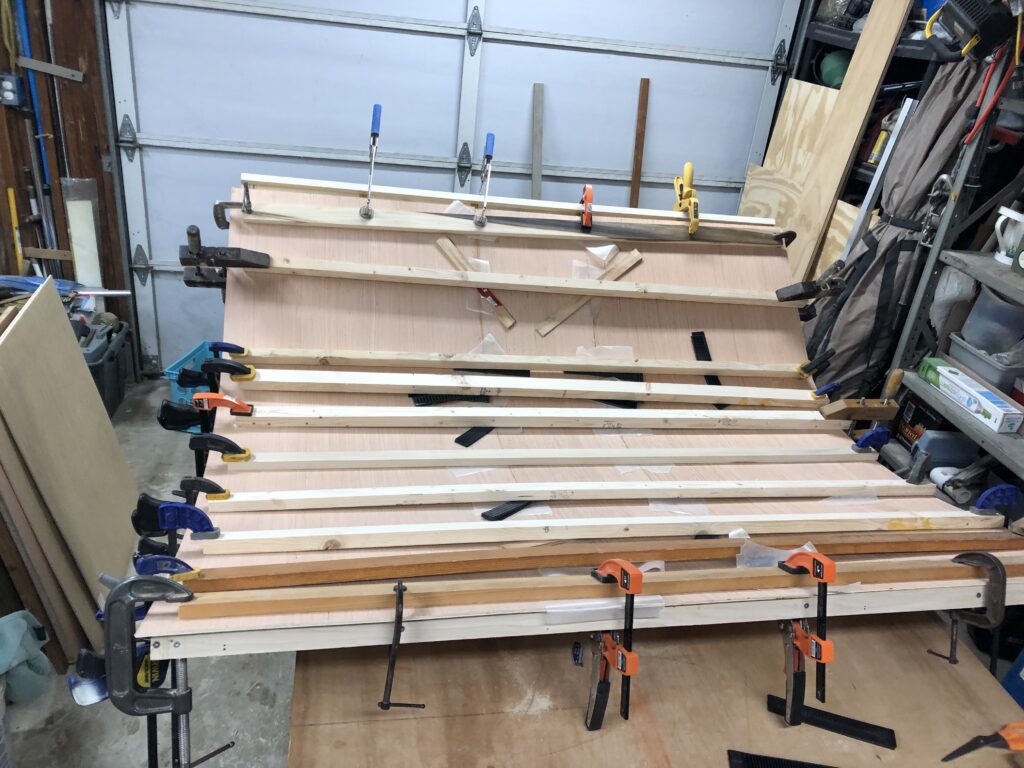
We glued each panel onto the frame separately, allowing us to assure a good fit and use every possible clamp. The center went in first.
The okoume plywood needs help bending. A wet towel and iron worked best. We heated and bent all the panels to the frame and clamped them overnight, then did another steam heat right before glueing.
Adding good ol’ PL300 to the frame.
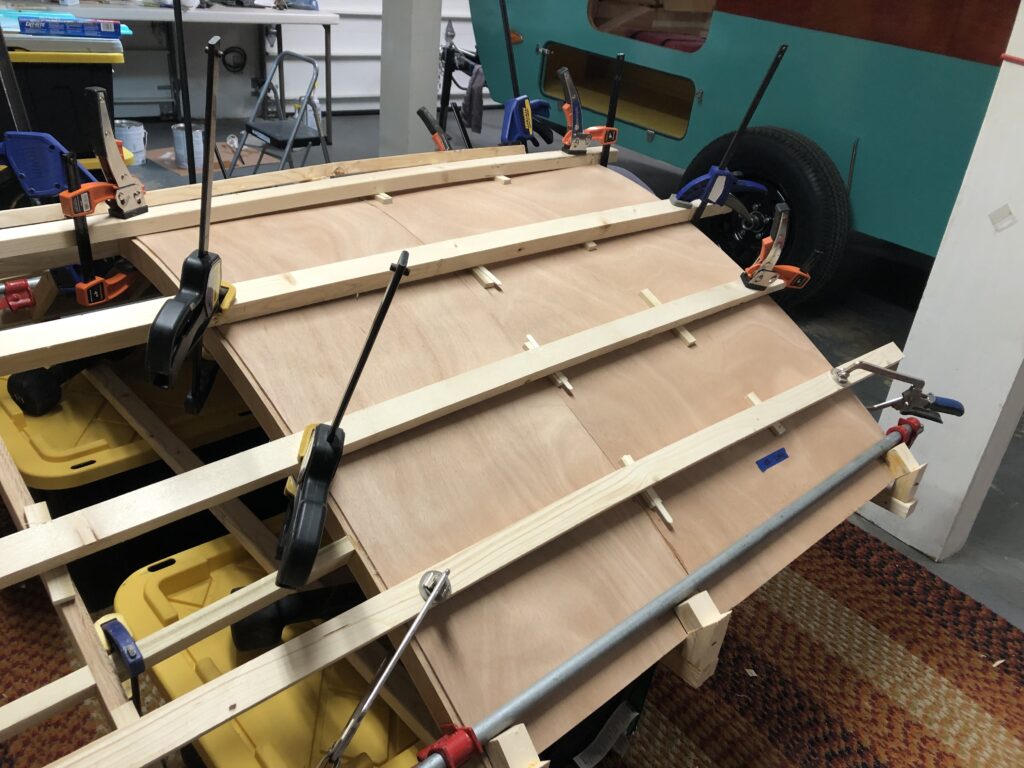
Second panel installed. Lots of wood bits and popsicle sticks helped to get even pressure on the frame.
Third panel installed.
Note the braces that grab the edges of the frame. This is to hold the curve and resist it moving out of shape from the pressure of the panels.
While the galley hatch door is getting painted, we’ll see some big progress with the remainder of the camper. Storage and entry doors will go on today, and the galley shelving should be mostly completed. Stay tuned for an update soon! In the meantime, I’ll leave you with this teaser of the storage hatch doors getting their insides painted…
Not many exciting pictures in this update, but some important steps have been made. There have been a great deal of fiddly bits that have been addressed, mostly around the galley hatch.
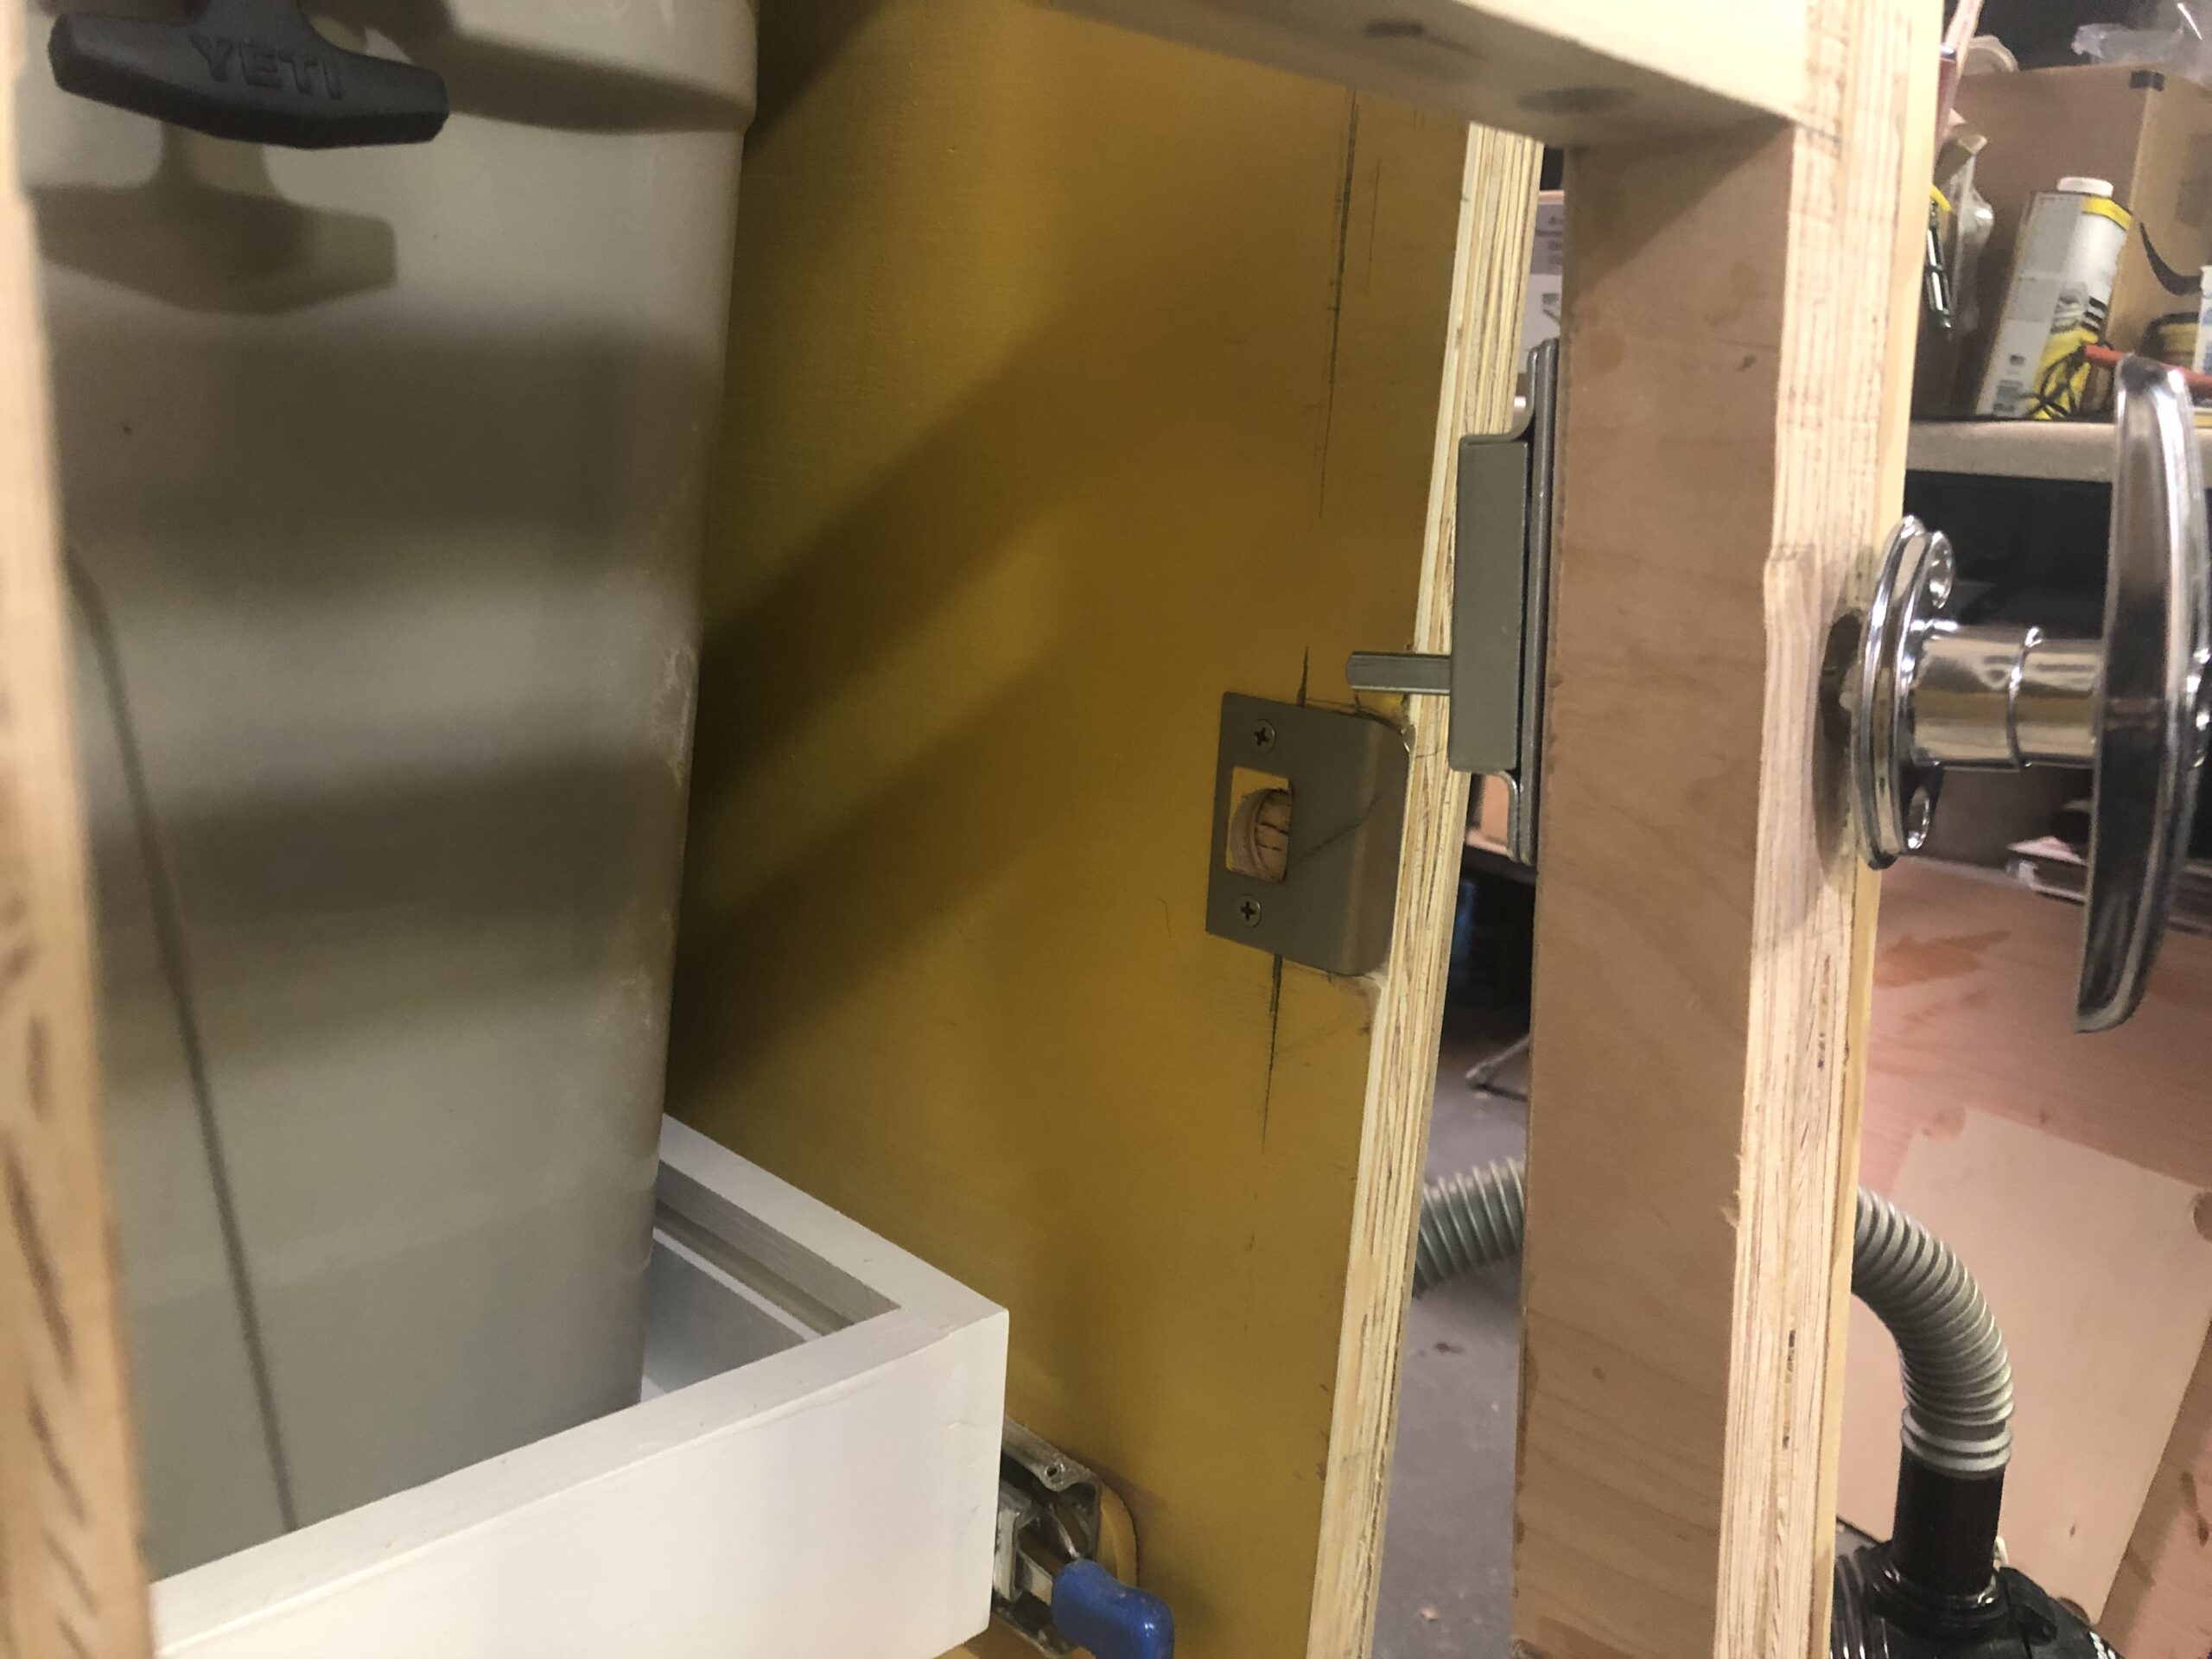
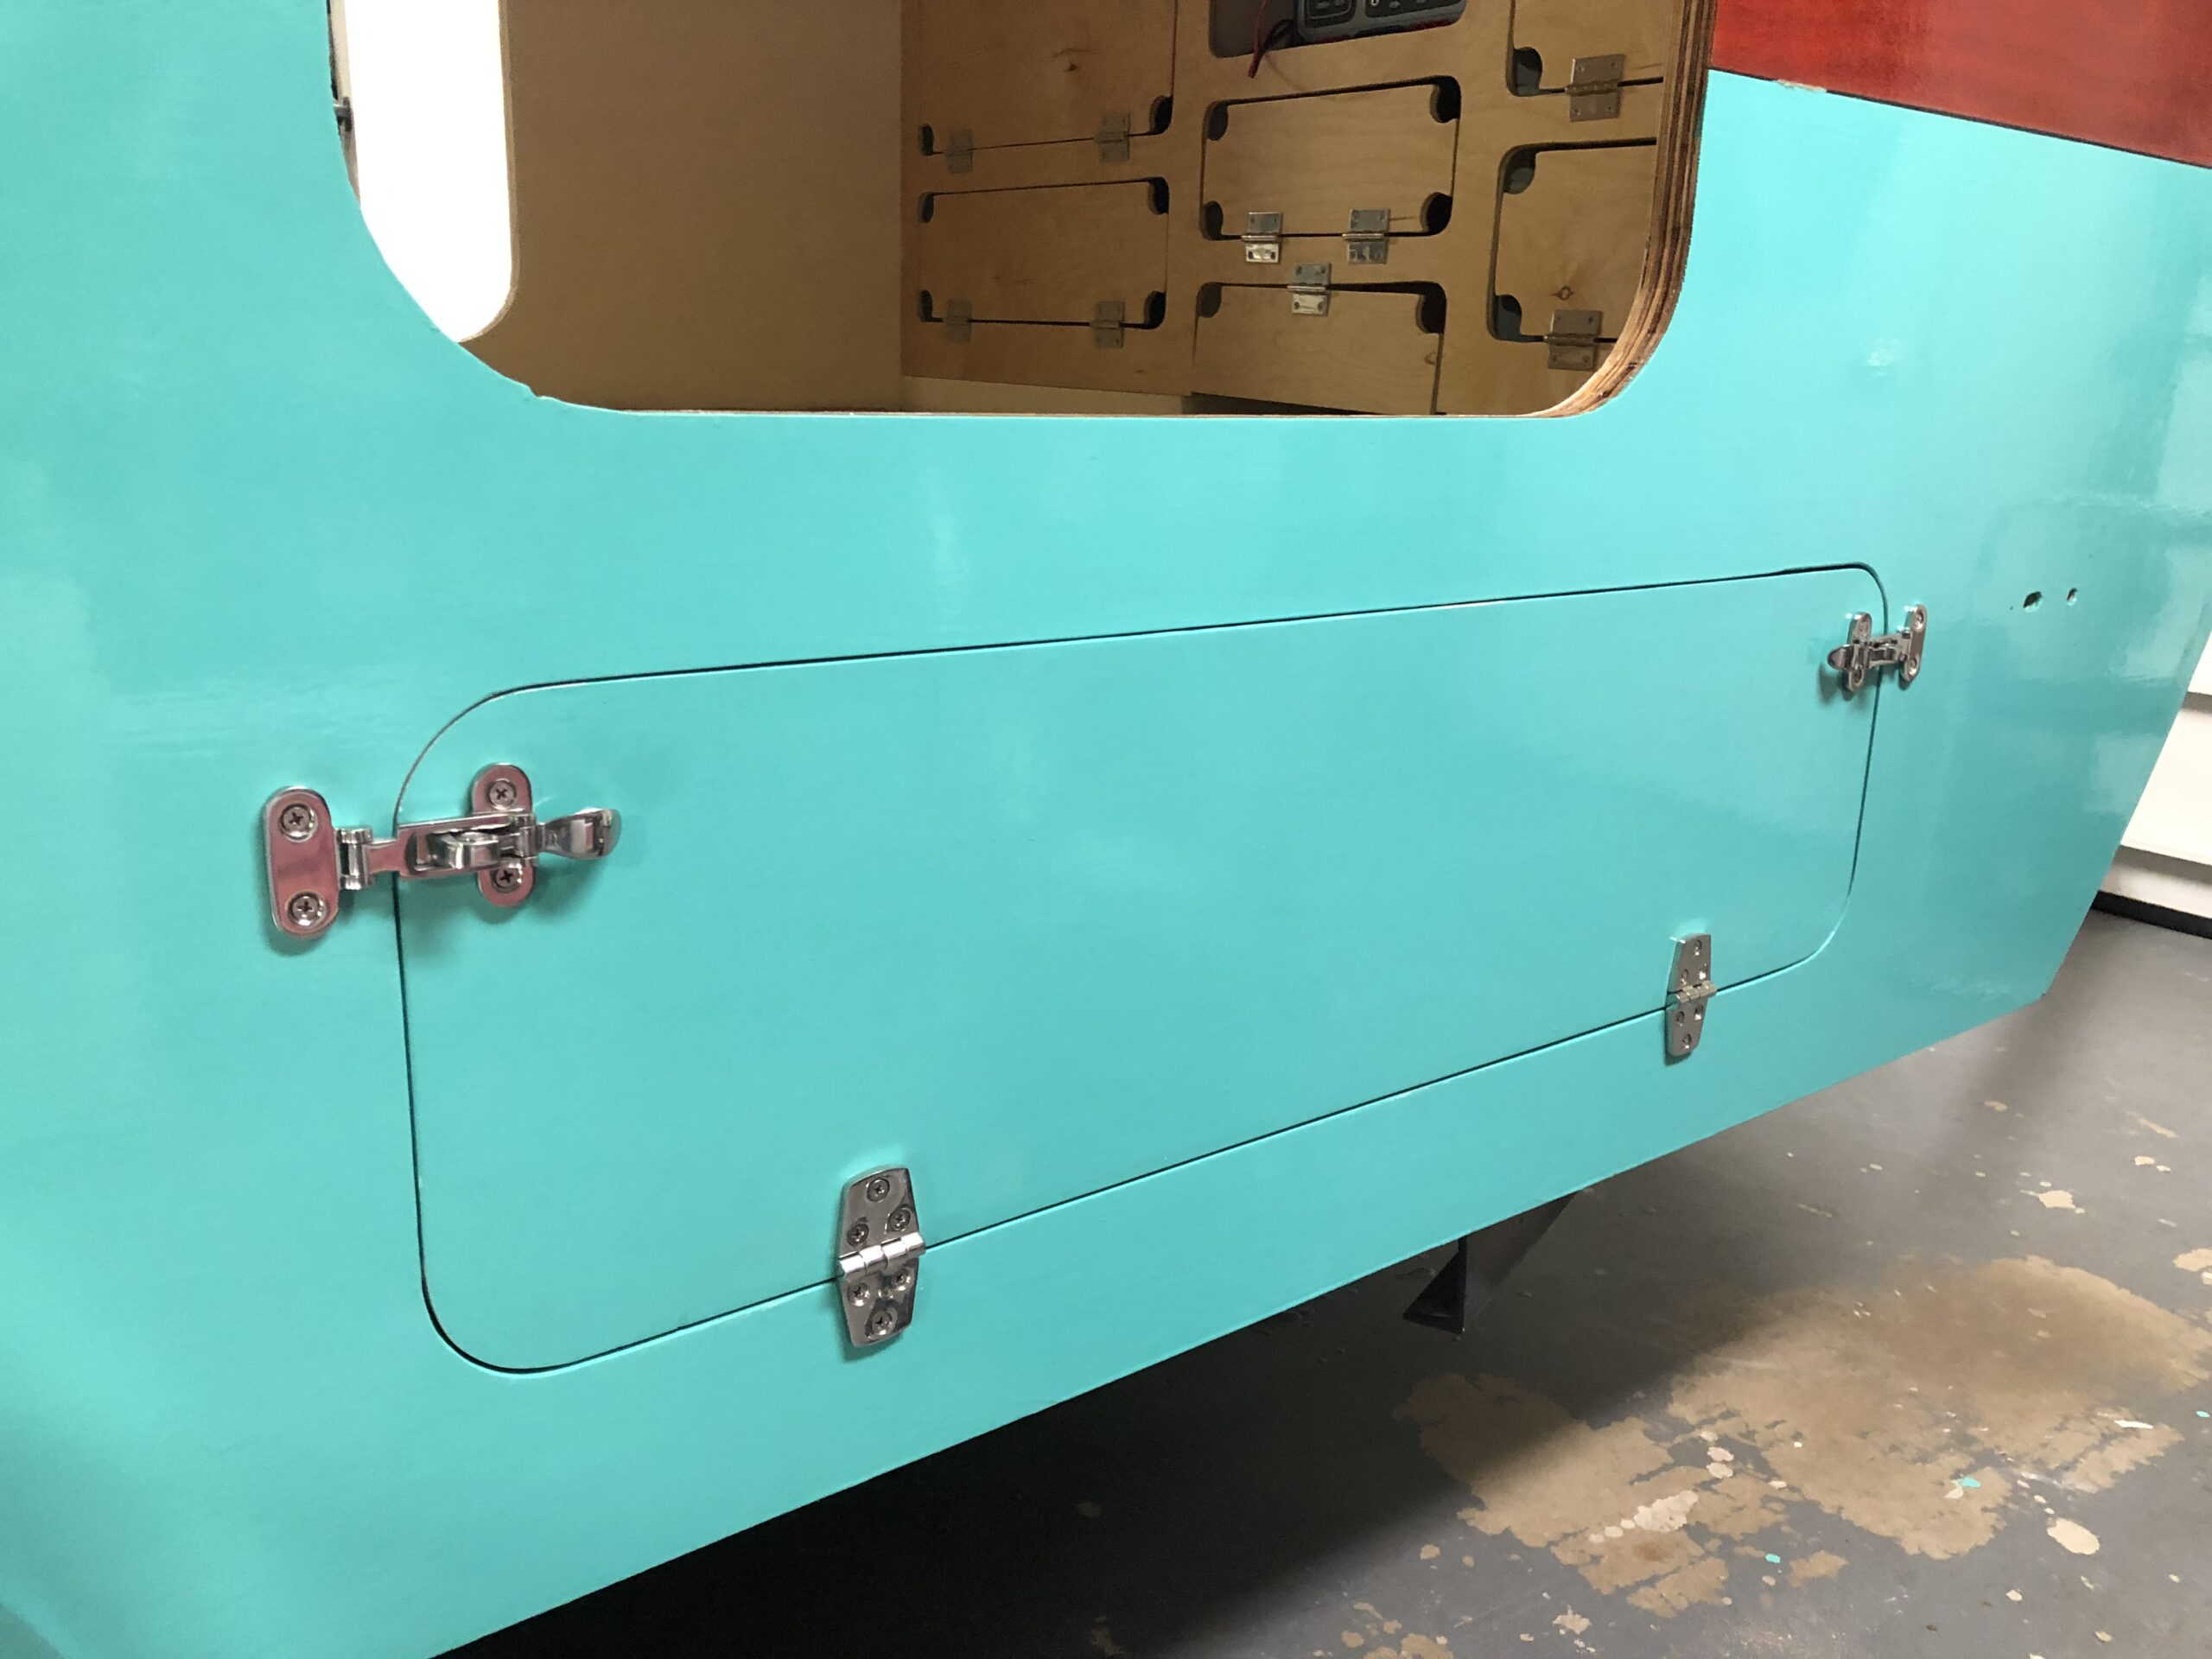
Two lockable latches have been installed on the galley hatch. Getting these bad boys to align took both adding and removing wood to get right.
The hatch now closes with a satisfying click.
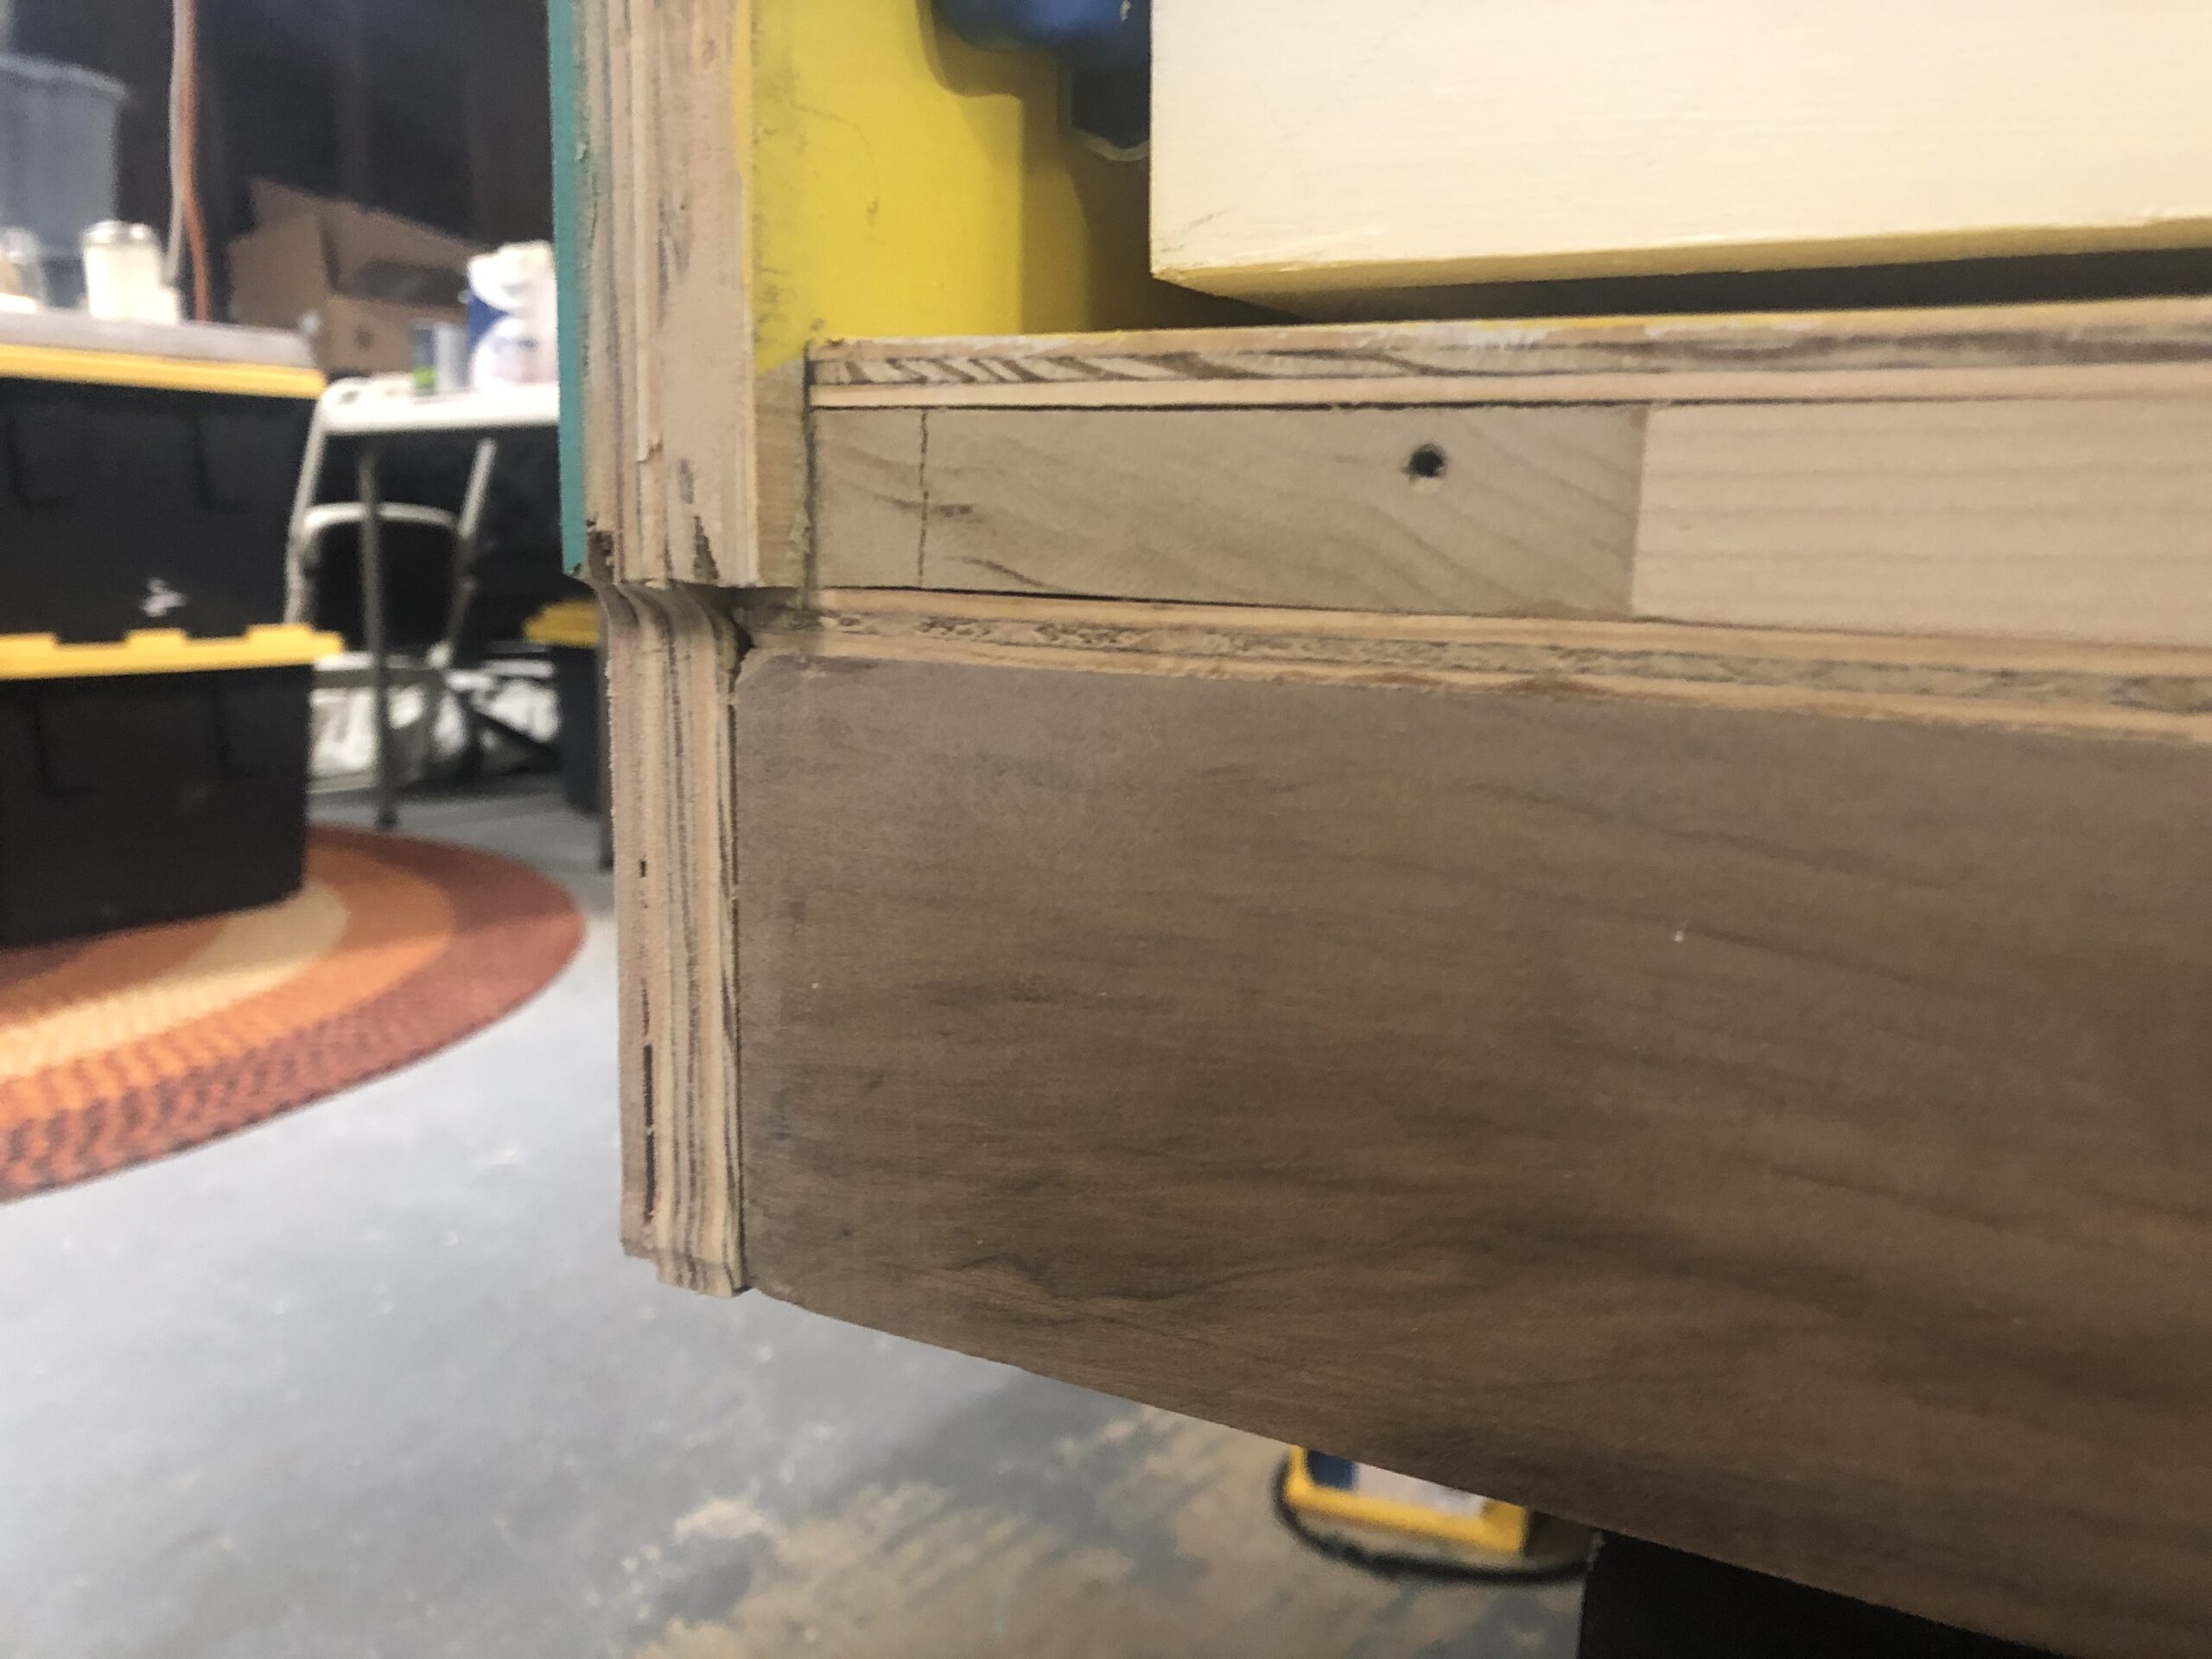
In a deviation from the original design, I took this bit of edge off the rear. Hopefully this will help in making the tight seal we will need.
Here it is cleaned up. It is emotionally draining to take a fierce router to the side of your beautiful camper, even if it is to take off a 1/4 inch of wood.
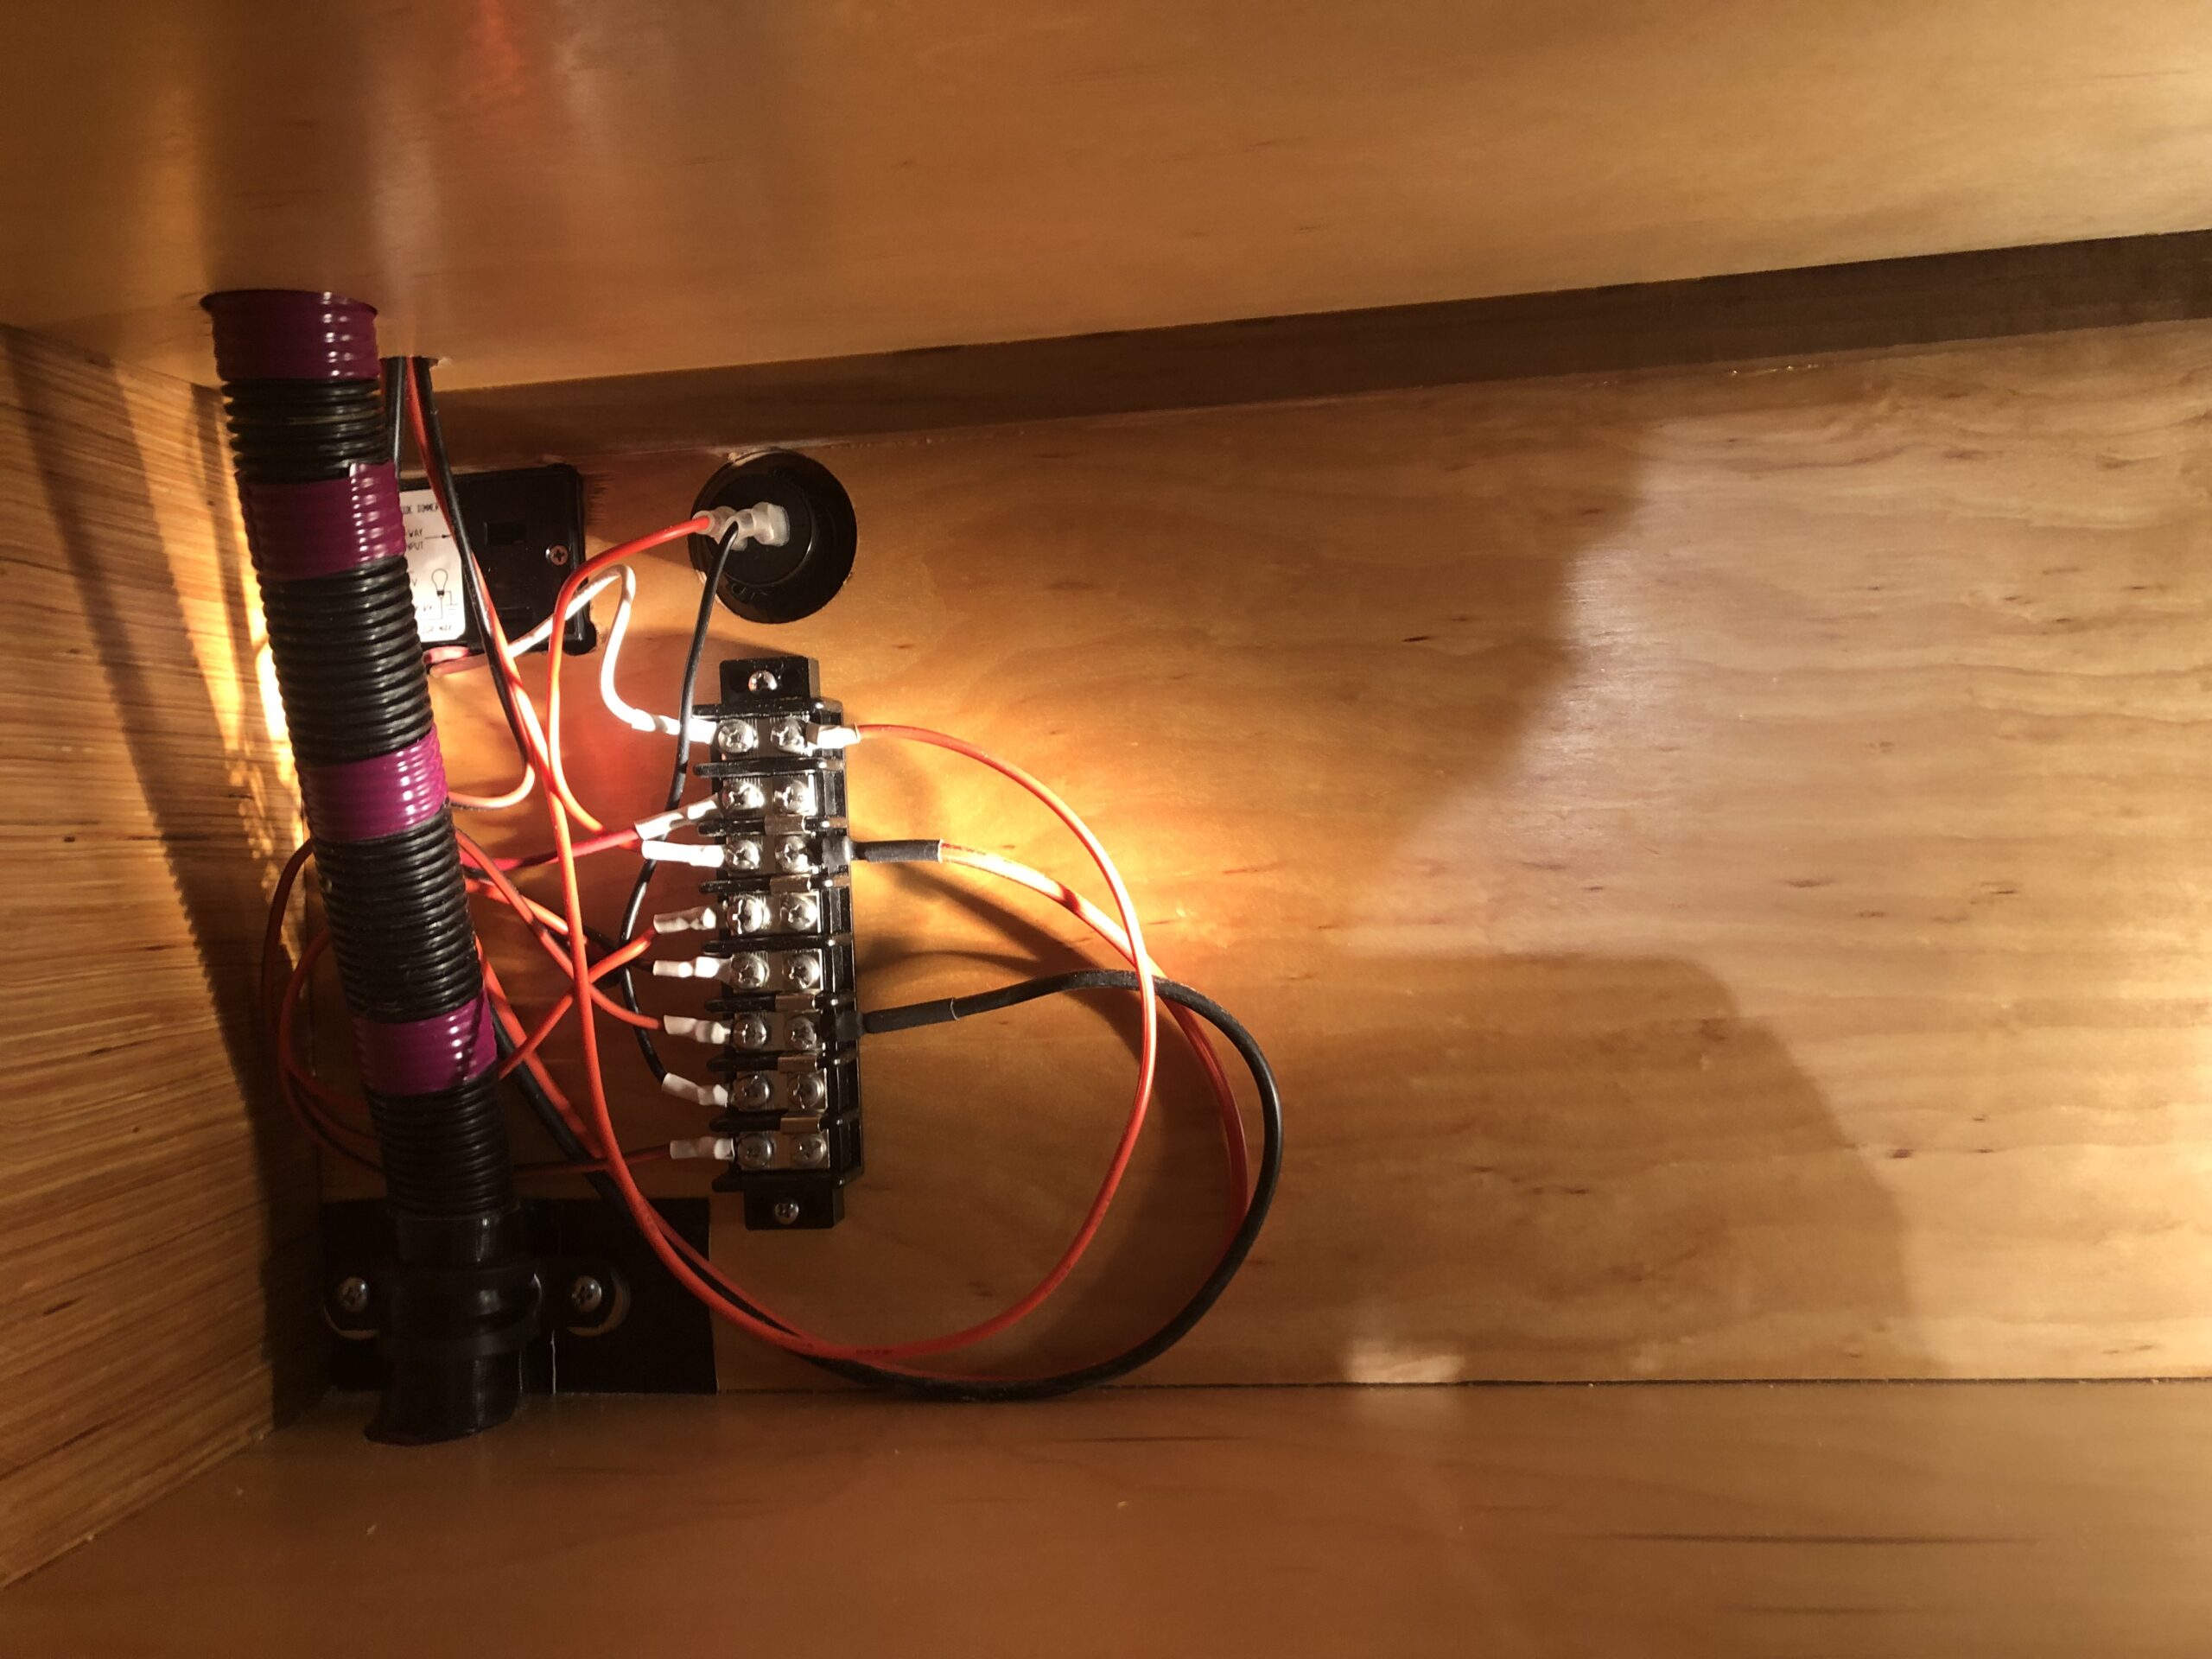
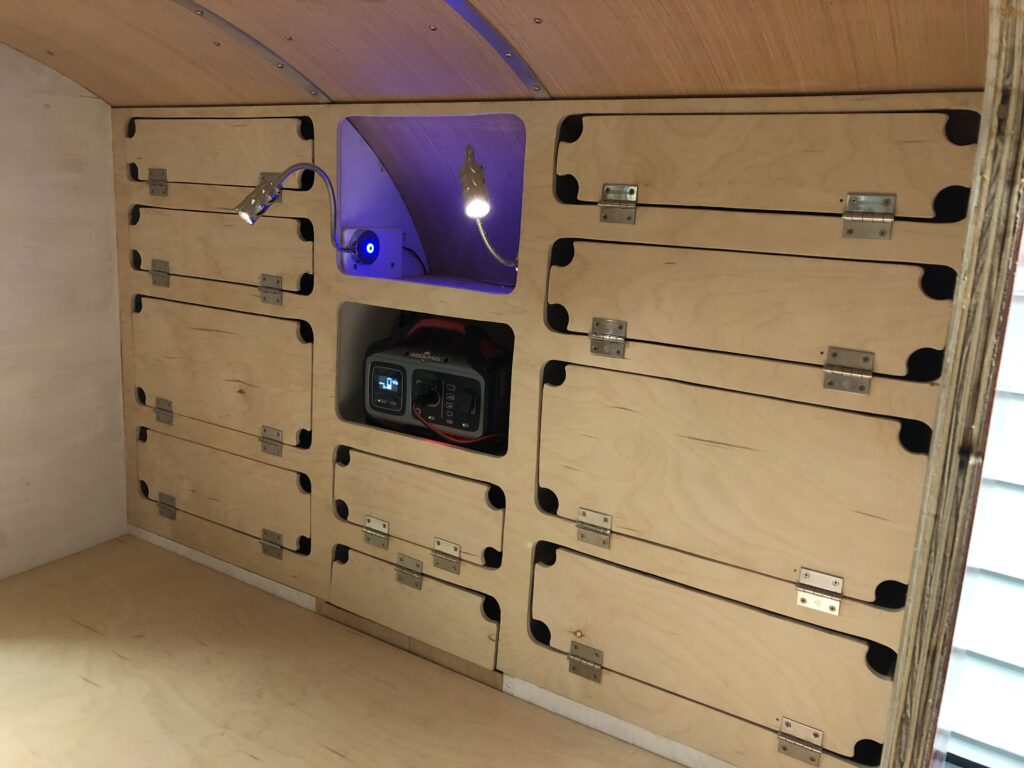
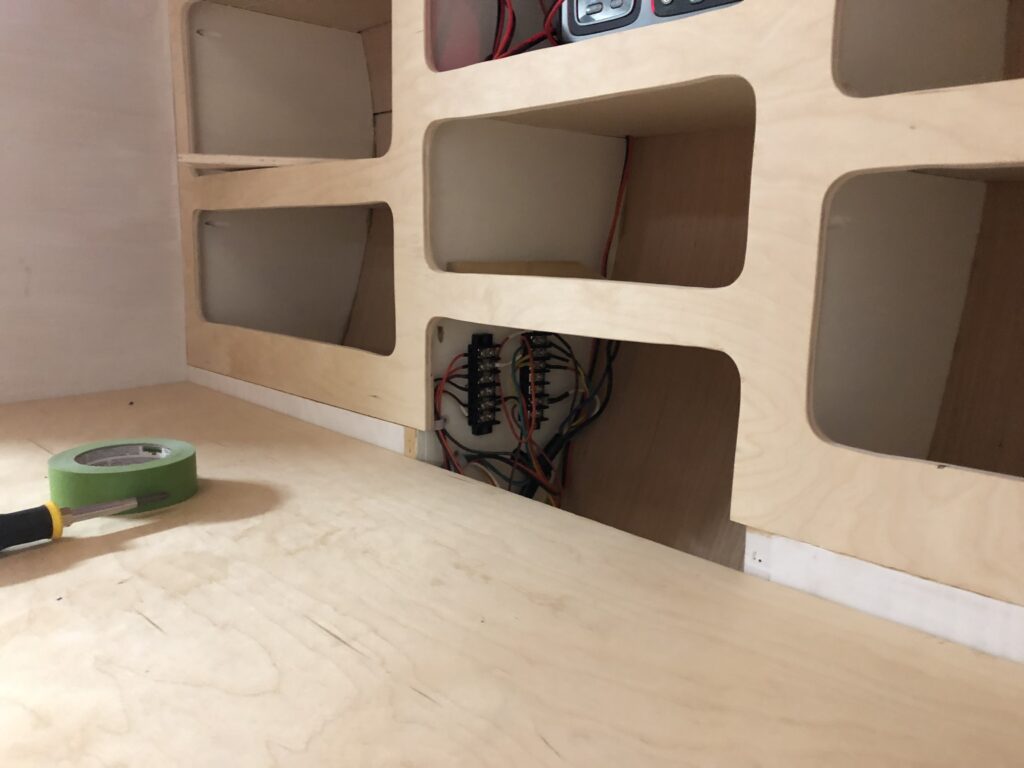
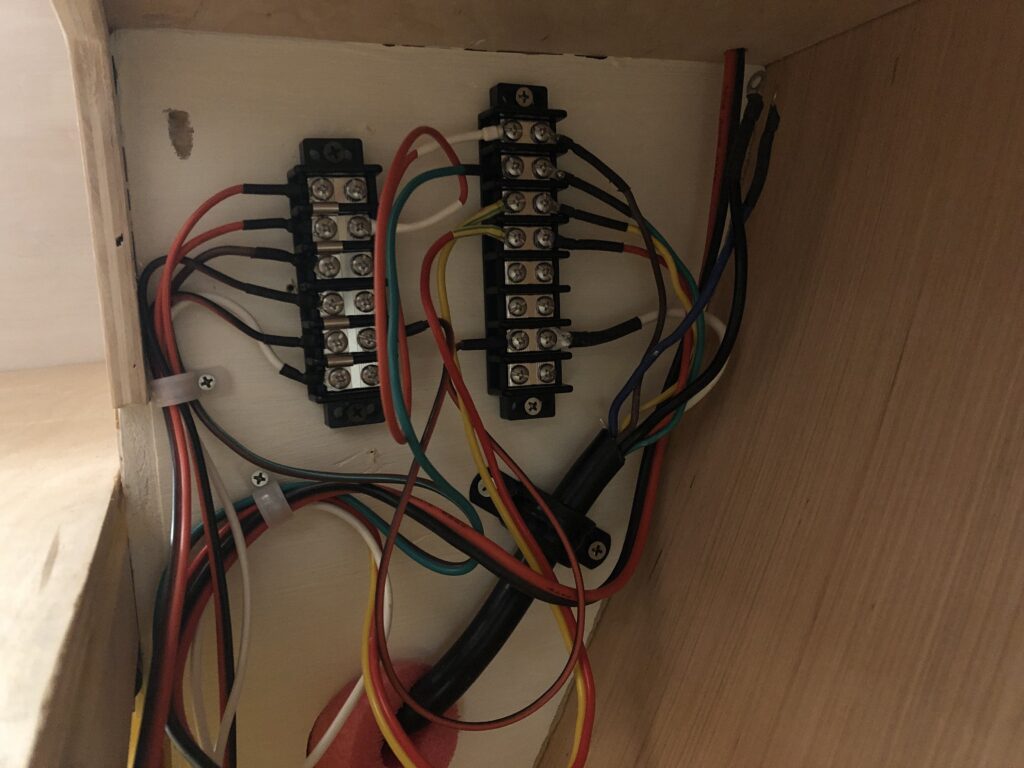
Here’s a shot of the electrical work in the rear of the cabin, inside a cabinet. This is powering a USB hub as well as a dimmer switch for the galley lights.
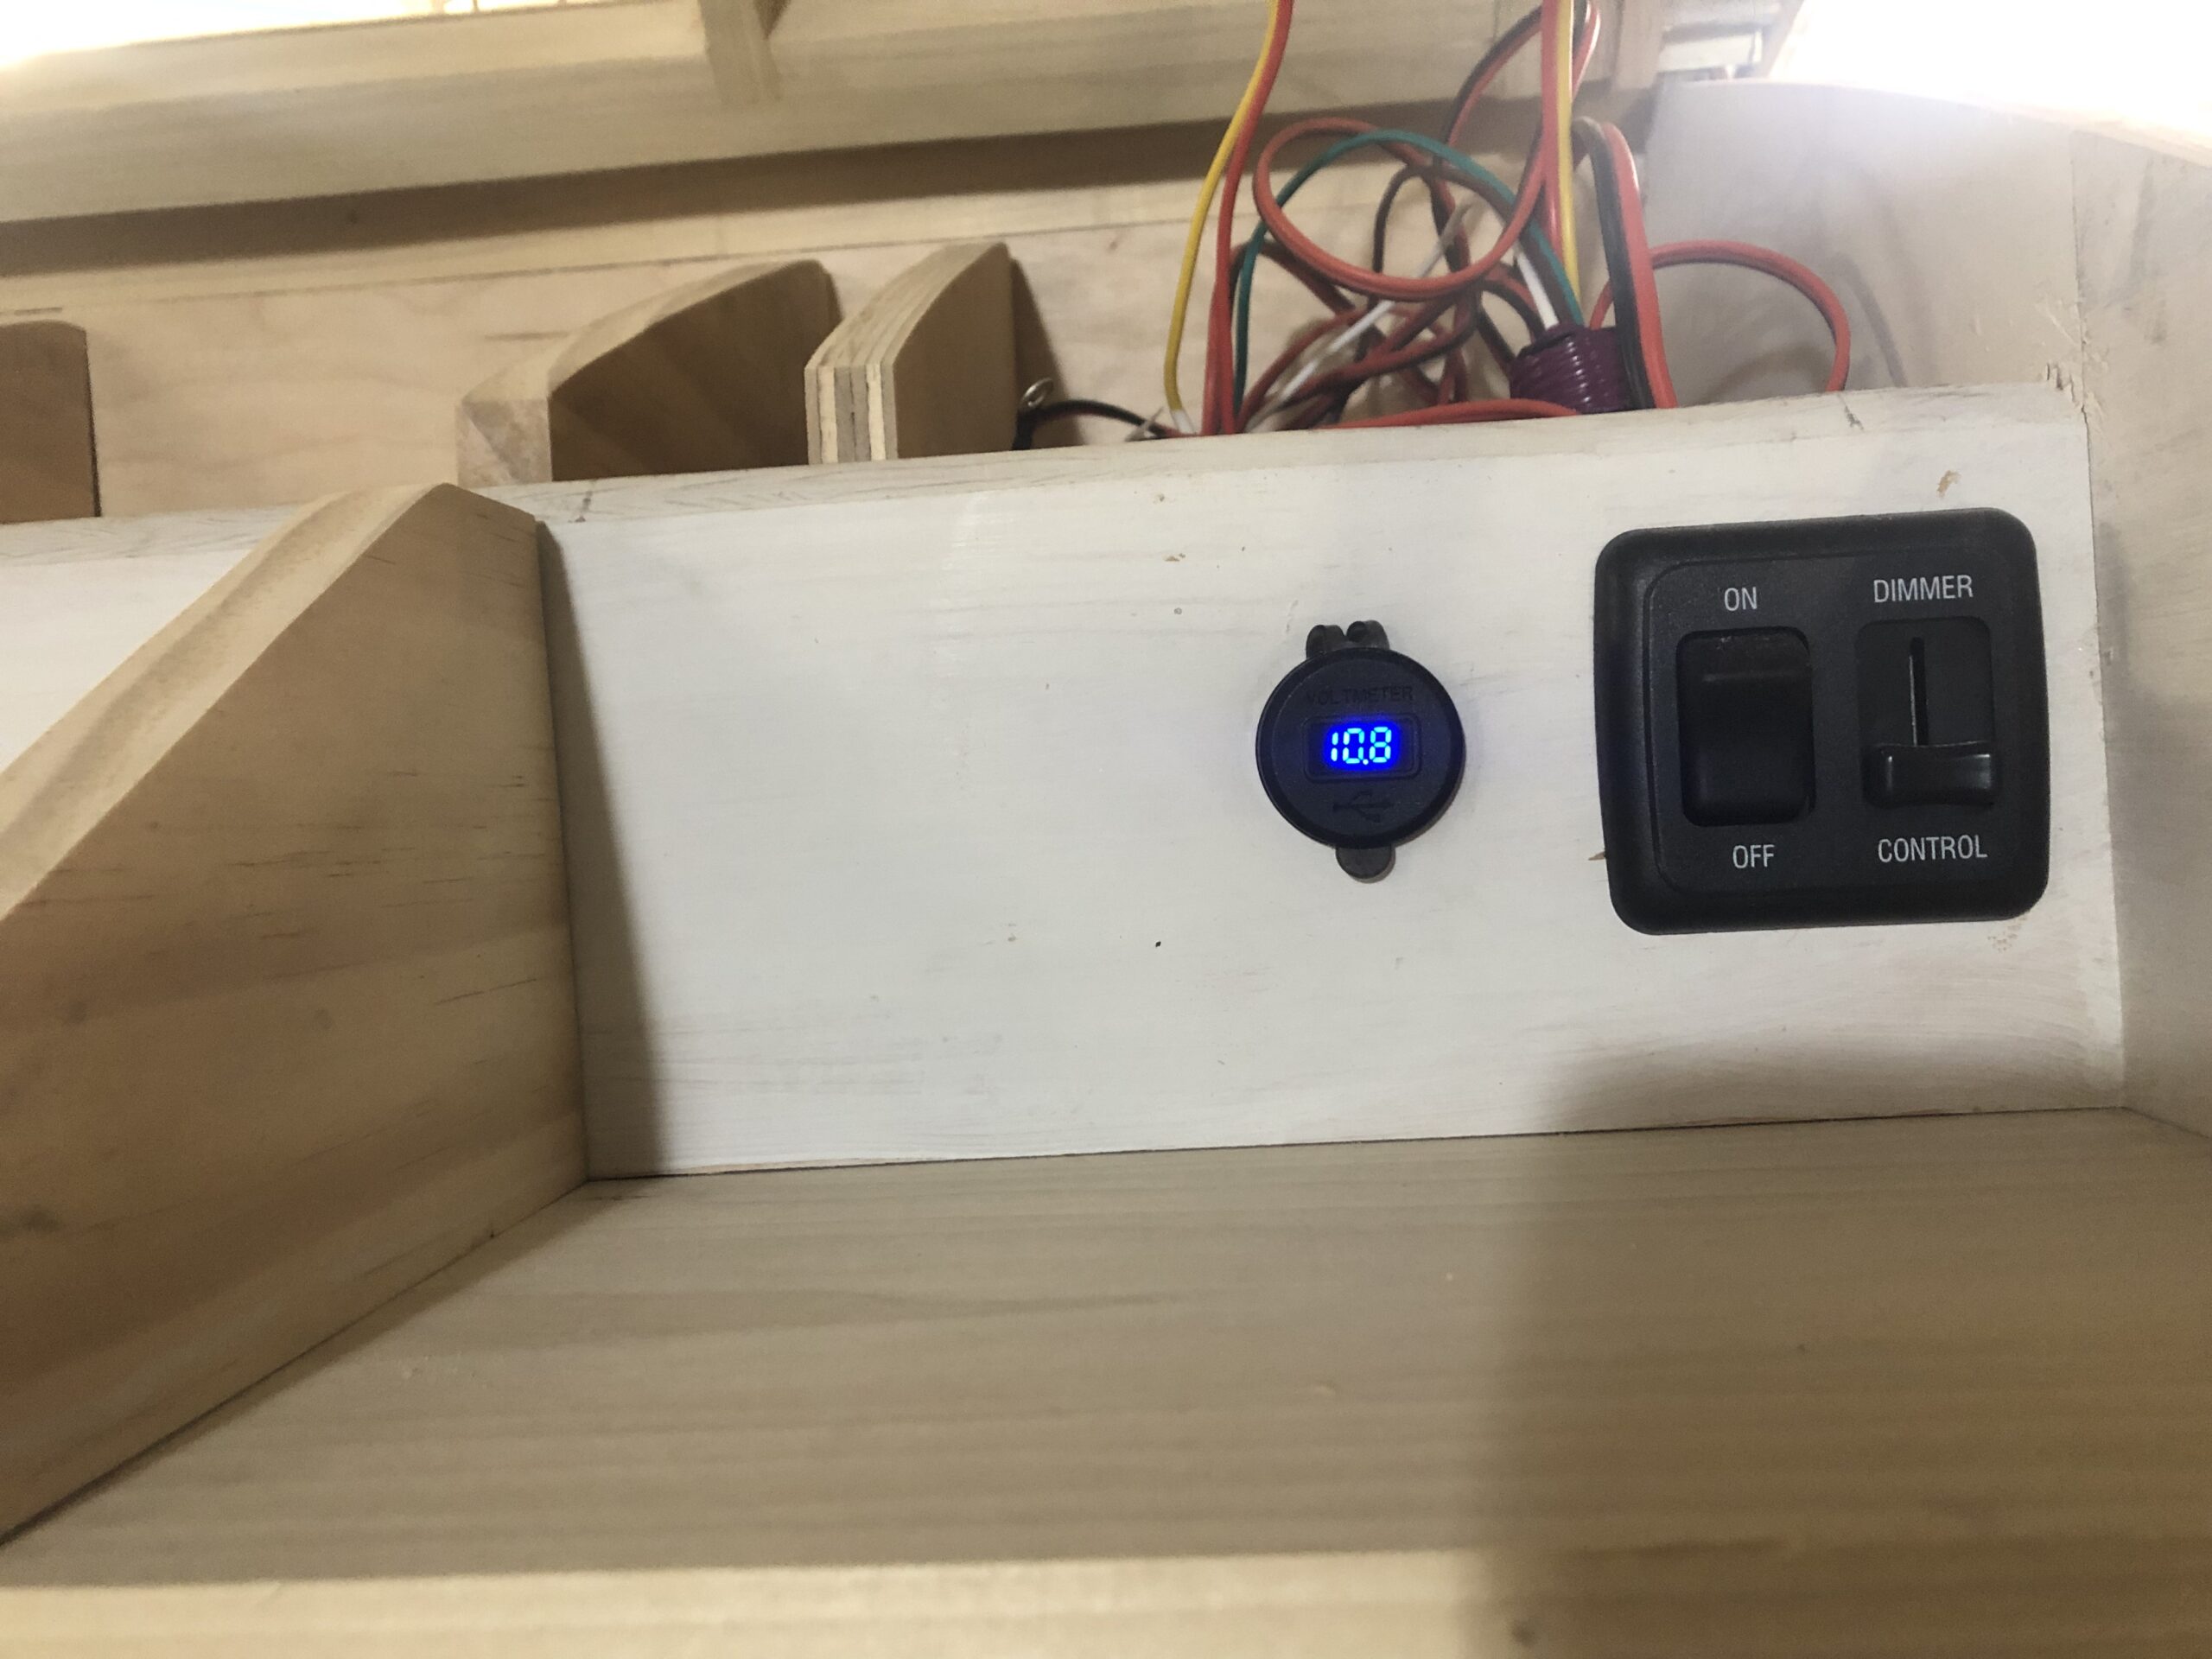
The USB and galley light switch from the outside. That tangle of wires above will be the final bit of electrical work.
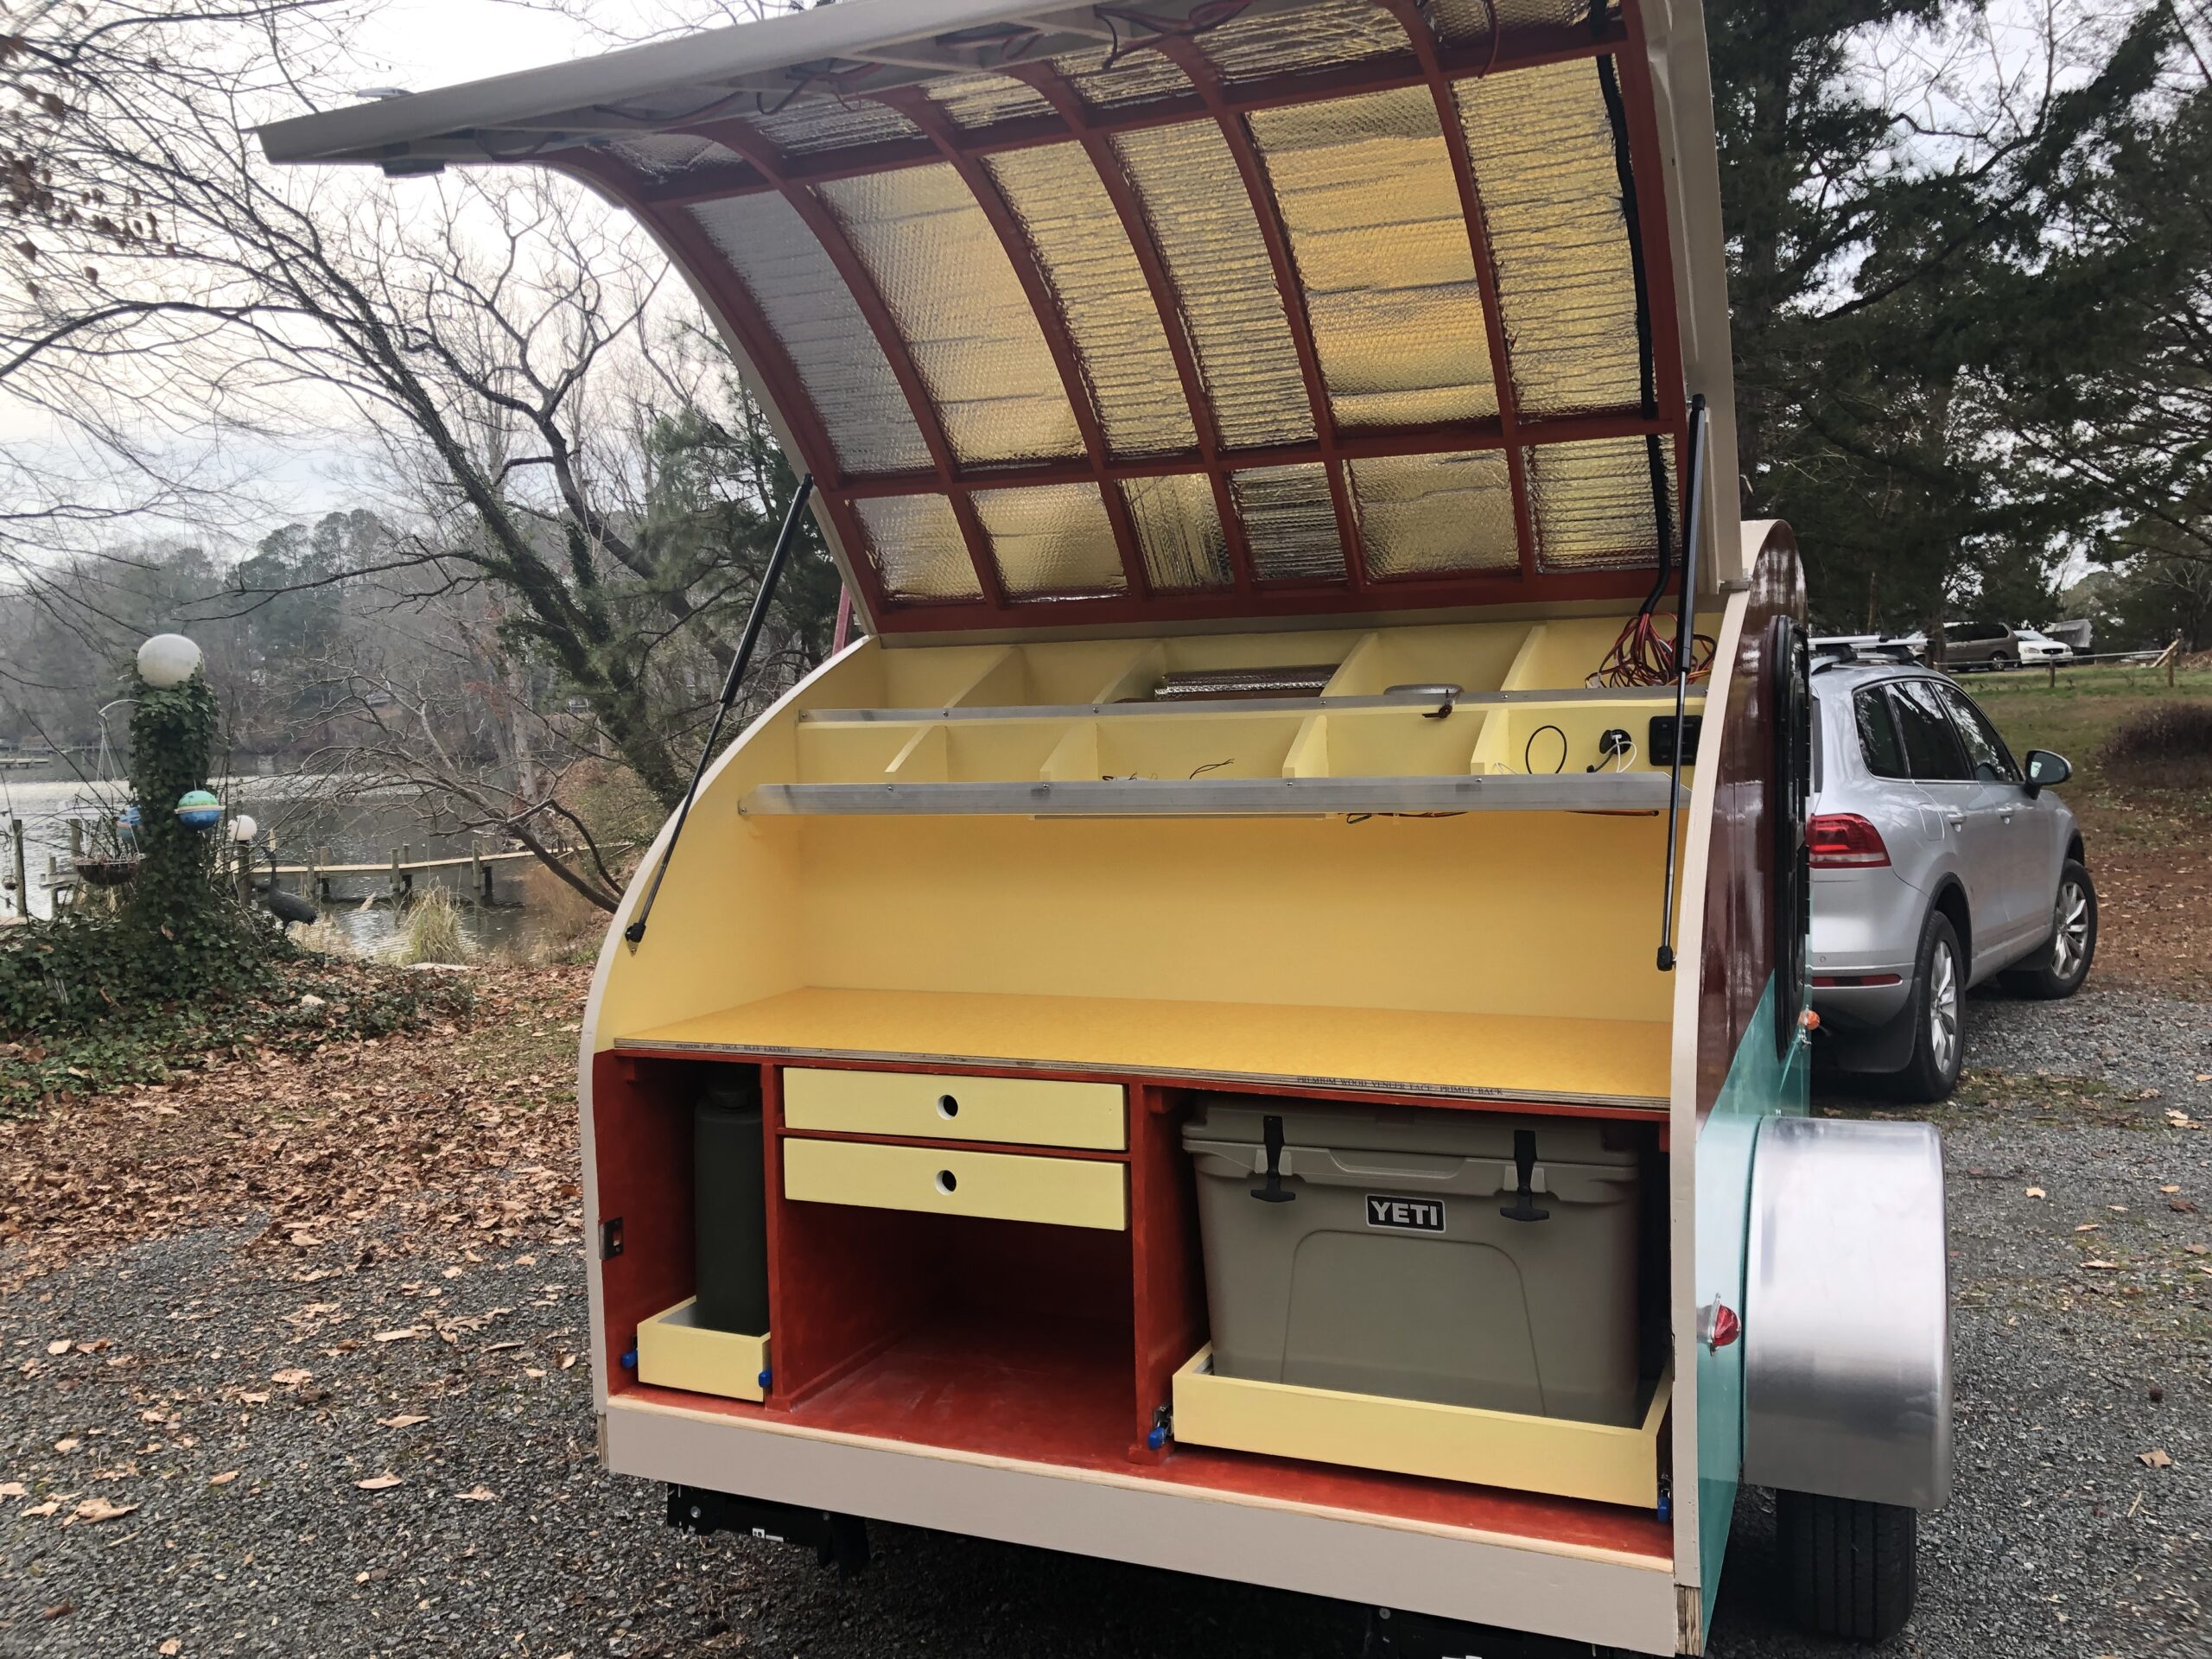
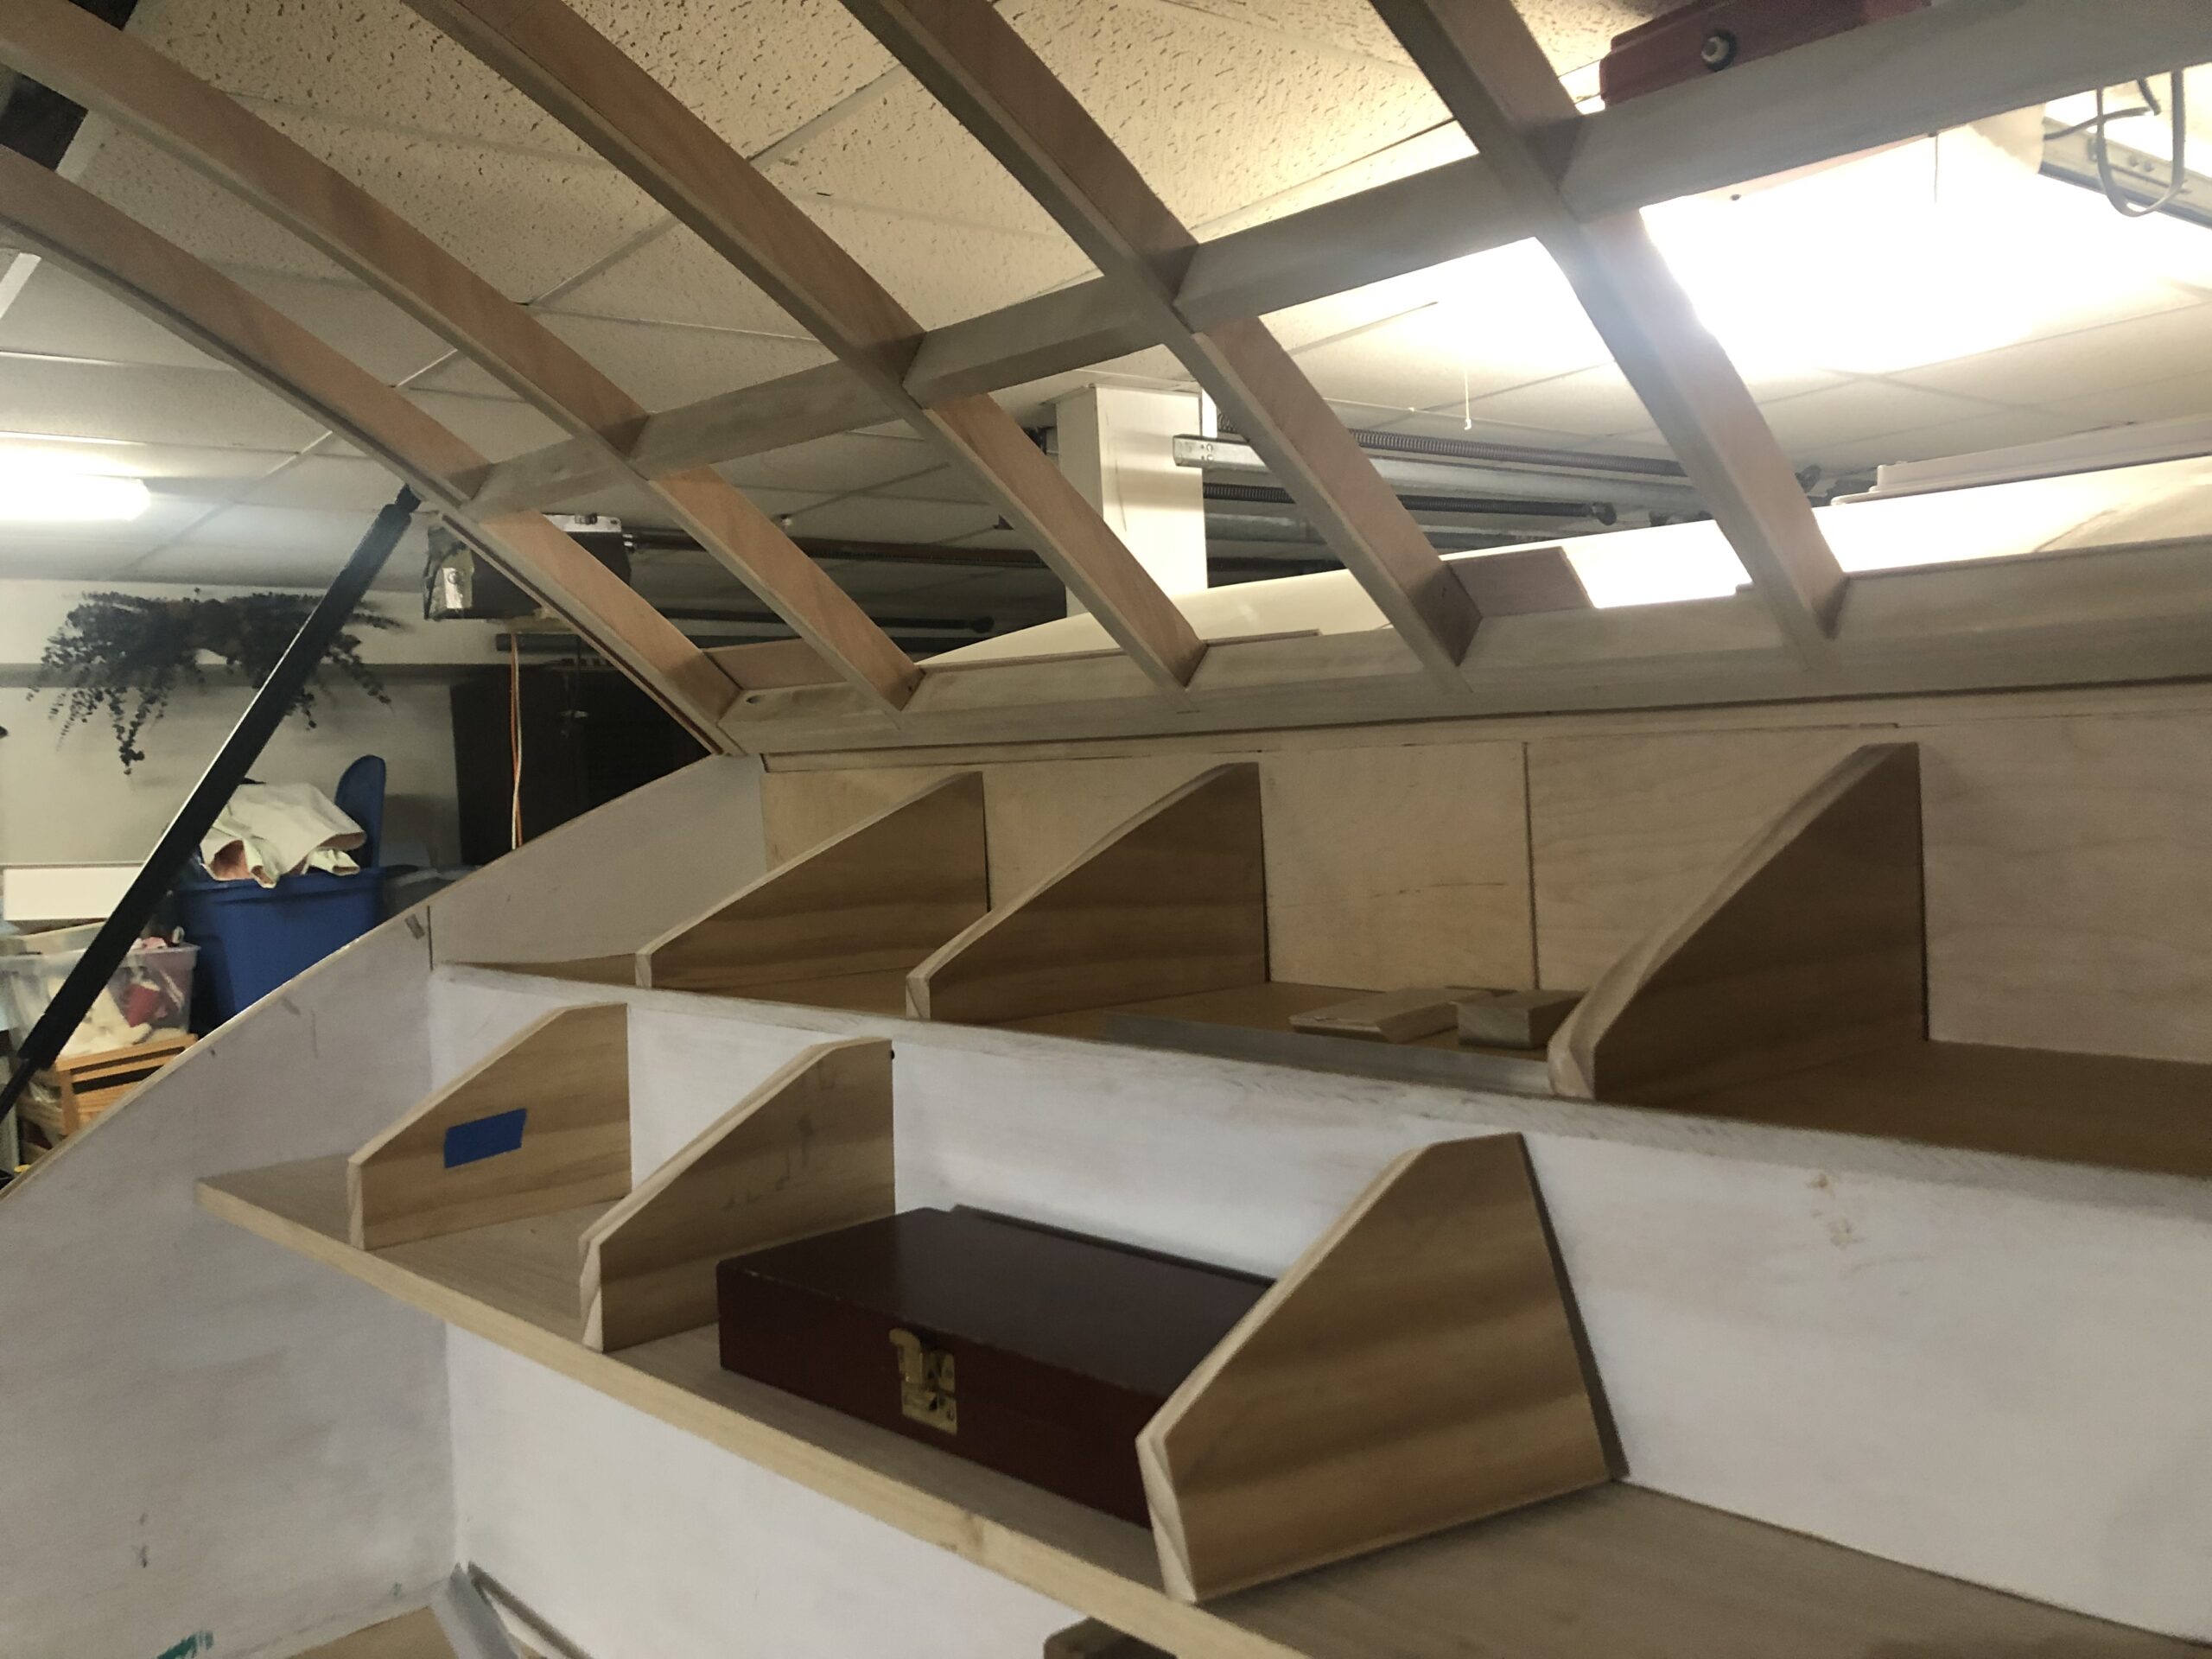
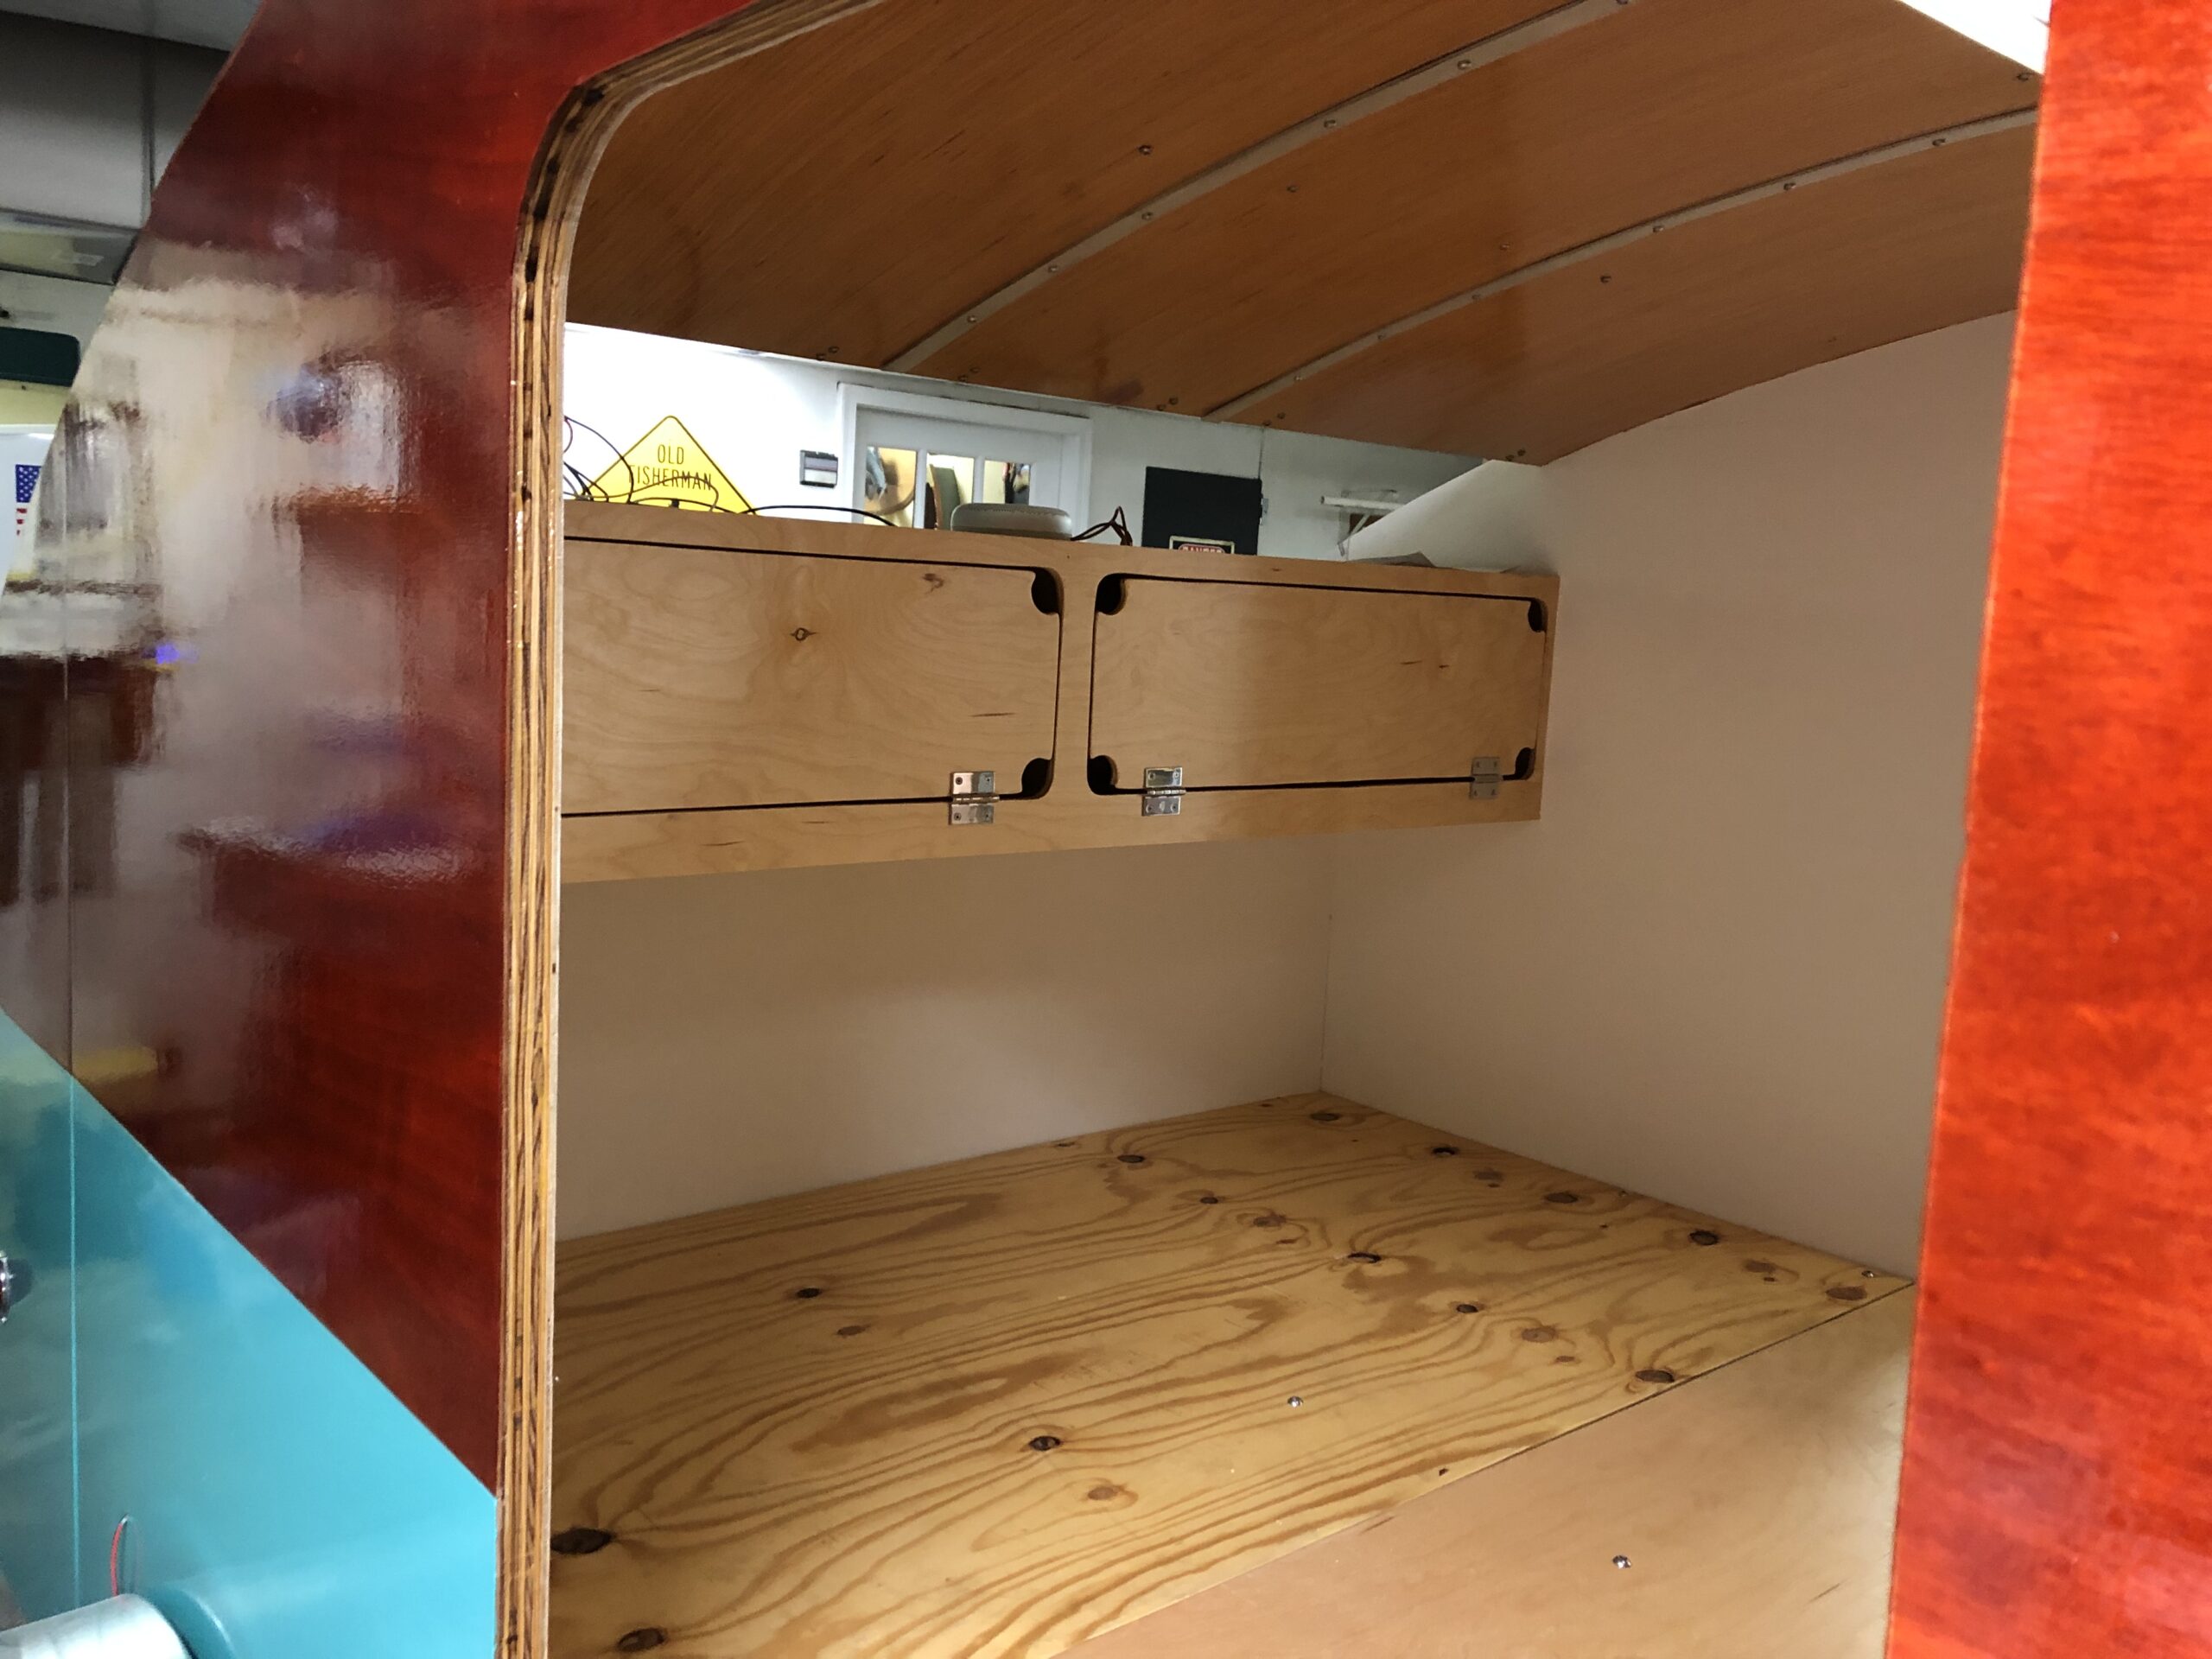
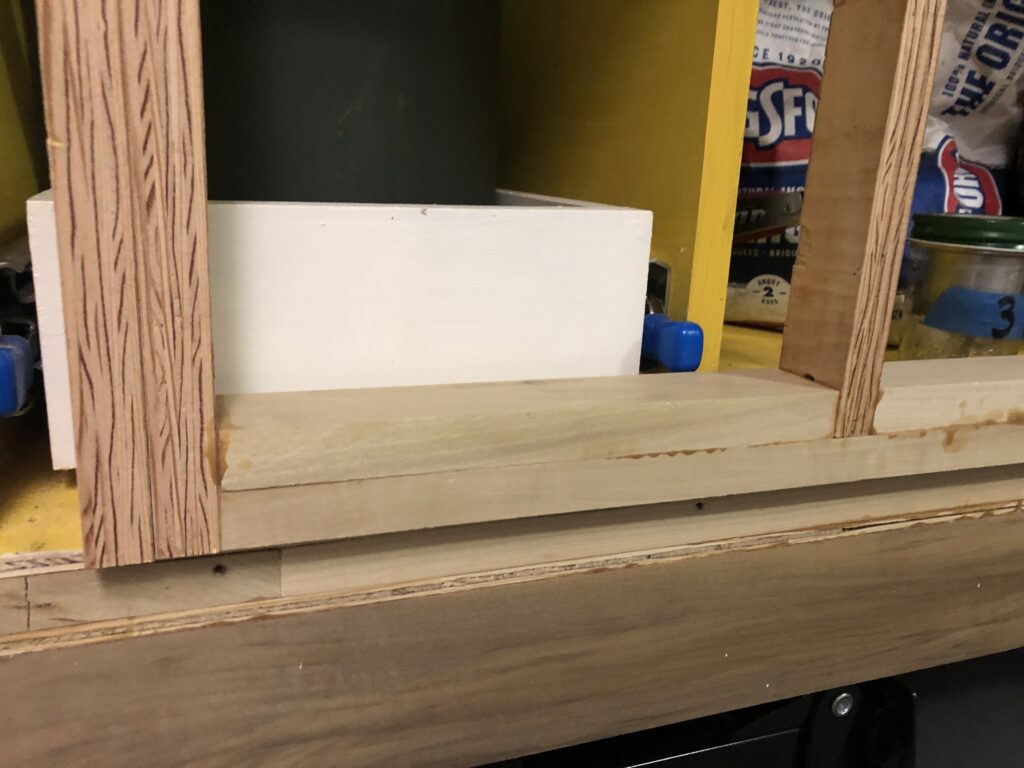
Here’s a sneak preview of some of the galley shelving. Those dividers align with the ribs of the hatch, so when it is closed, items in the shelves won’t be able to fly all over the place.
Next big step is to put the outside skin on the hatch, and finish up cabinet work in the galley. Expect to see some big changes in the next post!
All failed attempts at building galley hatches must be burned on a day of a full moon.
The second attempt at the galley hatch is going slowly but surely. I no longer needed the old hatch as a reference, so its last act of service was to provide some warmth and entertainment.
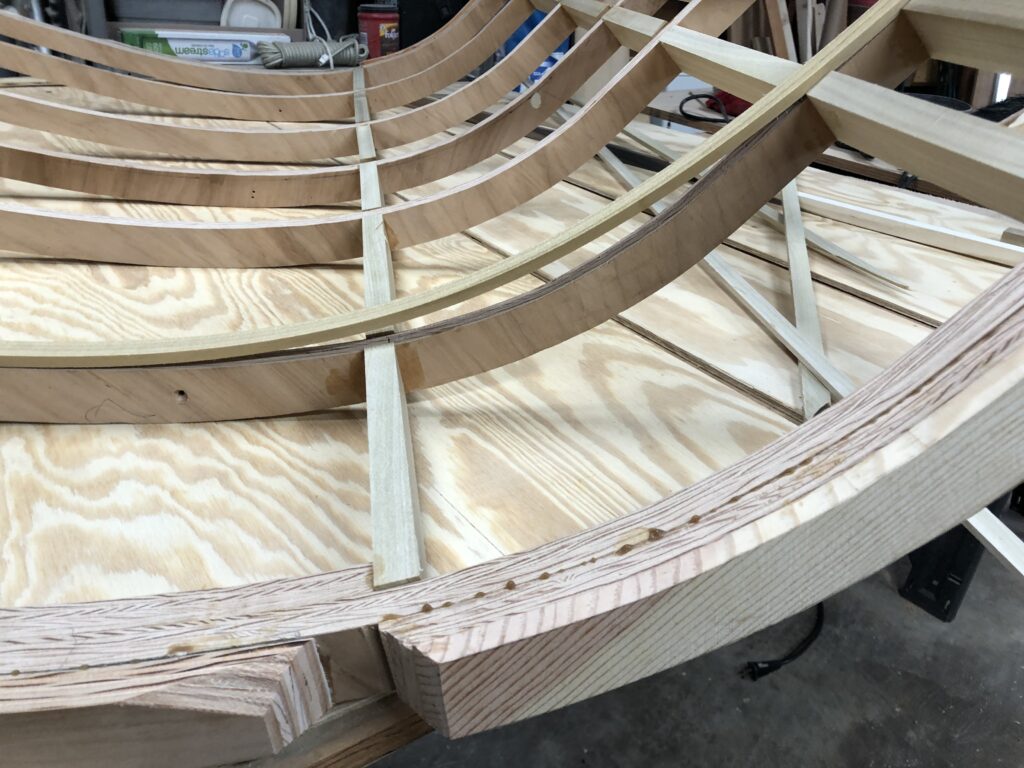
The main failure of the first galley hatch attempt was that the pressure from the interior skin changed the curvature of the ribs, so they no longer would make a watertight seal with the sides of the camper. To mitigate that this time, I’m trying a few things. In the old design, there was an interior and exterior skin on the hatch (much like how the rest of the roof structure is built). This time, I’m planning on leaving the interior exposed. This will make wiring (and one day, re-wiring) that much easier. It should also reduce weight. And it will reduce the forces trying to make my ribs go out of spec by 50%. I also added a few more ribs and reinforcement to the new hatch to really reinforce that curve.
No skin in the interior means that I want to make those exposed ribs on the inside look nice. So the big steps over the past week have been to apply a facing to the ribs from thin strips of poplar. This will cover the exposed plywood of the ribs, and my hope is that once glued in place will actually add another ply to help hold the rib shape.
I focused on making sure the exterior side of the hatch was as even and consistent as possible.
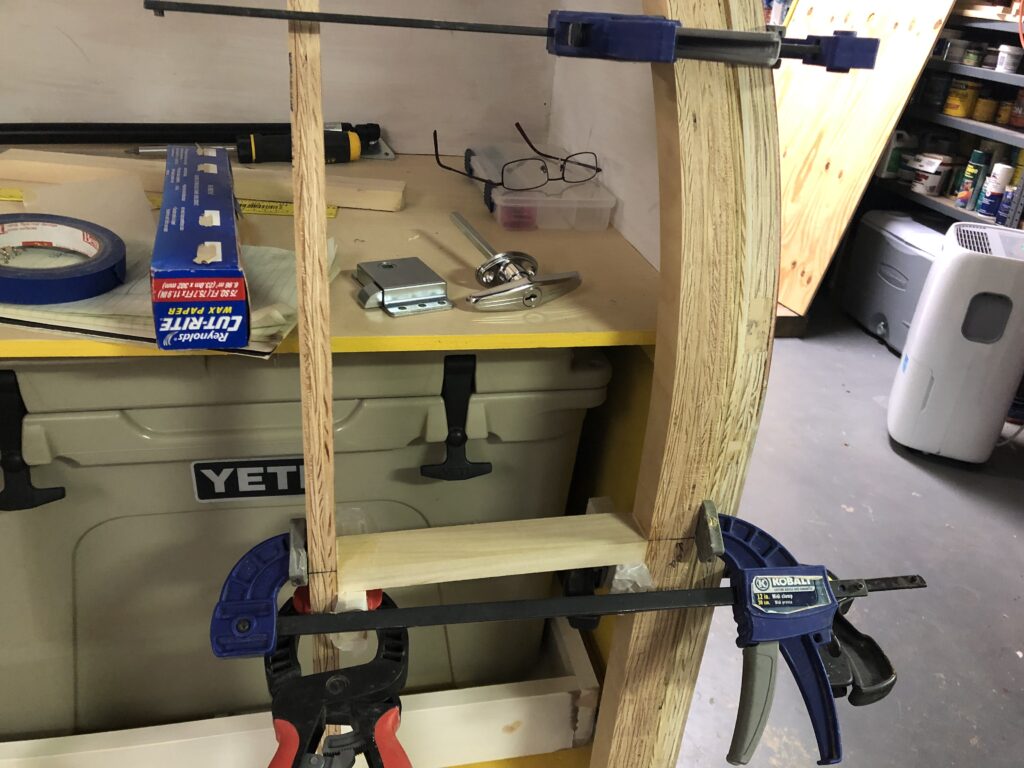
The interior side, however, needed some wood added. Note the gaps where the ribs meet the perpendicular supports. Here you see one of the new rib facings being fitted.
I made temporary braces to keep the curve of the hatch from changing due to the forces of the rib braces.
Here’s another view of the braces.
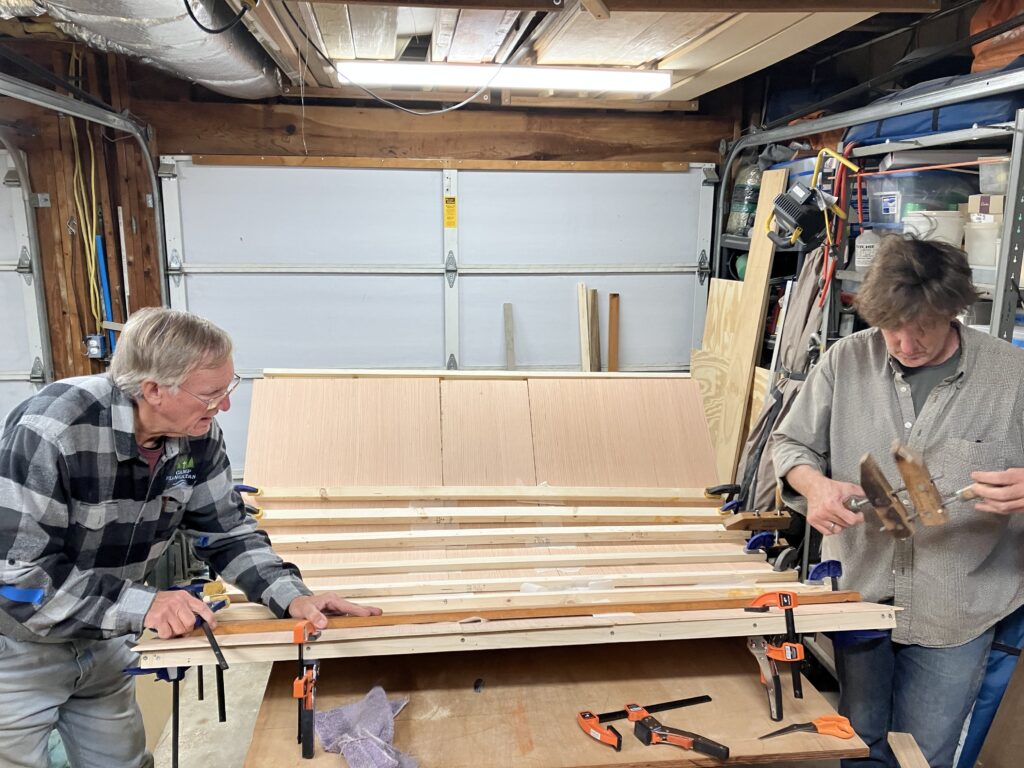
I soaked the rib facings in hot water for a few hours.
I then clamped the wet facings onto the ribs and let them sit overnight.
It worked! The next day the facings were mostly the same shape as the ribs, so there will be little pressure pout on the shap of the hatch.
I glued the facings one at a time to make sure everything stayed in alignment.
Here’s a closeup with the facings in place. They will need to be sanded to finish.
Meanwhile, work continued on the main body of the camper. The big achievement during this spate of work was getting everything finished in the “basement” – thats the storage area under the bed platform. The storage hatches are lined with a rubber gasket (sorry, I didn’t take a picture of that for this series). The hatch doors seem to fit well, though I guess we will get our real test once we hit the road. I also used butyl tape on the through holes for the lights, and coated the screws that hold the lights with 3M 5200 marine sealant. I’ll use this for all instances where screws enter the wood from the outside. Hopefully that will keep water and rot out.
I still need to paint the inside of the storage hatch doors and do some finish work on the outside, so you’ll be treat with more pictures of that work in a later post.
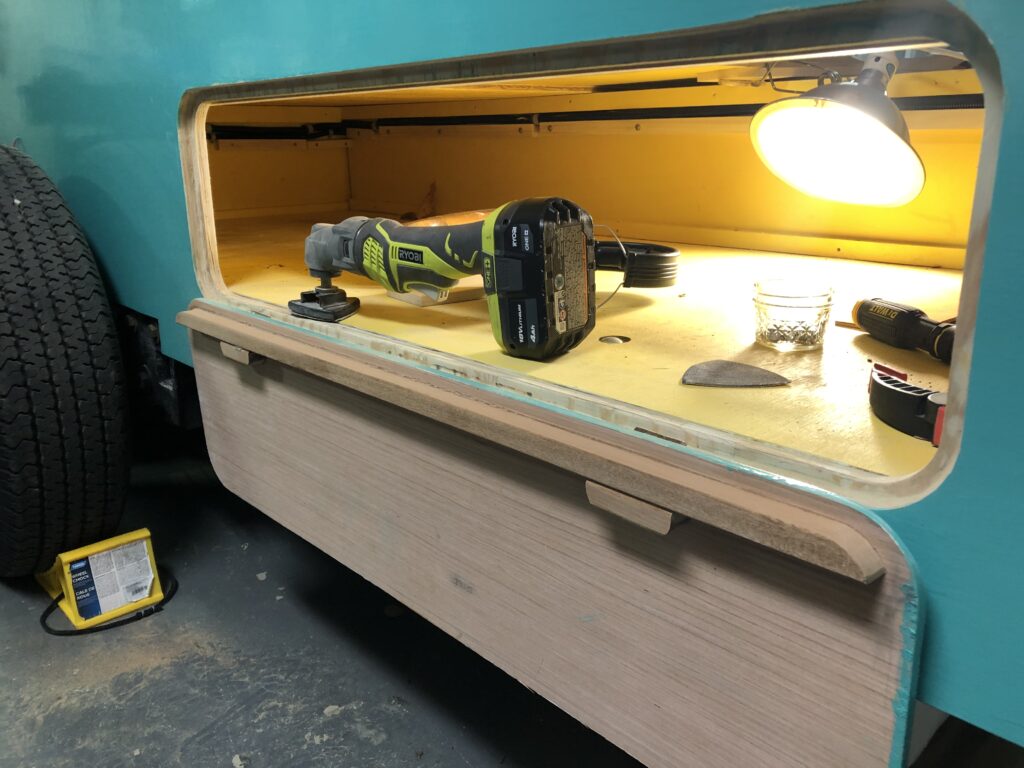
Here’s one of the storage hatches with all the equipment installed. Those latches are super cool, but the latch and clasp have a very low tolerance for variance.
I added another 3/4″ strip of poplar around the edges of the interior. This is provides the base for the bed platform. It gave me an opportunity to use and old school approach to getting the top surface nice and even.
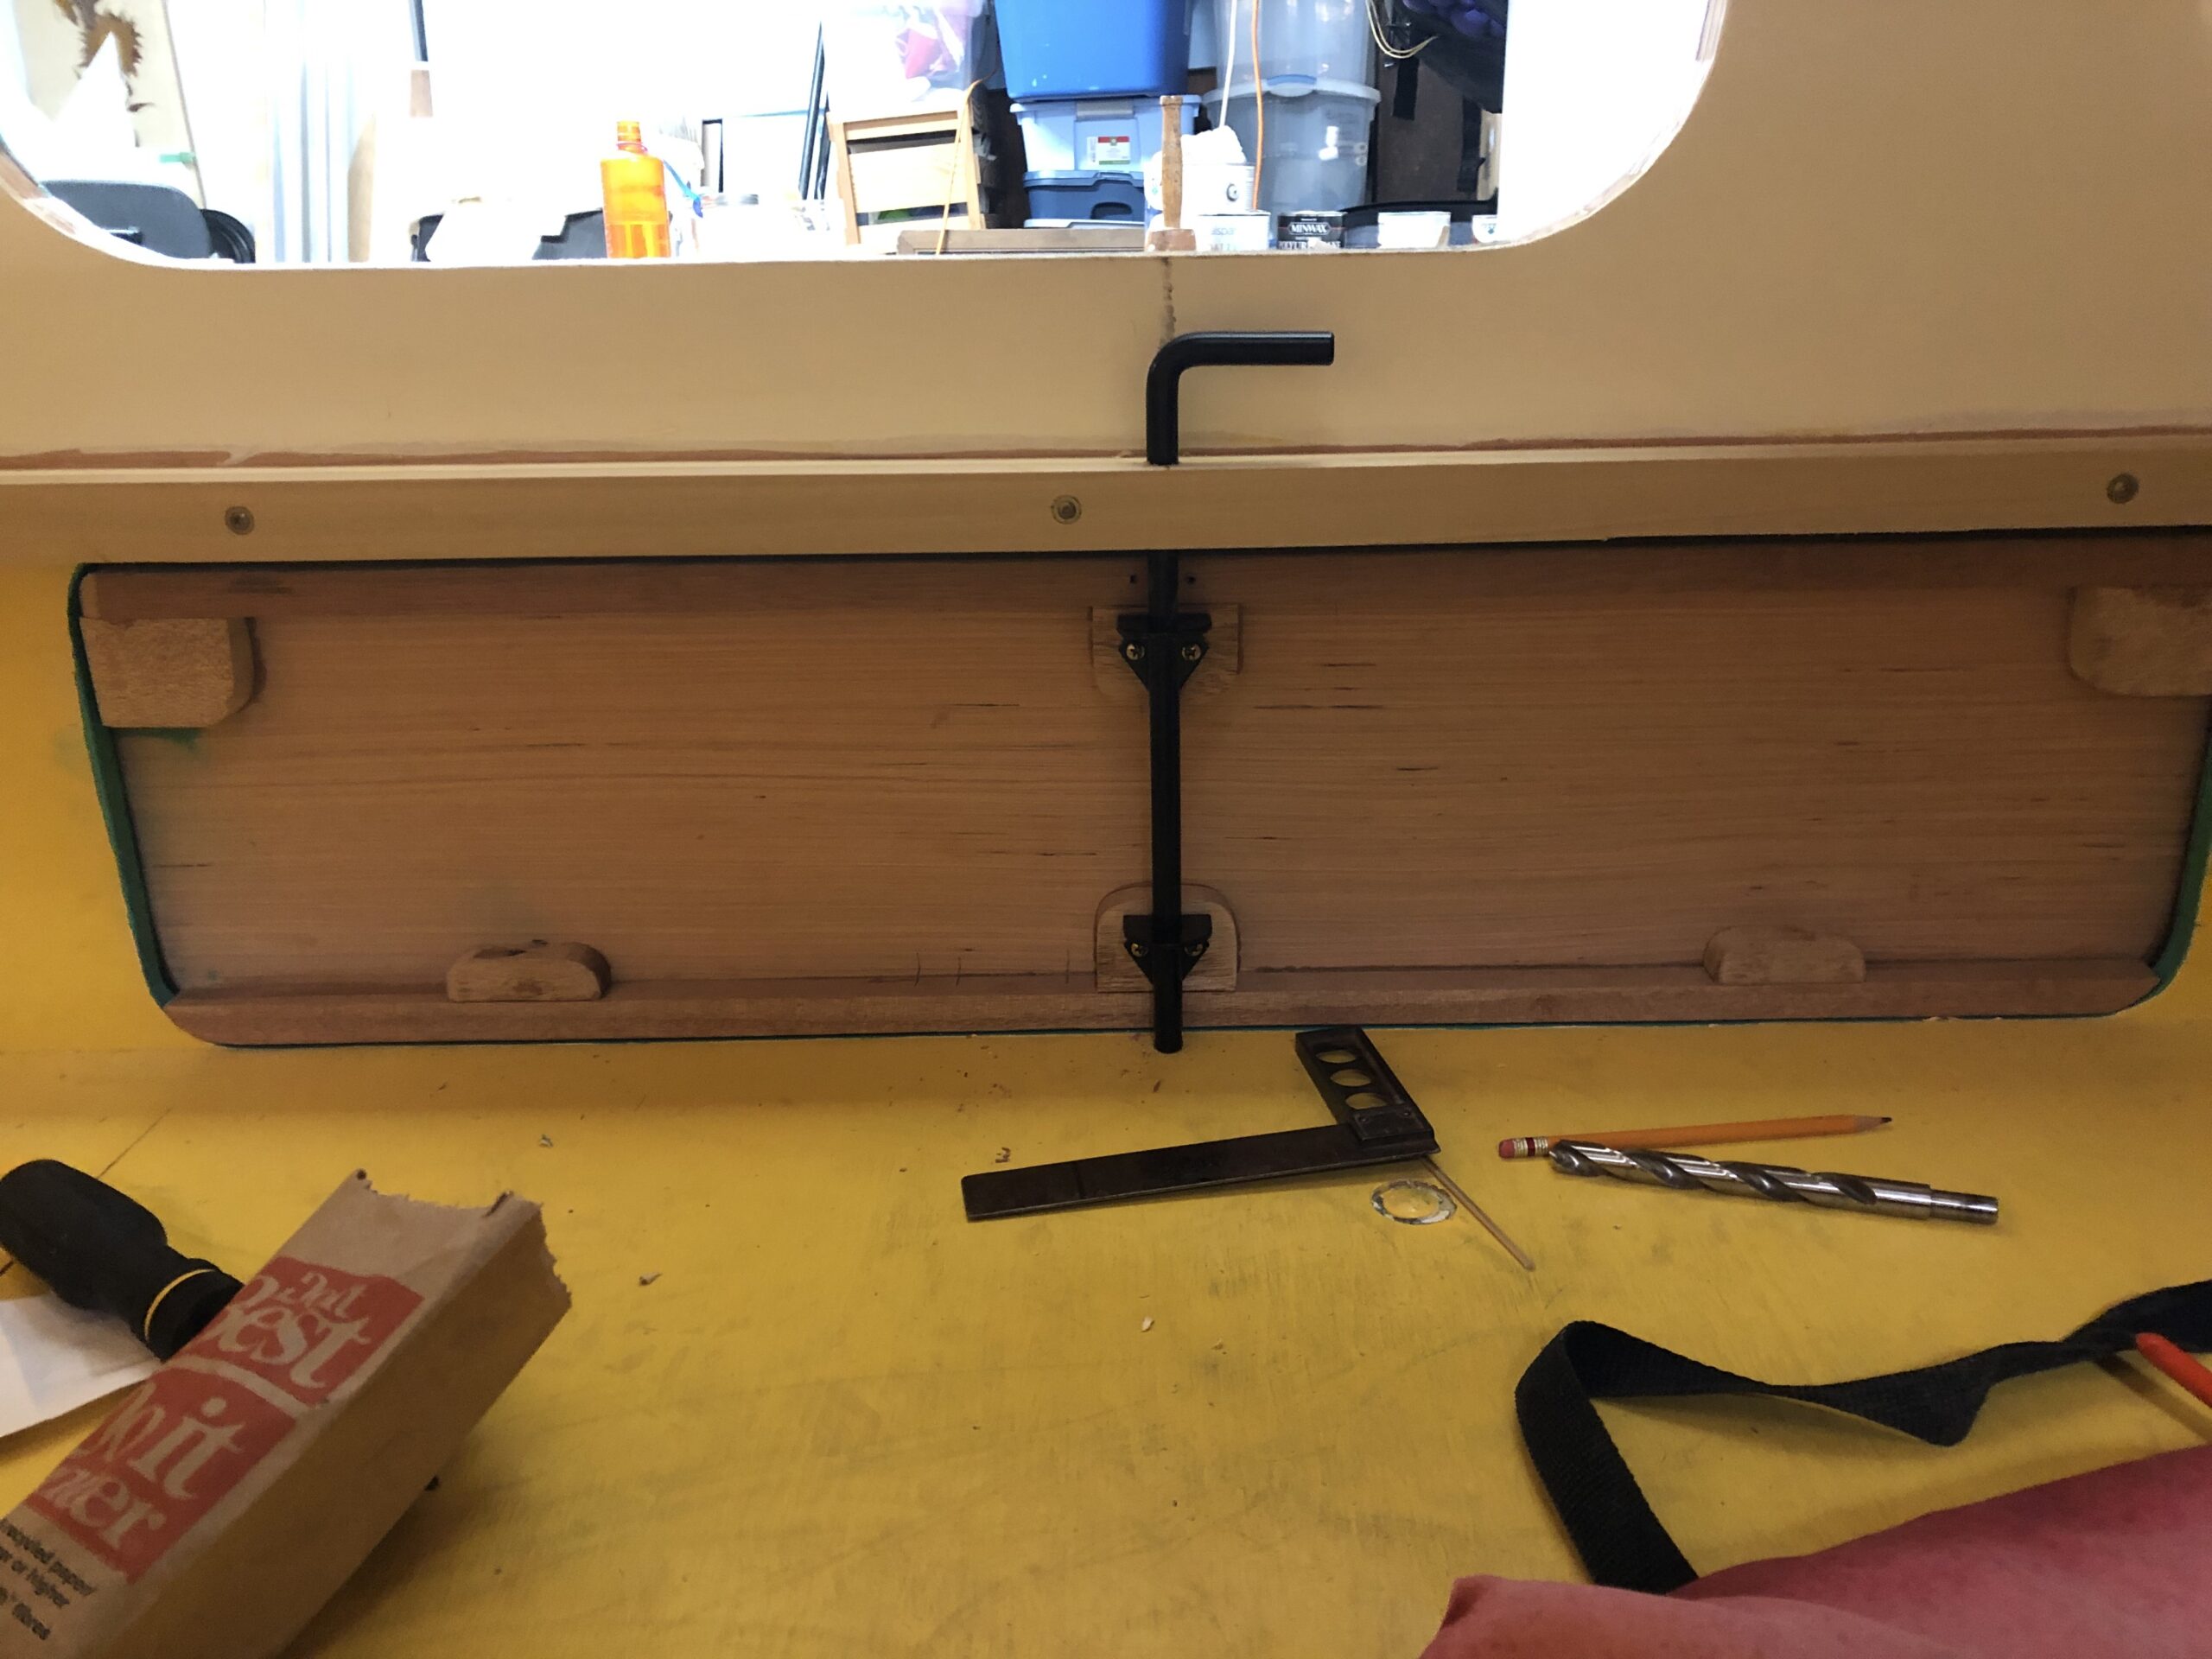
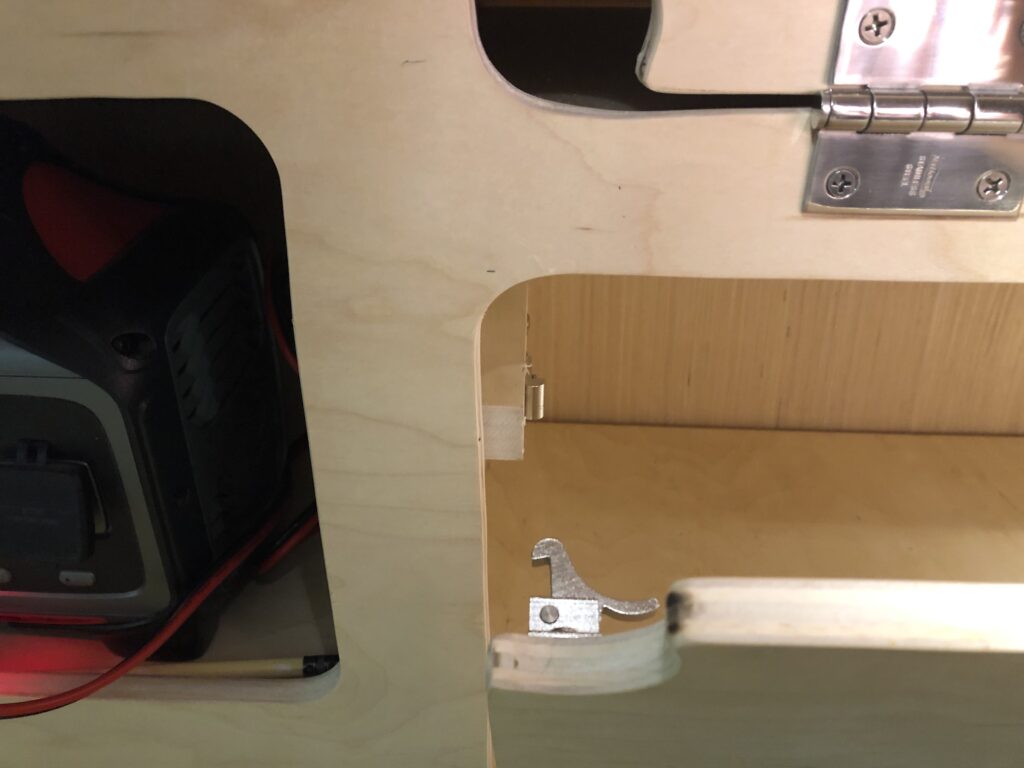
Here you see an interior view of how the storage hatches lock. Rather than making a key access outside, this simple gate latch slides in place from the inside.
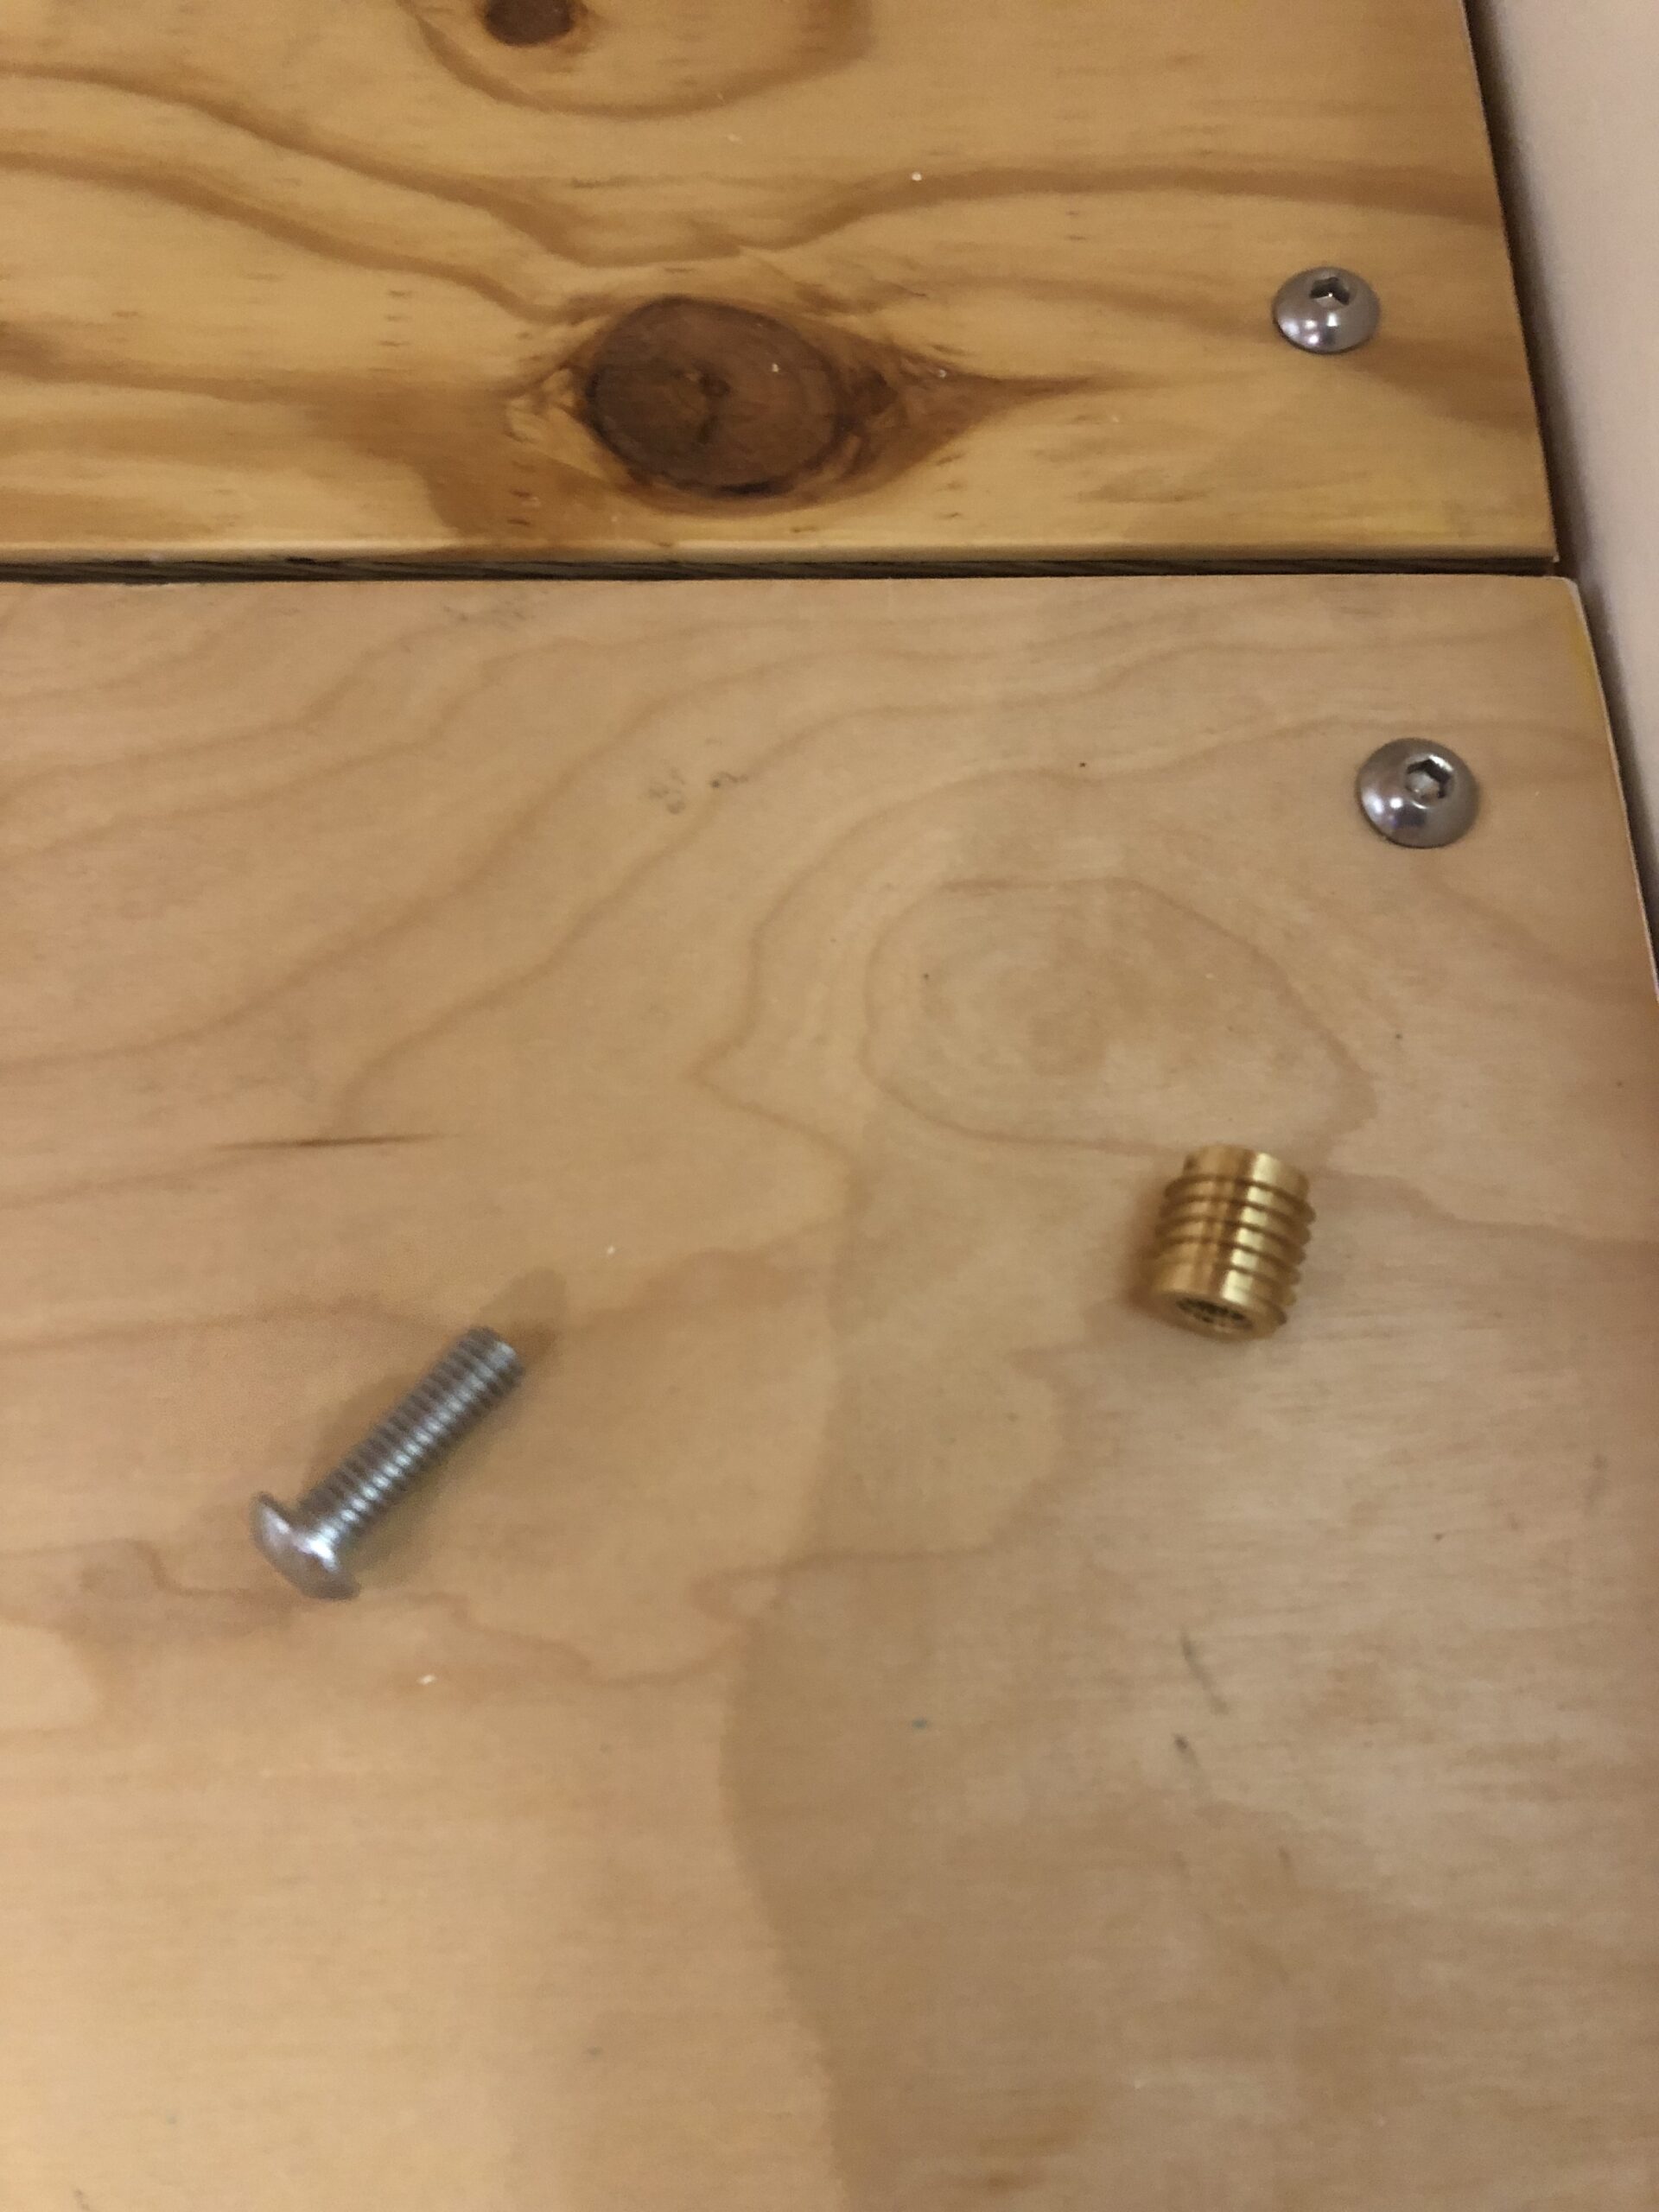
I had originally planned to glue the bed platform in place, but I have enjoyed gaining access to the “basement” by sliding the two pieces of the bed platform around, so instead I put in threaded brass inserts to hold the bed platform in place. It makes for a very stable base.
Bed platform in place. I had enough birch plywood around to use for 2/3 of the platform. The other 1/3 is just plain old plywood. It won’t matter – all this will be covered by our mattress.
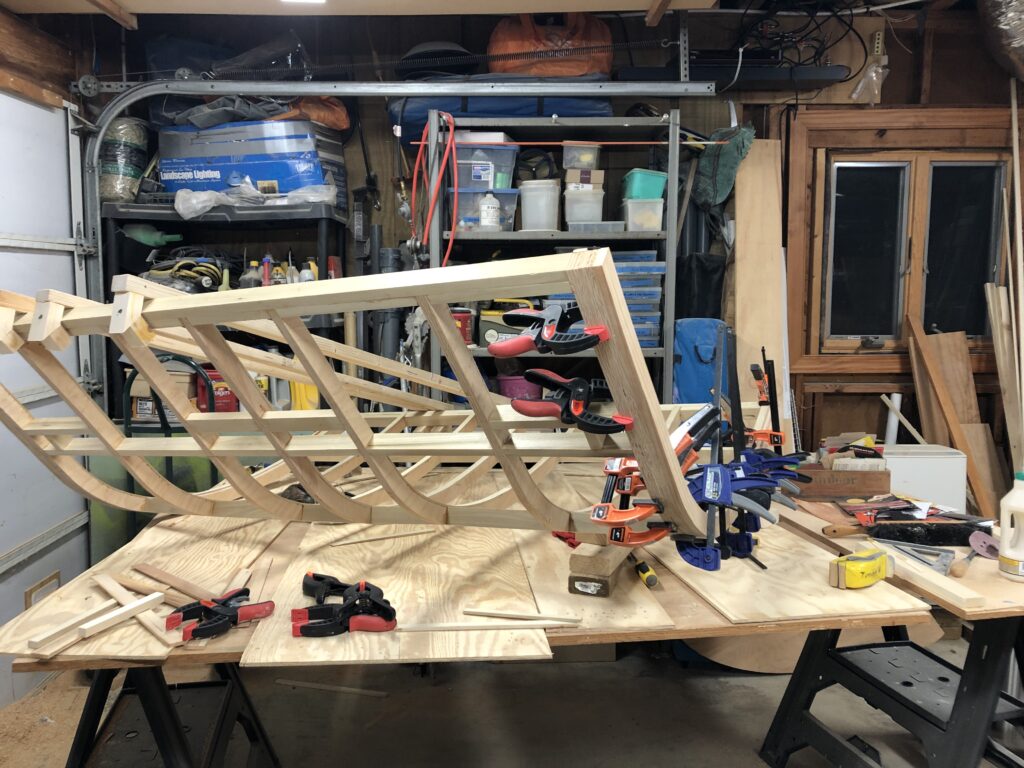
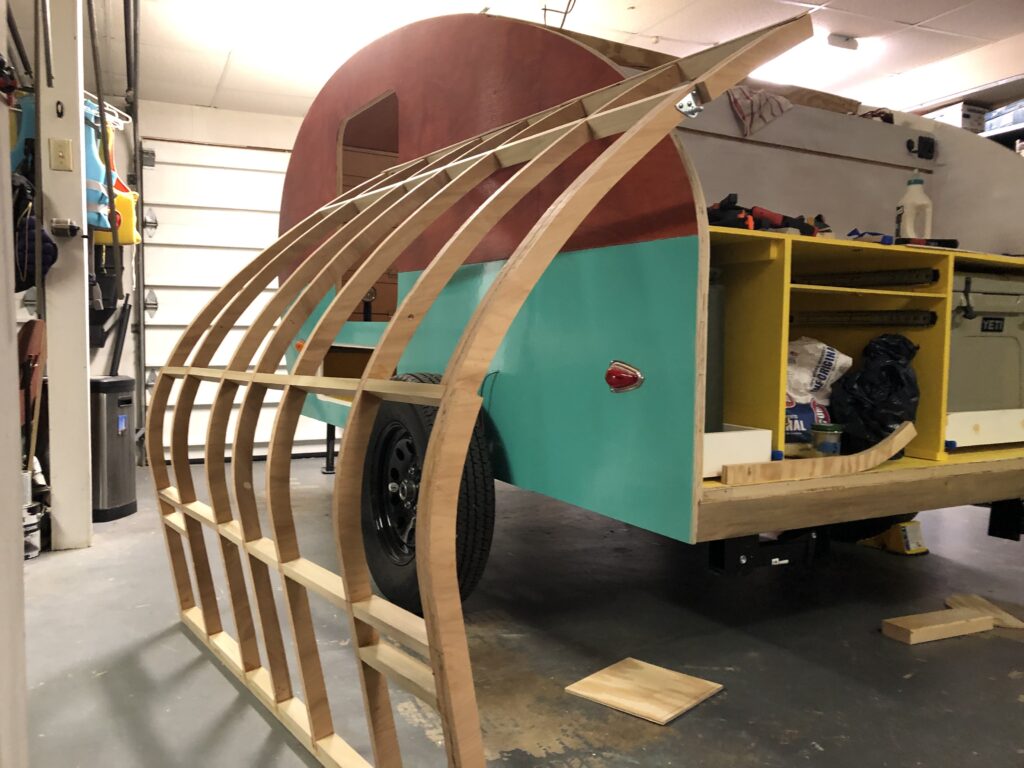
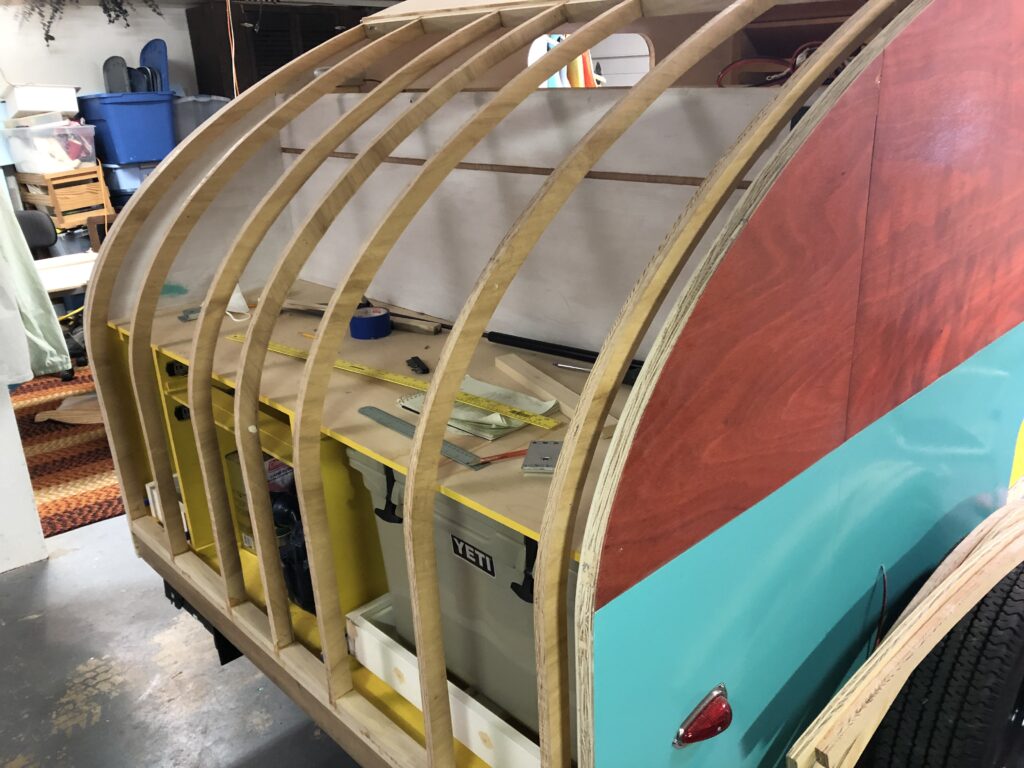
This frame is square, stiff, streamlined, and fits the galley perfectly – so far.
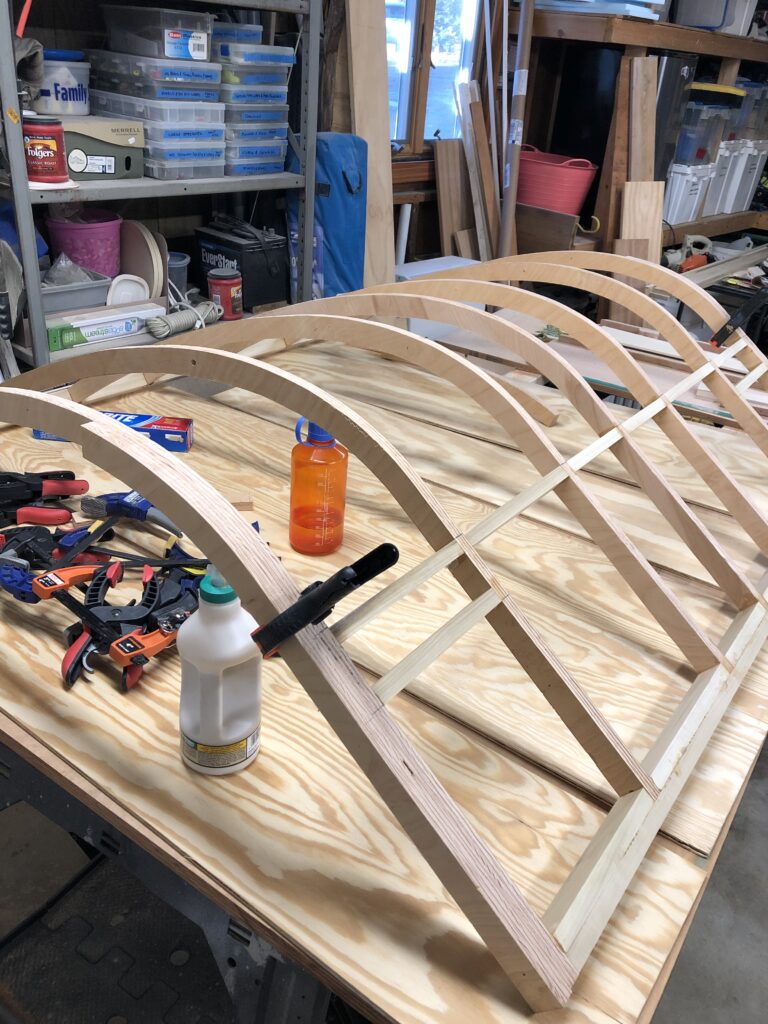
I’ve been taking the second build of the galley hatch very slowly and deliberately. Where the last time I tried to glue a lot of wood at the same time, with things slipping a sliding all the while, this time I would place just a few pieces at a time, make sure they set true, let the glue cure, then move to the next. Also key this time was doing most of the gluing in-place.
I guess I wasn’t in a picture taking mood for the first step. I routed new ribs and did the first round of gluing in the shop.
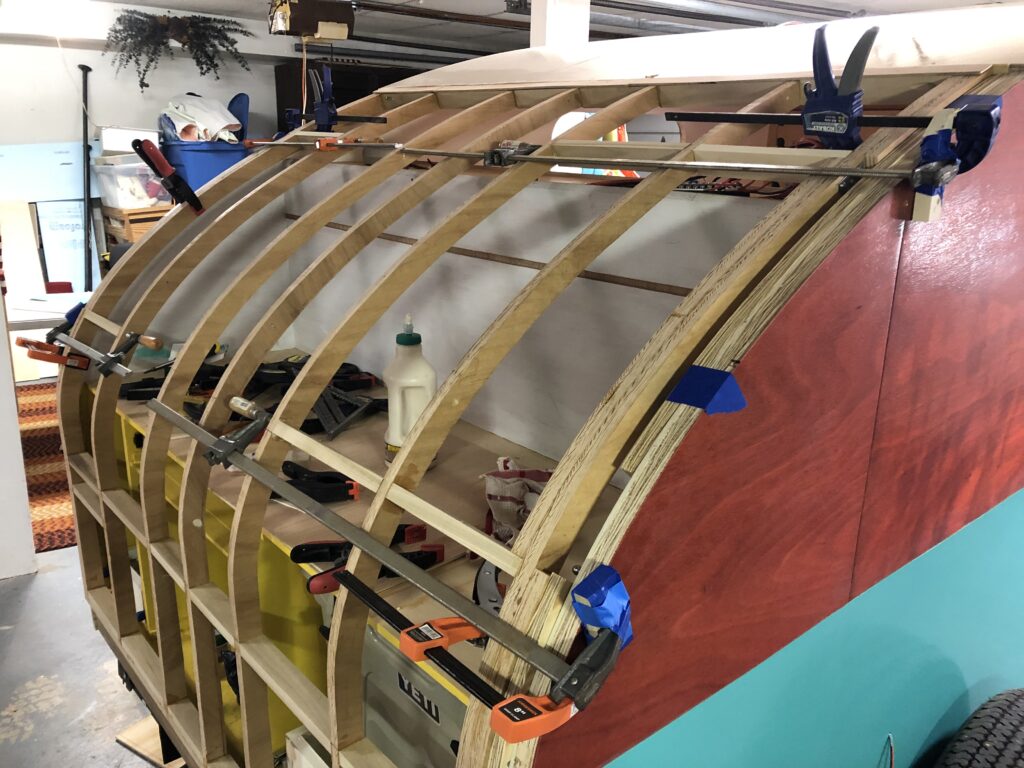
The frame went back on the trailer.
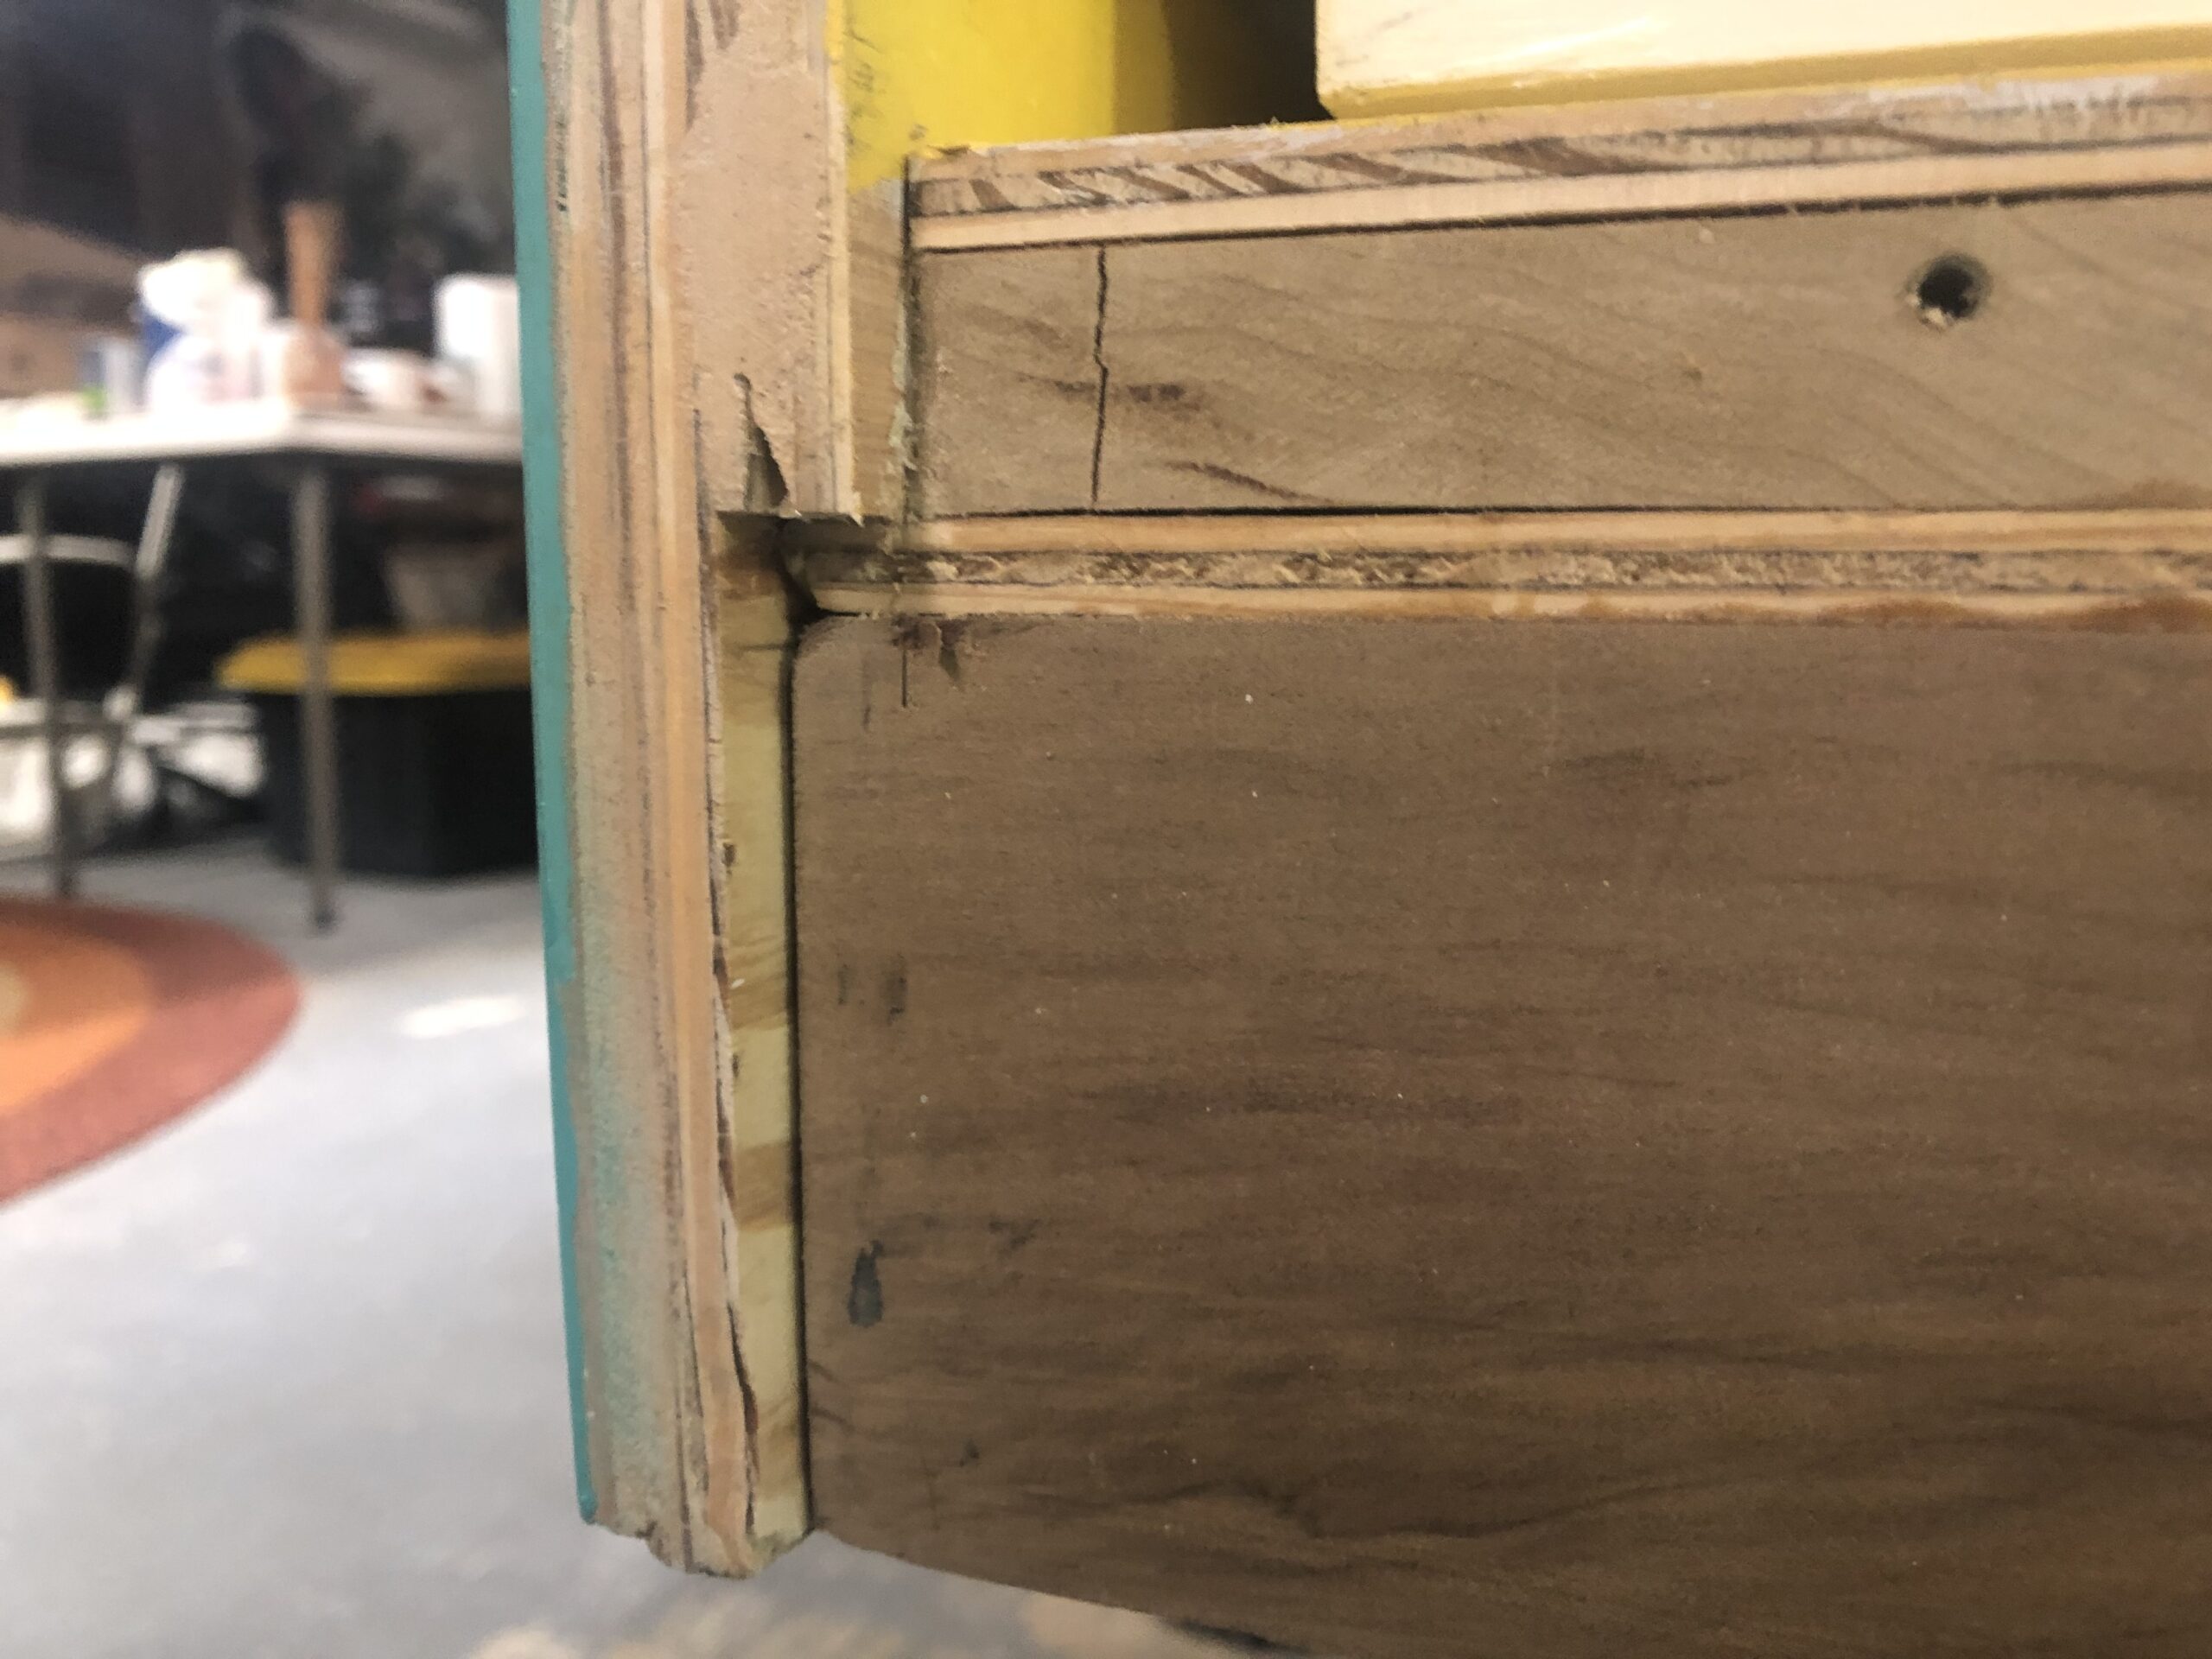
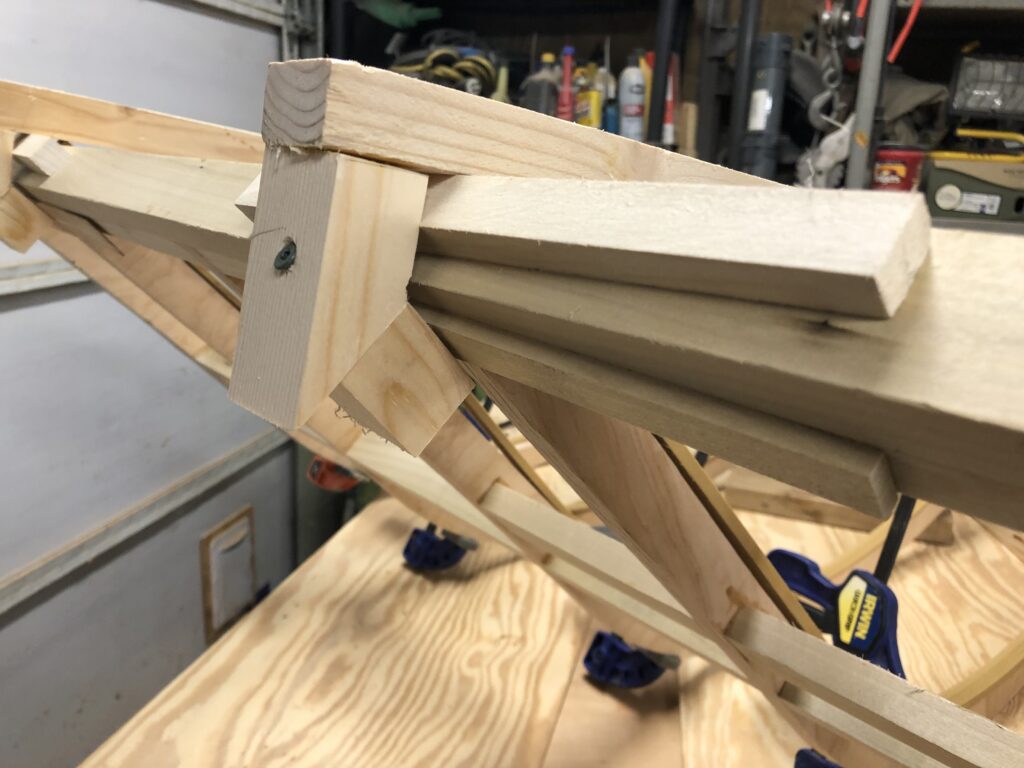
Detail of the frame corner. II only used four screws to secure the initial square. Everything else is held with wood glue.
I used wooden spacers to make allow for the spaces needed for hardware. Here you can see the even 3/8″ space around the trailer edge that will allow for the hatch to rest against the rubber seal that will go on the trailer edge.
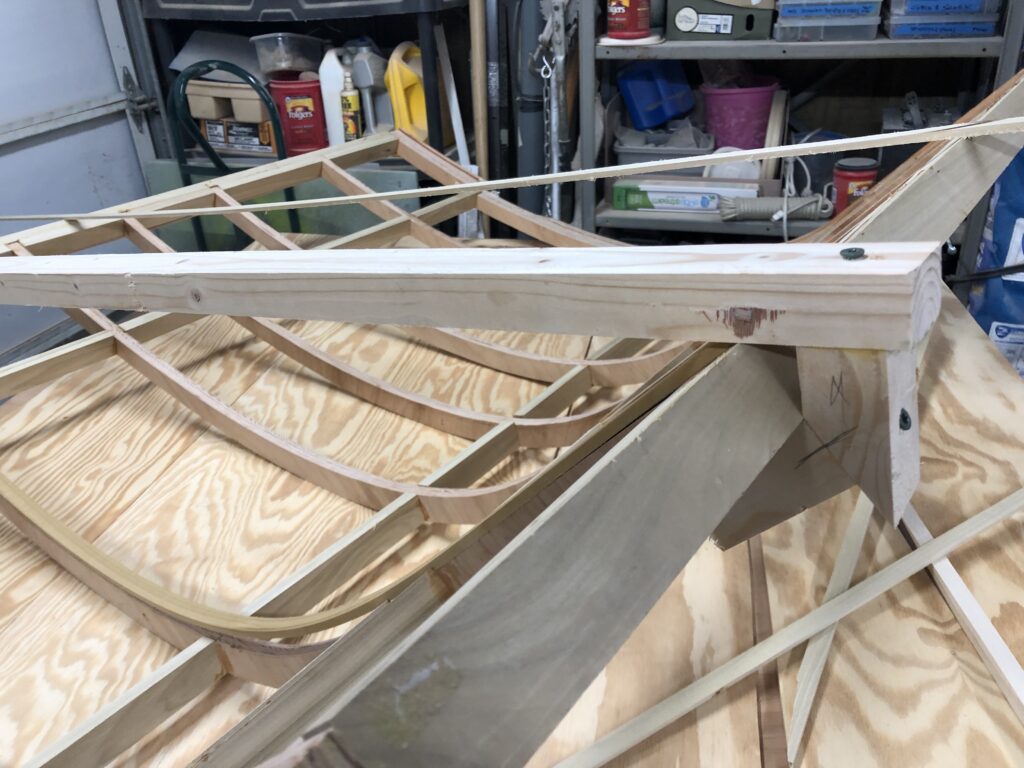
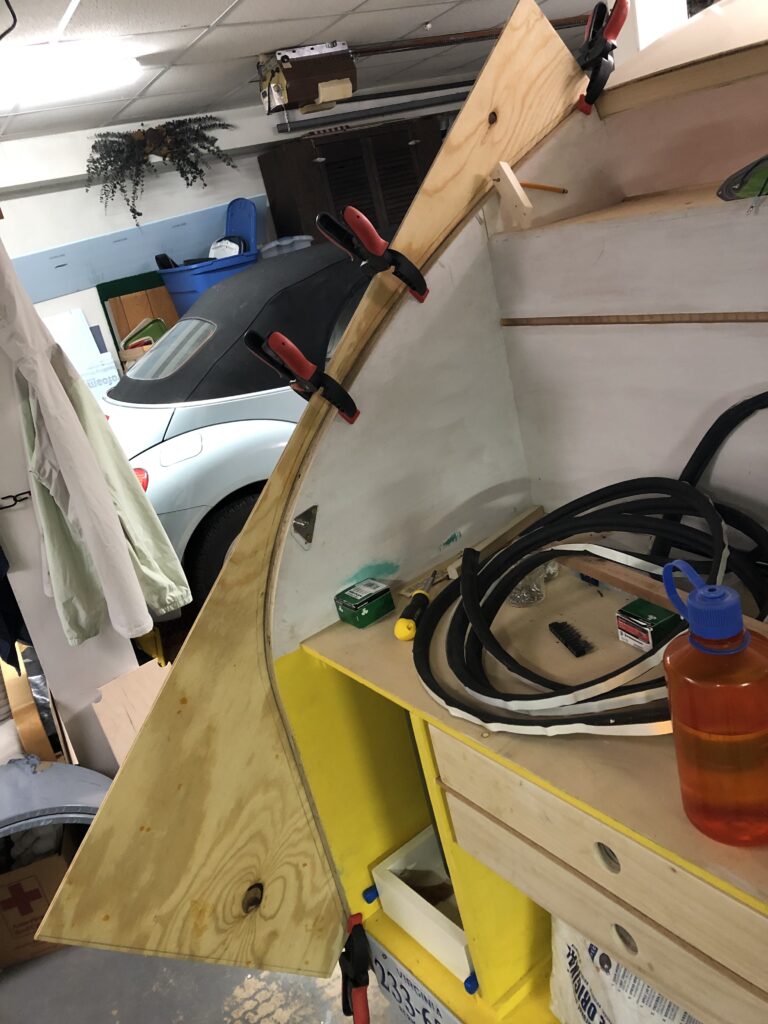
Carefully fitting the first of the support struts.
I kept a portion of the old hatch handy to remind me of what worked and what didn’t as I built the new one.
A quick test to make sure that the hatch lifts were in the right place.
One quick visit to the shop to add the supporting ribs that work around the gas lifts.
Getting close to completion.
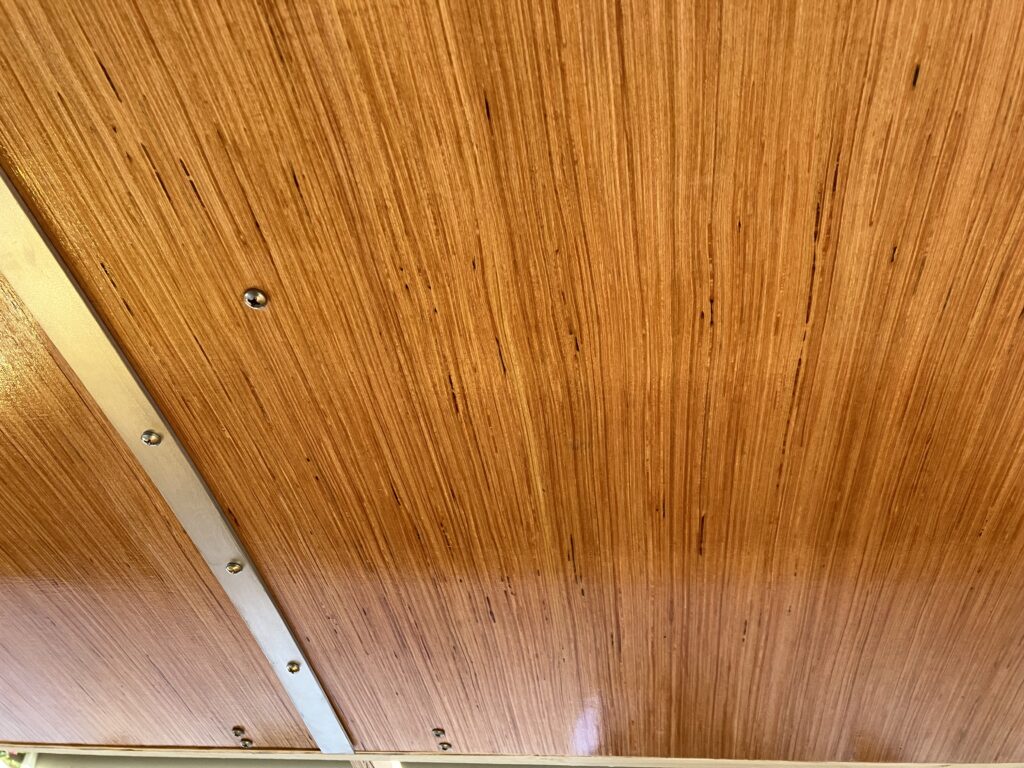
In between bouts of gluing we put layers of varnish on the interior. This required multiple coats with sanding in-between. Watching varnish dry is slightly less interesting than watching paint dry.
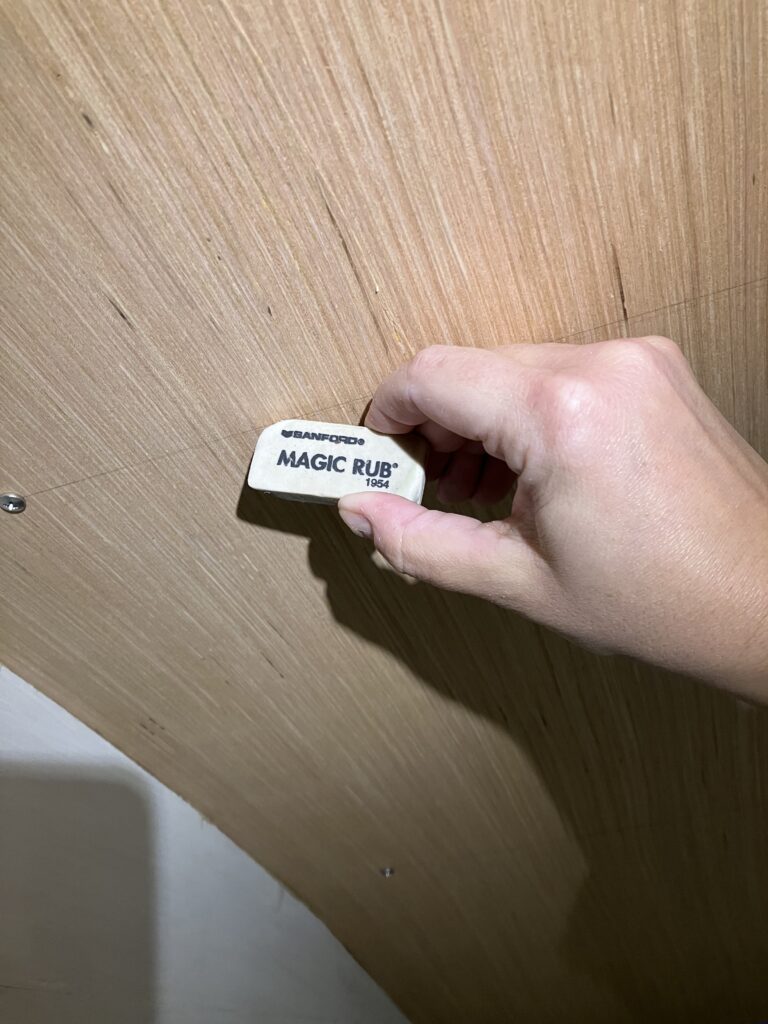
A little Magic Rub to erase pencil marks I had used for aligning screws.
We had a day warm enough to work outside, which was nice for all the varnish fumes we were making.
The finished interior ceiling.
We also had time to wire up the running lights.
We are getting really close to completion. The galley hatch still has plenty of steps to go, but that’s pretty much the main focus at this point. There’s some final exterior finishing to do, and some galley cabinetry puzzles to solve. But mostly it is crossing steps off the galley hatch list!
The doors have a hidden latch and are braced to allow for sitting up in bed. I wanted to allow for plenty of airflow to keep contents from getting funky.
I made a jig to try to get the hinges aligned. It kind of worked.
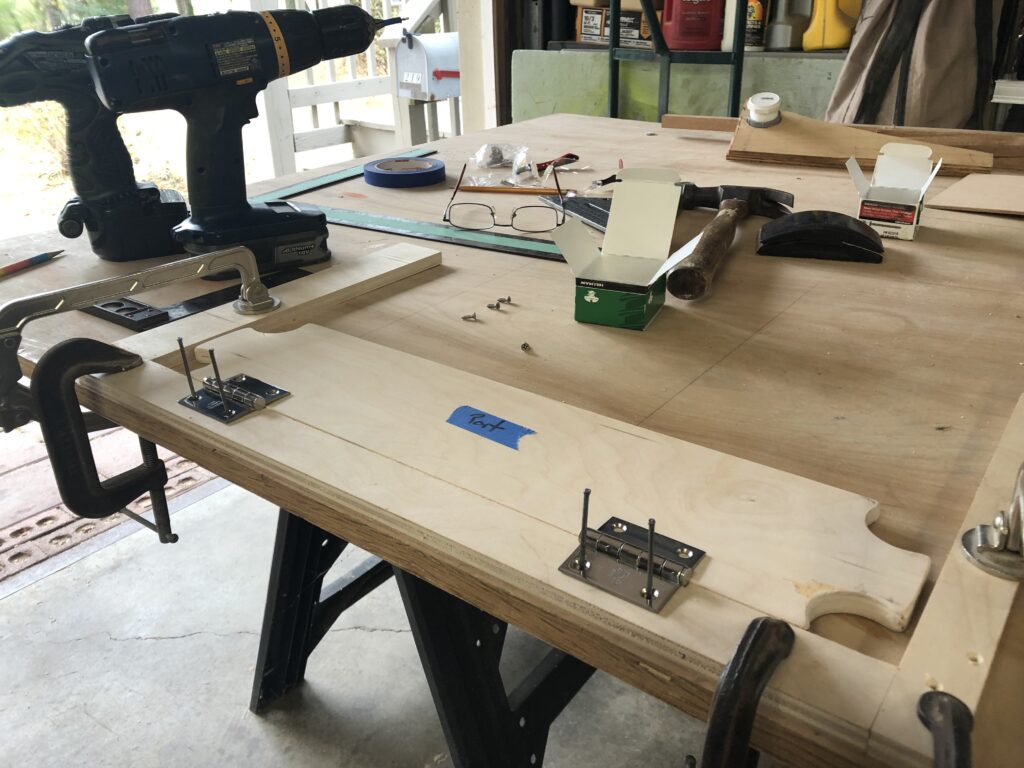
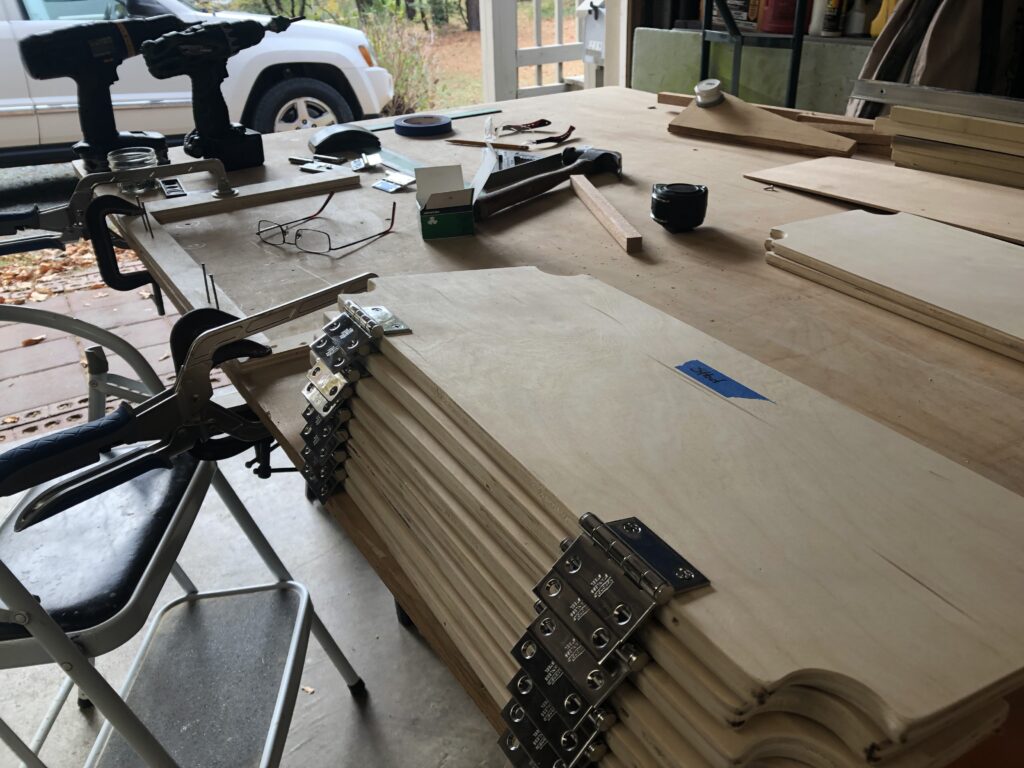
12 doors, 23 hinges, 92 screws.
Here’s a view of the latch.
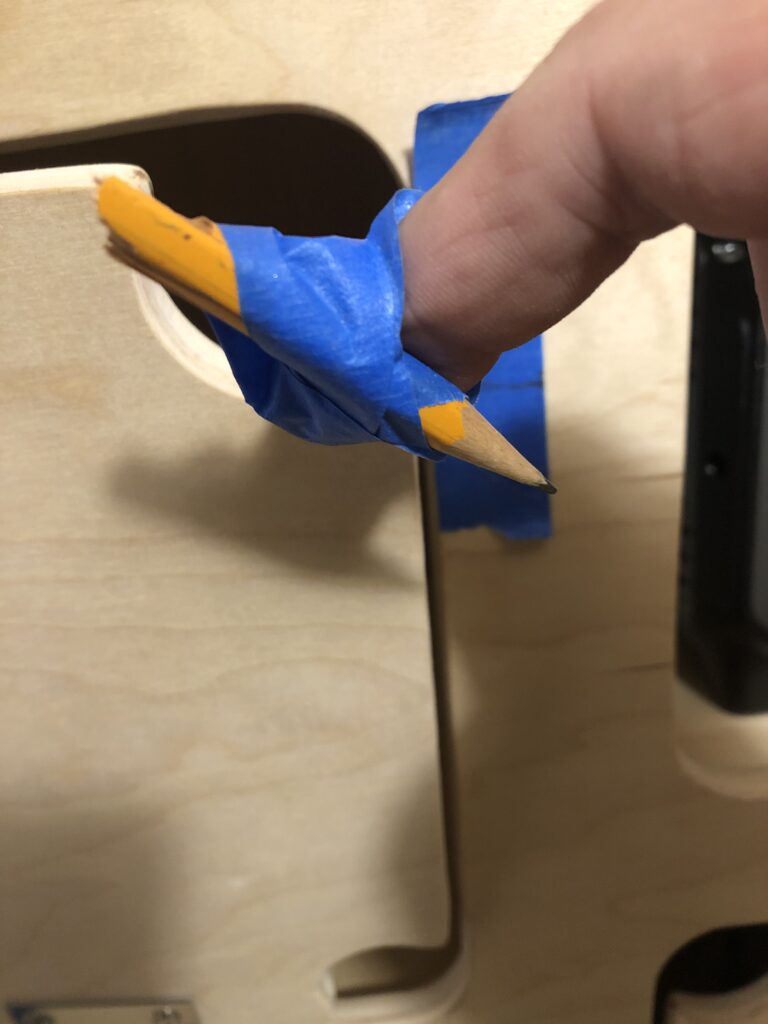
I had to make a blind mark with the door closed to get my latch location. Here’s how used the pencil.
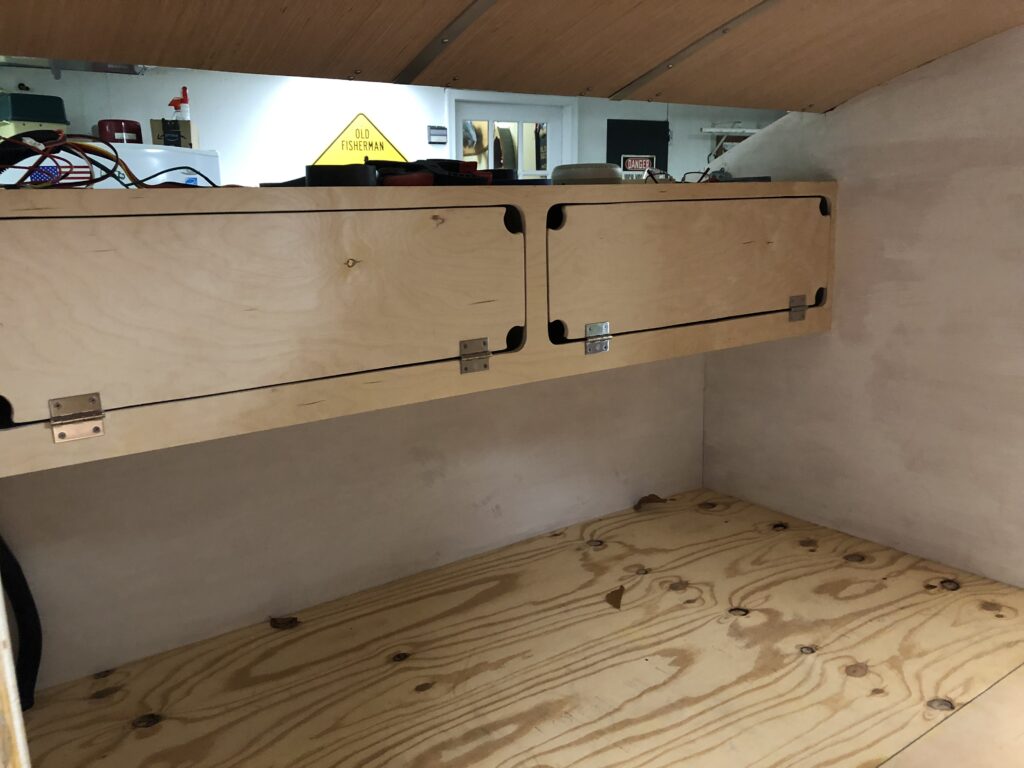
The cabinets at the foot of the cabin.
Meanwhile, I did a lot of sanding on the storage door to get a good fit. One of the challenges with using plywood here is that the depth of the rout exposes some really low-grade wood, which is wavy and hard to get smooth.And, yes, I’ve begun work on the galley hatch v2. Here I’m outlining the form I’ll use for a template for the ribs. This time, instead of the inside curve being the same radius as the side walls, they are 3/8 inch larger, which will allow for the rubber gasket that will seal it water tight. At the top of the photo you can see the fancy tool I made to draw the 5/8 radius.
Not a lot of “action” photos to share for the past week’s work. Most of my time has been spent painting and sanding. Three coats of poly paint on sides and top, each time with a sanding (first with 220, then 400, and 600 grit paper) a thorough scuffing to get a “mechanical” (my new favorite term) bond, then a wipe down with alcohol and again with tack cloth. It has really led to a beautiful finish.
The wood grain will get some more coats of epoxy and varnish, but that will come a little later.
Meanwhile, all the wiring at the front of the trailer is complete.
Electric will be accessed from a secret hatch.
Here’s the innards.
Next steps are getting those storage hatches on the side to seal water tight, and get the cabinet doors installed inside. There is also the small matter of rebuilding the galley hatch, but I guess I am still waiting for the bruises from my first attempt to heal?
The past weeks have been lovely for working outdoors.
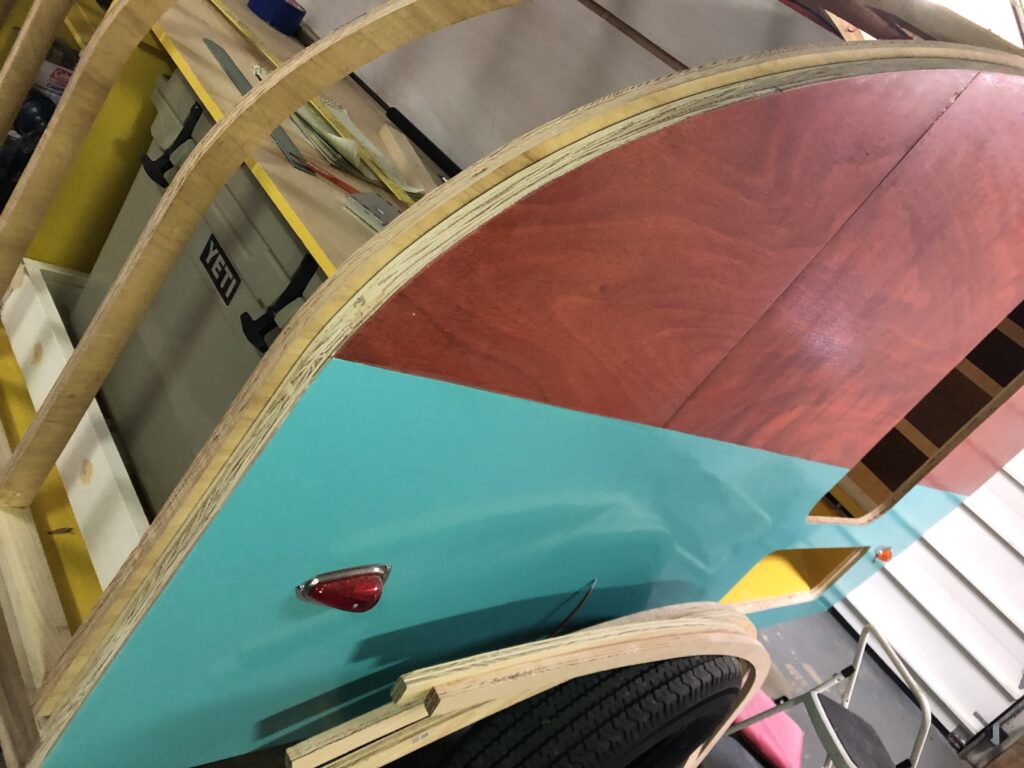
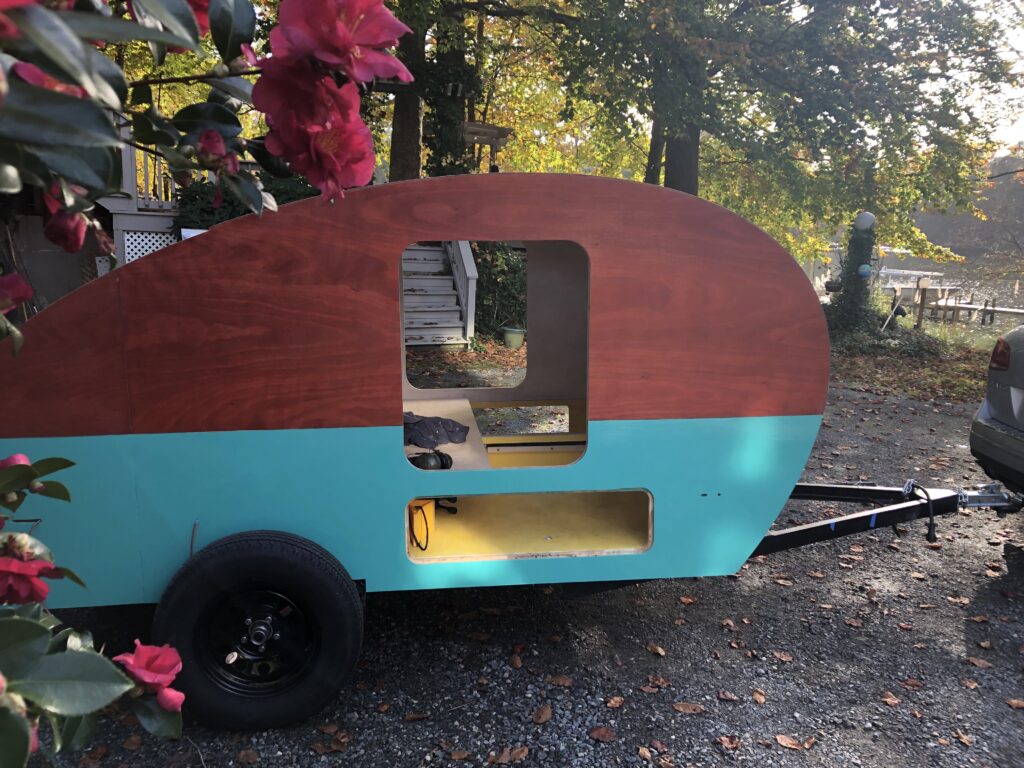
I like this shot with the flowers framing the Bettie Mobile.
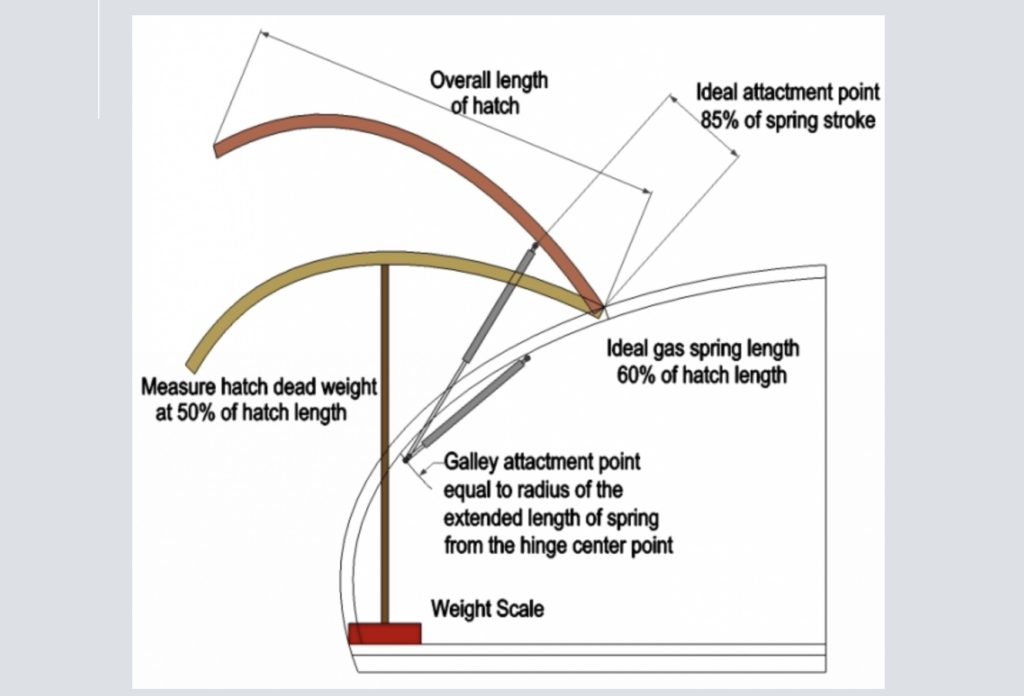
Sad tidings on the galley hatch. But before we go there, let’s take a look at some more of the build steps for the hatch. One thing I wanted to share was this fantastic resource from a web page and great resource called Teardrops and Tiny Trailers. It helps take a lot of guessing out of getting gas struts to work. The strut design for the Wyoming Woody (from which the Bettie Mobile borrows from) used a different strut design – shorter struts anchored higher up in the frame – which we could never get to work. The TNTT design required us getting longer struts, but worked great. You saw that in a previous post.
So the next steps were to get the interior skins on and start doing some wiring and whatnot.
First we glued on the middle.
Then the outside skins.
It took every clamp that we and our neighbors had to hold it in.
Once the glue dried and everything was trimmed to size, I wanted to give the hatch another dry fit to to the camper. This was a good idea since now the roof was on the camper, so everything would be much closer to how the hatch would finally fit.
And that’s when things took a turn for the worse. The hatch contours just didn’t align with the contours of the camper. This is critical for ensuring that there is a water-tight seal back there.
What a disappointment! It didn’t make me feel like documenting the moment, apparently.
There could be a bunch of reasons why things didn’t fit. The interior skins had a really tight radius to fit, and that might have put enough pressure on the ribs to change the curve. When I did the initial dry fit, many of the components of the roof were not glued in yet, and so dimensions may have shifted. Mostly, the hatch is designed with a compound curve – which means that even 1/8″ of variance in one place can mean a full inch of variance somewhere else. Things just didn’t line up.
The timing of the Great Galley Hatch Disaster came just as it was time for us to leave town for a while. A little distance both in time and space is probably a good thing right now. In a couple of weeks, we’ll be back at the camper build and have a plan for moving forward.